> ## Documentation Index
> Fetch the complete documentation index at: https://docsv4.mile.app/llms.txt
> Use this file to discover all available pages before exploring further.
# Creating a Task
> Create one task from the web form, choose who does it and set its time window.
Required permission:
* View task
* Create task
* Assign task (to pick an assignee while creating)
A task can be created in several ways: from the web form described here, [in bulk](/pages/activities/task/bulk-create) from a spreadsheet or a manual table, from the field app, by an [automation](/pages/workflow/automation/introduction), by a [task schedule](/pages/planning/schedule/task-schedule), or through the API.
## Create one task
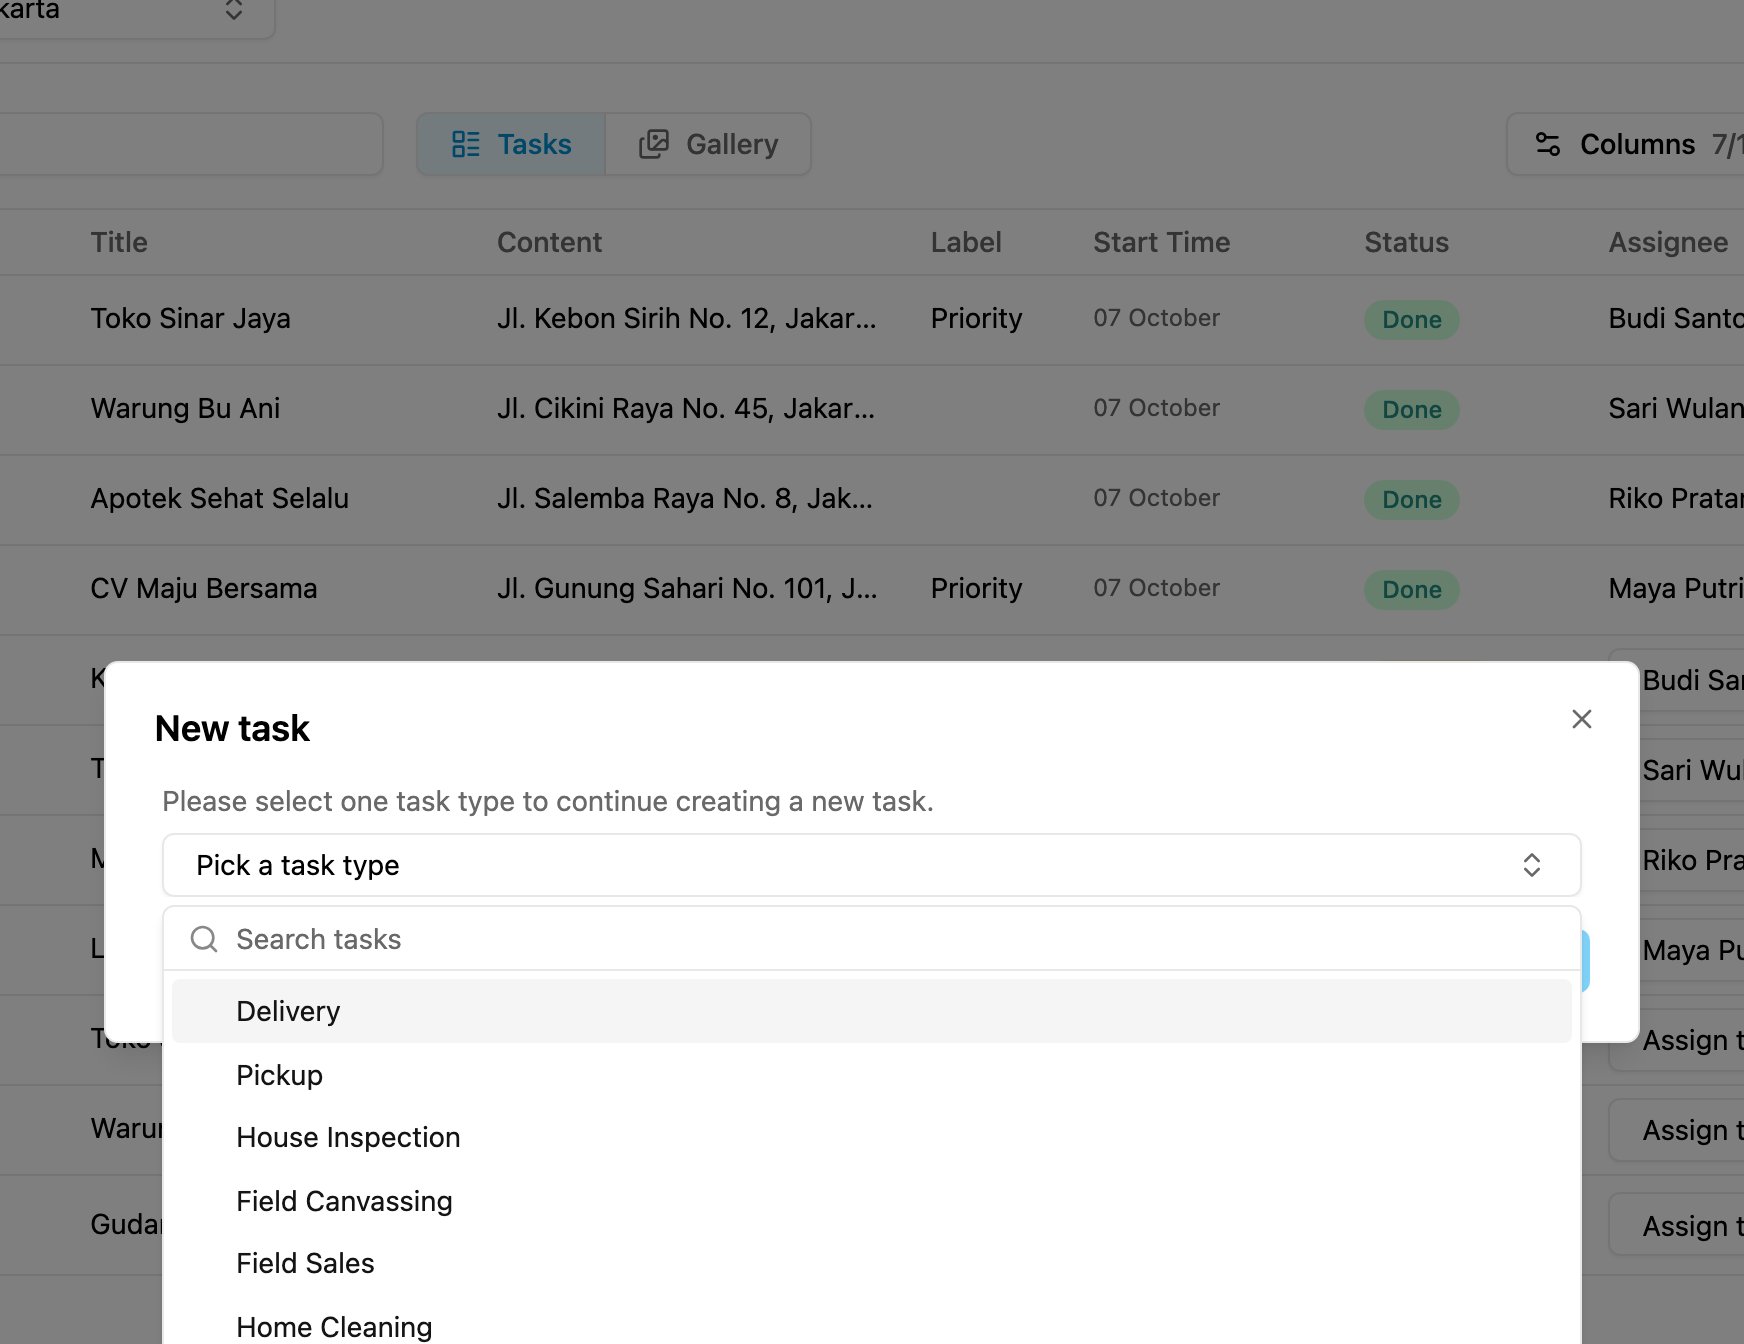
1. Open **Activities › Task** and click **New**.
2. Pick the task type the task belongs to. The task type decides which fields the task carries, so it is chosen first.
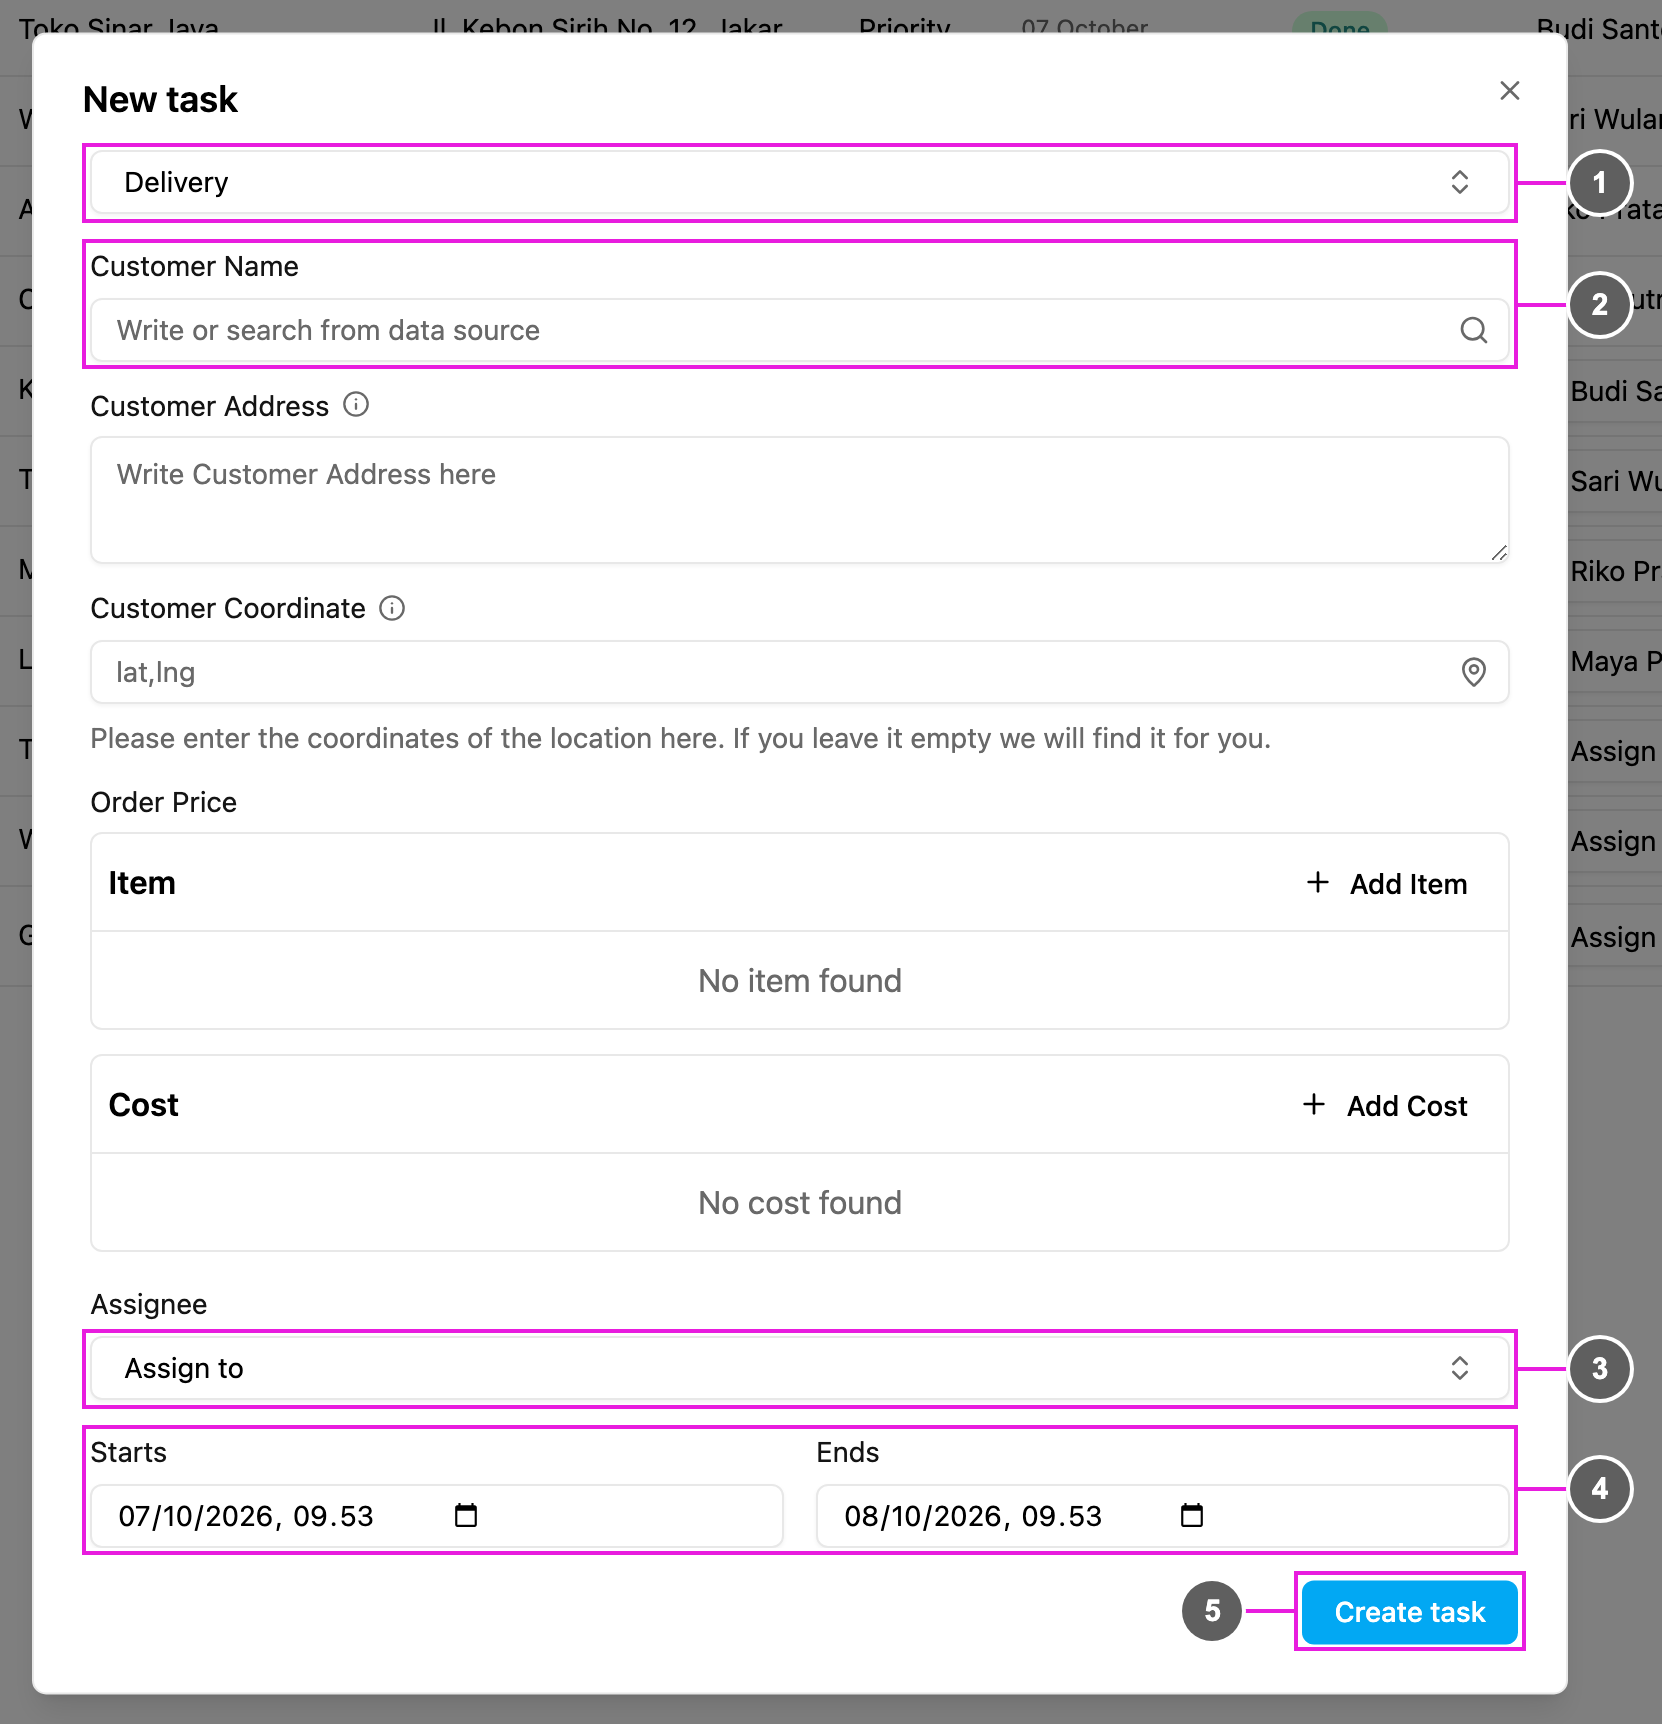
3. Fill in the form. It shows the fields of the task type's initial page, the page that is filled in from the web.
1. **Task type**: the task type you picked. Change it to switch to another form.
2. **Fields**: the fields of the initial page. They differ per task type: text, numbers, dates, addresses, coordinates, choices, lists, bills and more. See [Components](/pages/workflow/task-type/components/introduction).
3. **Assignee**: pick one or more people to give the task to right away. Leave it empty to create the task as **Unassigned** and assign it later.
4. **Starts / Ends**: the time window of the task. They are filled in from the task type's [time configuration](/pages/workflow/task-type/configuration); change them for this task if you need to.
5. **Create task**: create the task.
The new task appears at the top of the list. It is **Unassigned**, or **Ongoing** when you picked an assignee.
For an address field you can type the address and leave the coordinates empty: the coordinates are found from the address for you. If they cannot be found, a message asks you to check the address.
### What you see while filling in
* A field the task type marks as required shows "This task type requires an answer here." until it is filled in.
* **Starts** must be earlier than **Ends**.
* A field fed by a data source shows **Click here to choose the data for this task**: pick a row from the data source and its values fill the form.
* If the task type's initial page is turned off, the form says so and the task is created with only its time window and assignee.
* Fields the web form cannot fill in are listed under "Left for the field app to answer"; the field worker fills them in on the field app.
* If you close the form after changing something, **Discard changes?** asks before your input is lost.
When your plan's monthly task limit is reached, the form says so and links to **Billing plan**.
## Create tasks on the field app
Field workers can also create a task on the go, which is handy when the work is not planned in advance:
1. In the field app, tap **+** in the middle of the bottom menu.
2. Pick the task type.
3. Fill in the first page.
4. Tap **Create Task**.
## Related
* [Creating Tasks in Bulk](/pages/activities/task/bulk-create)
* [Assigning Tasks](/pages/activities/task/assign-task)
* [Subpage in a Task](/pages/activities/task/subpage-in-task)
* [Subflow in a Task](/pages/activities/task/subflow-in-task)
This documentation is built and hosted on [Mintlify](https://mintlify.com), a developer documentation platform.