> ## Documentation Index
> Fetch the complete documentation index at: https://docsv4.mile.app/llms.txt
> Use this file to discover all available pages before exploring further.
# Bulk add and edit
> Add or update many records at once, from a spreadsheet or by typing them into a table.
Required permission:
* View data source
* Create data and Edit data source
Bulk adds new records and updates existing ones in the same go. A row whose **Title** matches an existing record updates that record; any other row creates a new one.
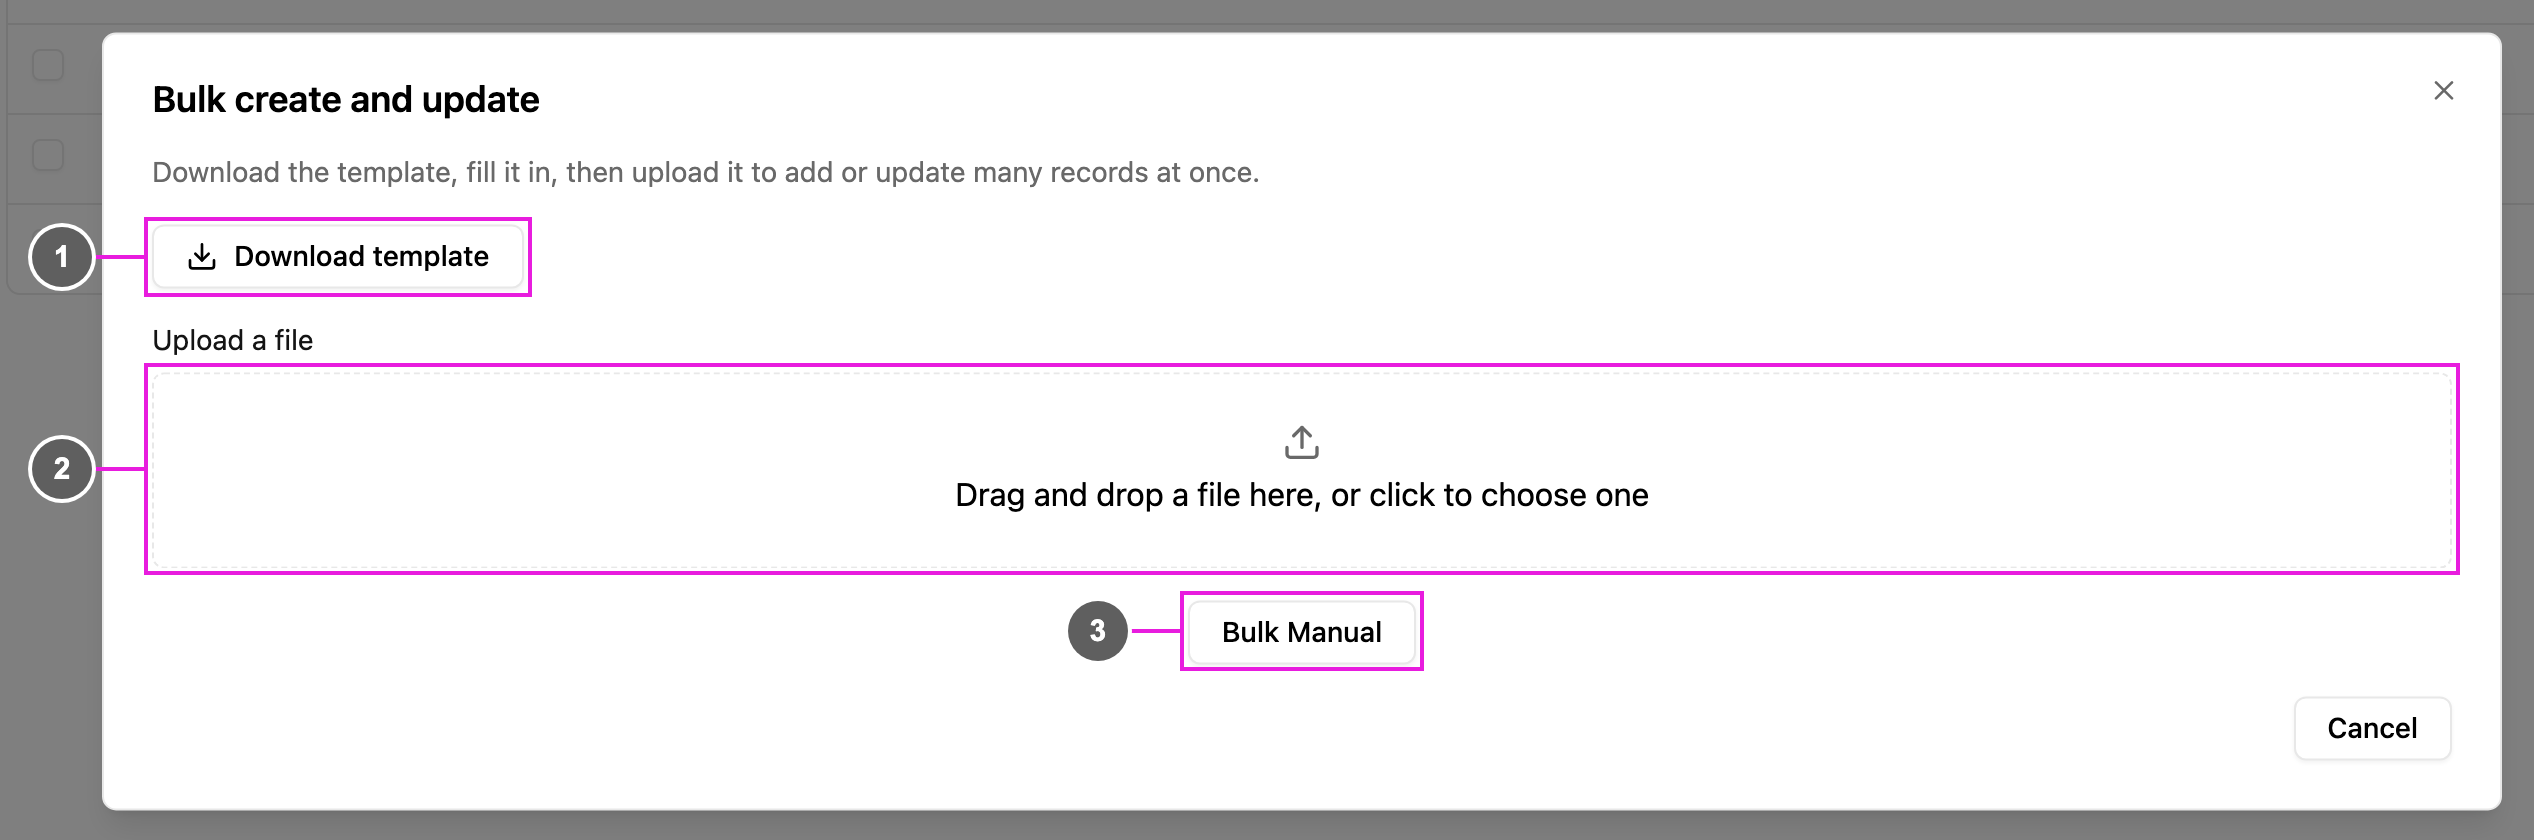
Open **Workflow › Data Source**, pick the data type, click the arrow beside **New** and choose **Bulk**. The **Bulk create and update** dialog opens.
1. **Download template**: a spreadsheet with one column for each field of the data type, plus **Hub** for data types limited by hub and **Limit Data by User** for data types limited by user.
2. **Upload a file**: drag the filled-in file here, or click to choose it.
3. **Bulk Manual**: type the records into a table instead of uploading a file.
## Upload a file
1. Click **Download template** and fill in one record per row.
* **Hub**: hub names, separated by commas.
* **Limit Data by User**: user emails, separated by commas. Leave it empty for everyone.
* **Checkbox**: `TRUE`, `FALSE`, `1`, `0`, `yes` or `no`.
* **Coordinate**: latitude and longitude, such as `-6.2,106.8`.
* **Relation**: the Title of the linked record.
2. Drop the file on **Upload a file**. CSV, XLS and XLSX files up to 5 MB are accepted. A file with no data rows, or with a blank column header, is refused with a message saying why.
3. Match each column of your file to a field. Columns with the same name as a field are matched for you. Every required field needs a column. Click **Next**.
4. The rows open in a table. Invalid cells are highlighted, and a banner says how many invalid rows were found; use the arrows on the banner to jump between them. Fix the cells in place, or remove a row with its bin.
5. Click **Import**. A summary shows how many records were **Imported** and how many **Failed**, with the reason for each failed row. Click **Done**.
If you changed the data type after downloading the template, the web app asks you to download the template again before importing.
### Files with more than 2,000 rows
A file with more than 2,000 rows can't be checked row by row in the dialog. The web app asks **Process in the background?**; click **Process in background**. The rows are then checked and imported on the server. The dialog shows the progress, and you can close it while the import keeps running. Follow it in [Import](/pages/export-import/import).
## Type the records in
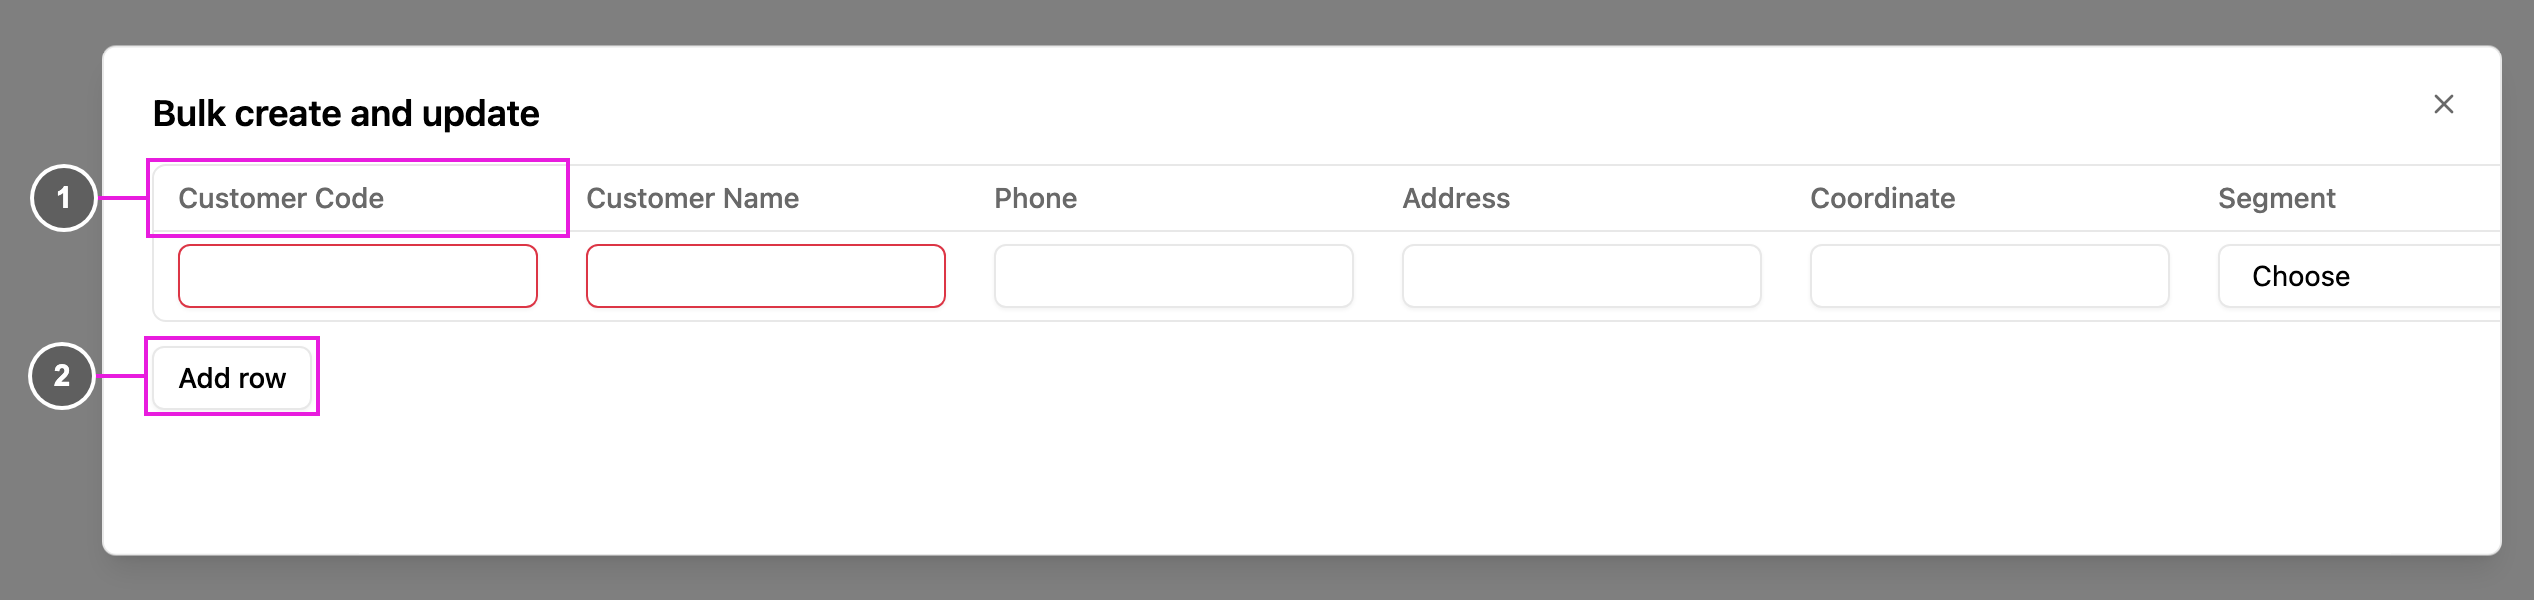
Click **Bulk Manual**.
1. One column for each field. Required fields are outlined.
2. **Add row**: add another record.
Fill in the rows the same way as the file: type values, pick options and relations from lists. To start over, **Delete all data** clears every row after asking **Delete all data?**. Click **Import** when you're done.
If you close the dialog with unsaved rows, the web app asks **Discard this bulk entry?**
This documentation is built and hosted on [Mintlify](https://mintlify.com), a developer documentation platform.