> ## Documentation Index
> Fetch the complete documentation index at: https://docsv4.mile.app/llms.txt
> Use this file to discover all available pages before exploring further.
# Introduction
> Browse, search and manage the records of each data type.
**Data Source** holds the records of your [data types](/pages/workflow/data-type/introduction): your list of customers, stores, products and so on. Task types can fill their fields from these records, so the people creating tasks on the web app and field workers in the field app pick a record from the list instead of typing the same details again. That's set up on the task type, see [Configuration › Data source](/pages/workflow/task-type/configuration#data-source).
Open **Workflow › Data Source**.
Required permission:
* View data source and View data type
* Create data, Edit data source, Delete data source to change records
* Export Data Source to export
## The record list
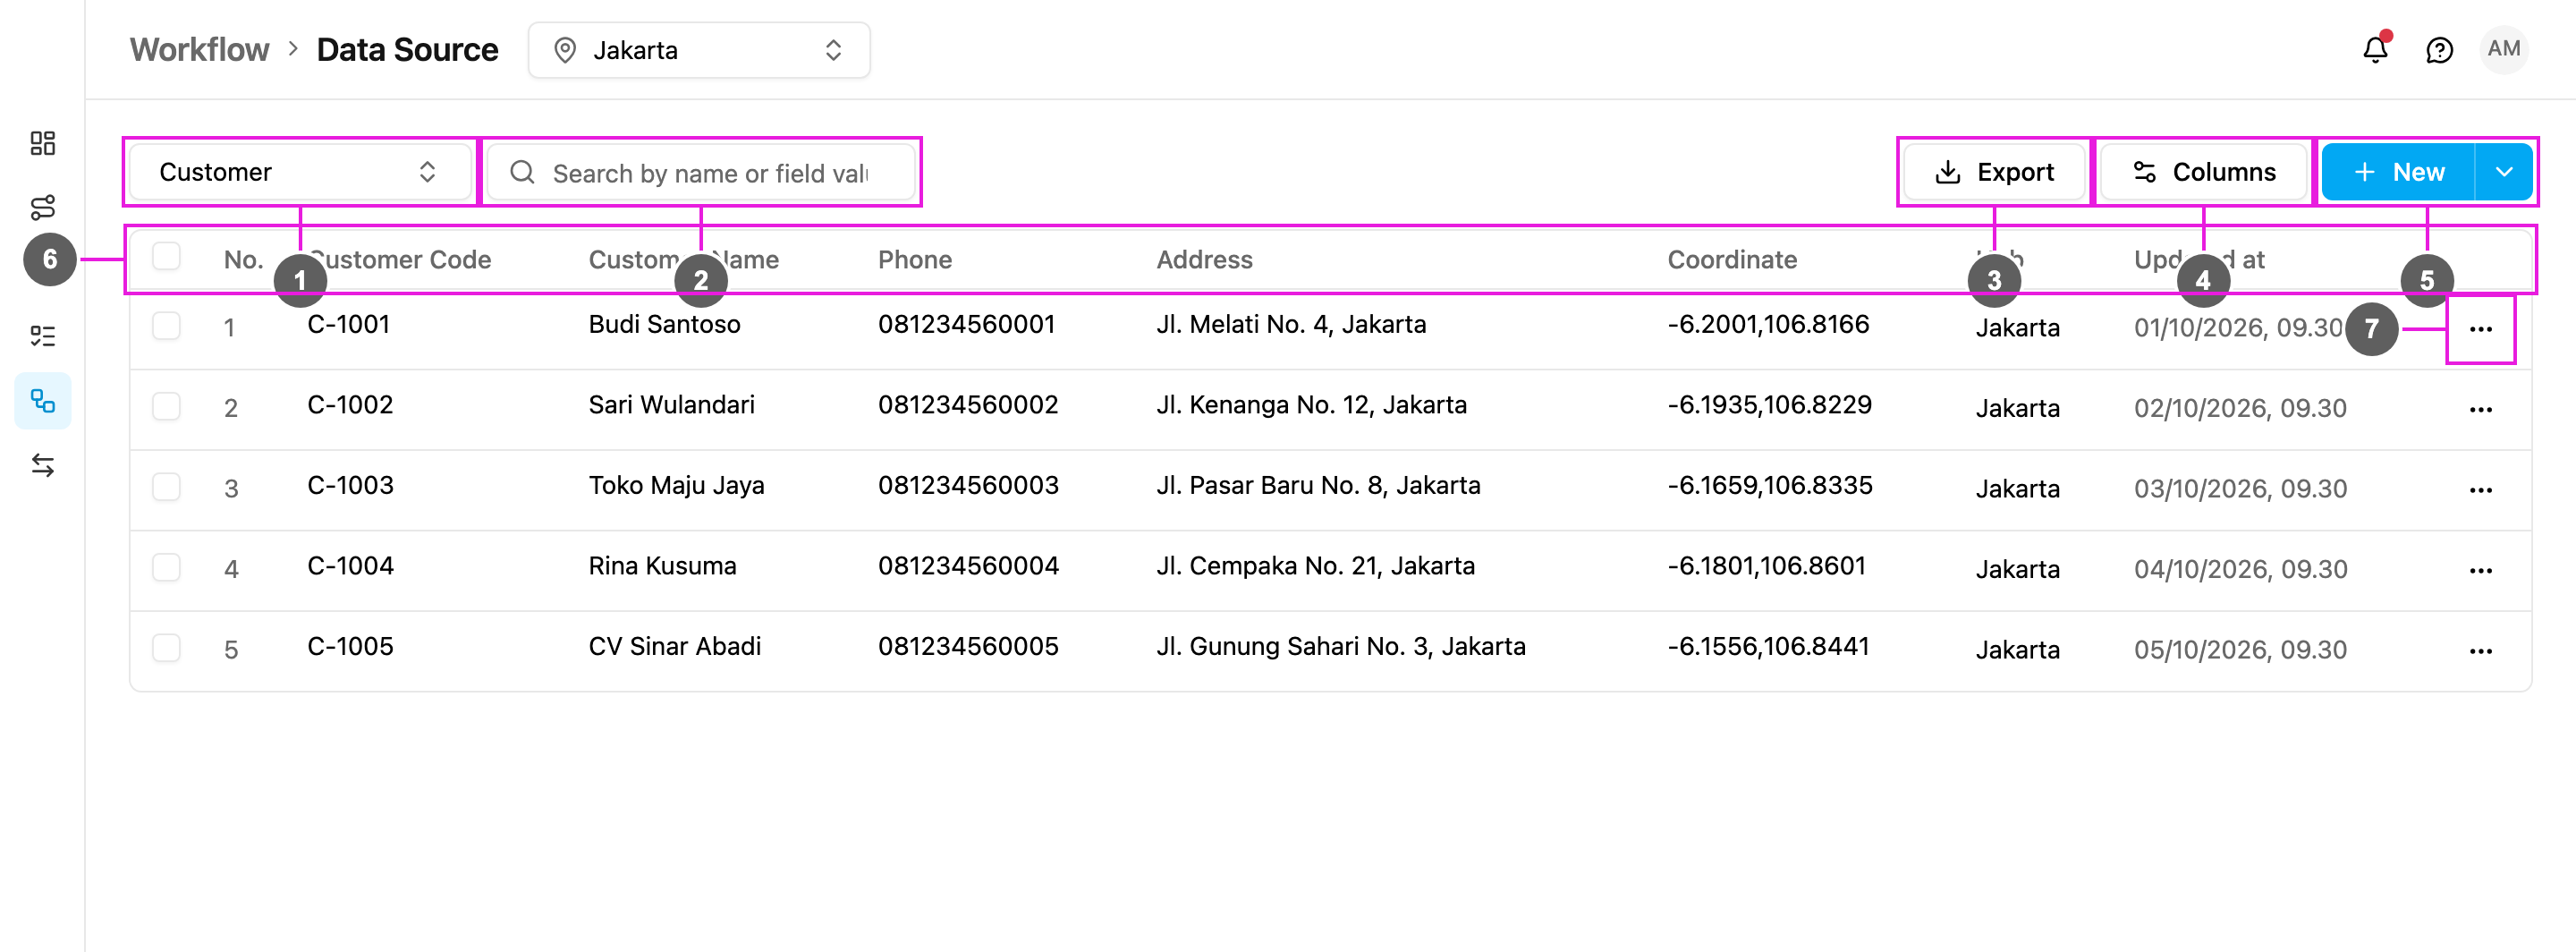
1. **Data type**: which data type's records to show. The page opens on the first data type that isn't Master Data.
2. **Search by name or field value**: find records. The search matches the value of every field of the record, and a code typed with one separator also finds it written with another, so *PT-001* finds *PT\_001* and *PT 001*. For a Relation field marked **Searchable**, it also matches the title of the linked record.
3. **Export**: download the records as a spreadsheet. See [Export](/pages/workflow/data-source/export).
4. **Columns**: choose which fields are shown as columns, and their order.
5. **New**: add one record. The arrow beside it (**More create options**) opens **Bulk**, to add or edit many records at once. See [Adding records](/pages/workflow/data-source/adding-records) and [Bulk add and edit](/pages/workflow/data-source/bulk-add-and-edit).
6. The table. Its columns are:
* A checkbox, to select records for [bulk delete](/pages/workflow/data-source/editing-and-deleting#delete-several-records).
* **No.**: row number.
* One column for each field that is shown on the table. Here **Customer Code**, **Customer Name**, **Phone**, **Address** and **Coordinate**.
* **Hub**: the hubs the record belongs to. Only for data types limited by hub.
* **Limit Data by User**: who can see the record. Only for data types with Limit Data by User on.
* **Updated at**: when the record was last changed.
7. **More actions** (**⋯**): **View**, **Edit** and **Delete** the record.
The list shows the records of the hub you are working in, chosen at the top of the page, unless the data type is shared by every hub.
## Pick a data type
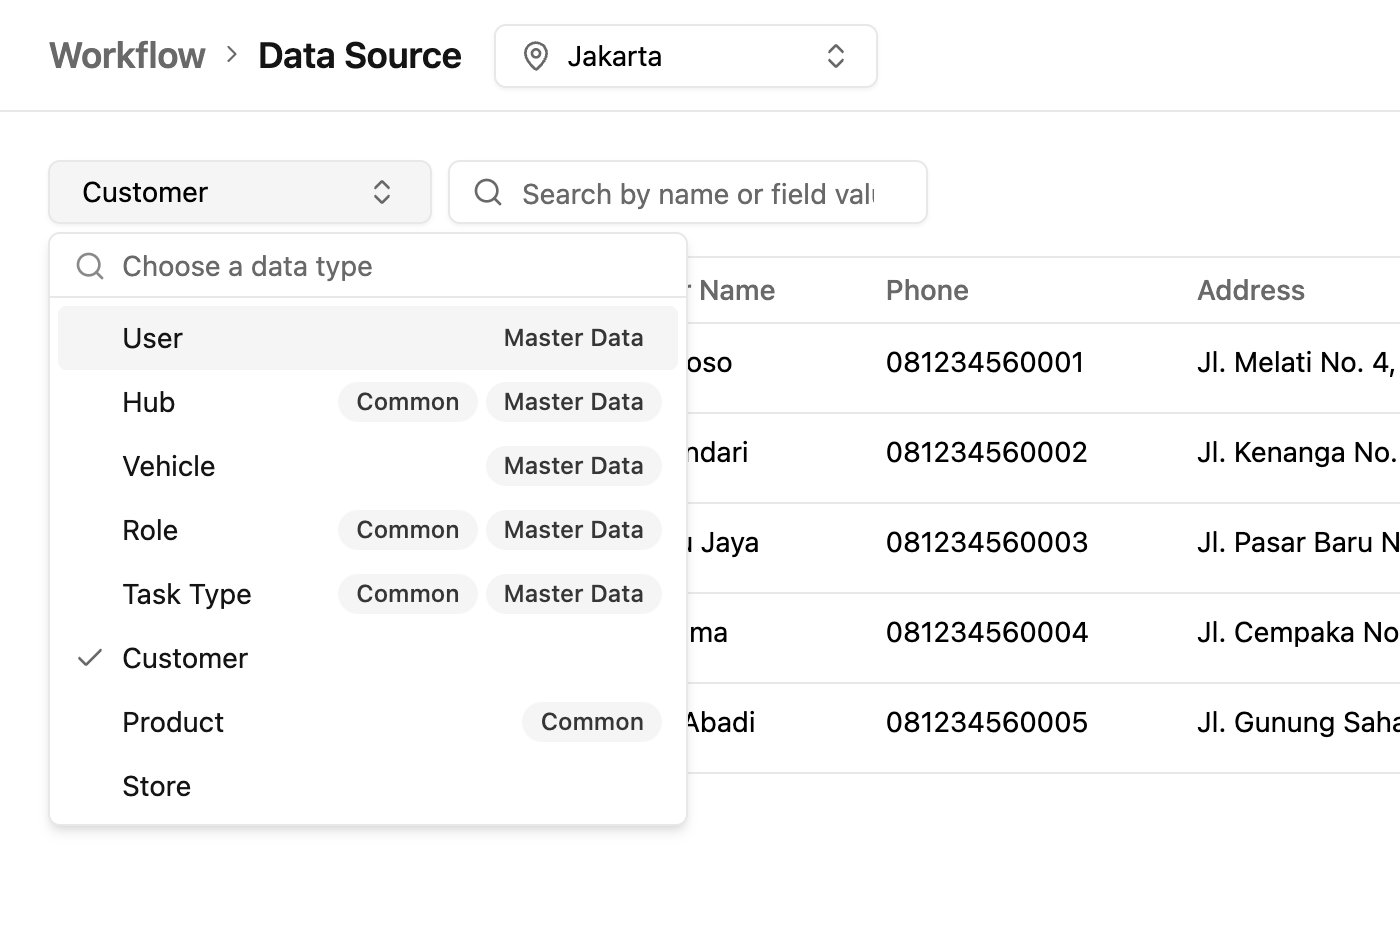
Click the data type picker to switch data type. Type to search the list.
The Master Data types are listed first, then your own data types.
* **Common**: the data type is shared by every hub.
* **Master Data**: a built-in data type (User, Hub, Vehicle, Role, Task Type). All five are always listed, even before you add fields to them. Its records hold your extra information about each user, hub and so on. See [Linked records](/pages/workflow/data-source/linked-records#extra-information-on-master-data).
## Choose the columns
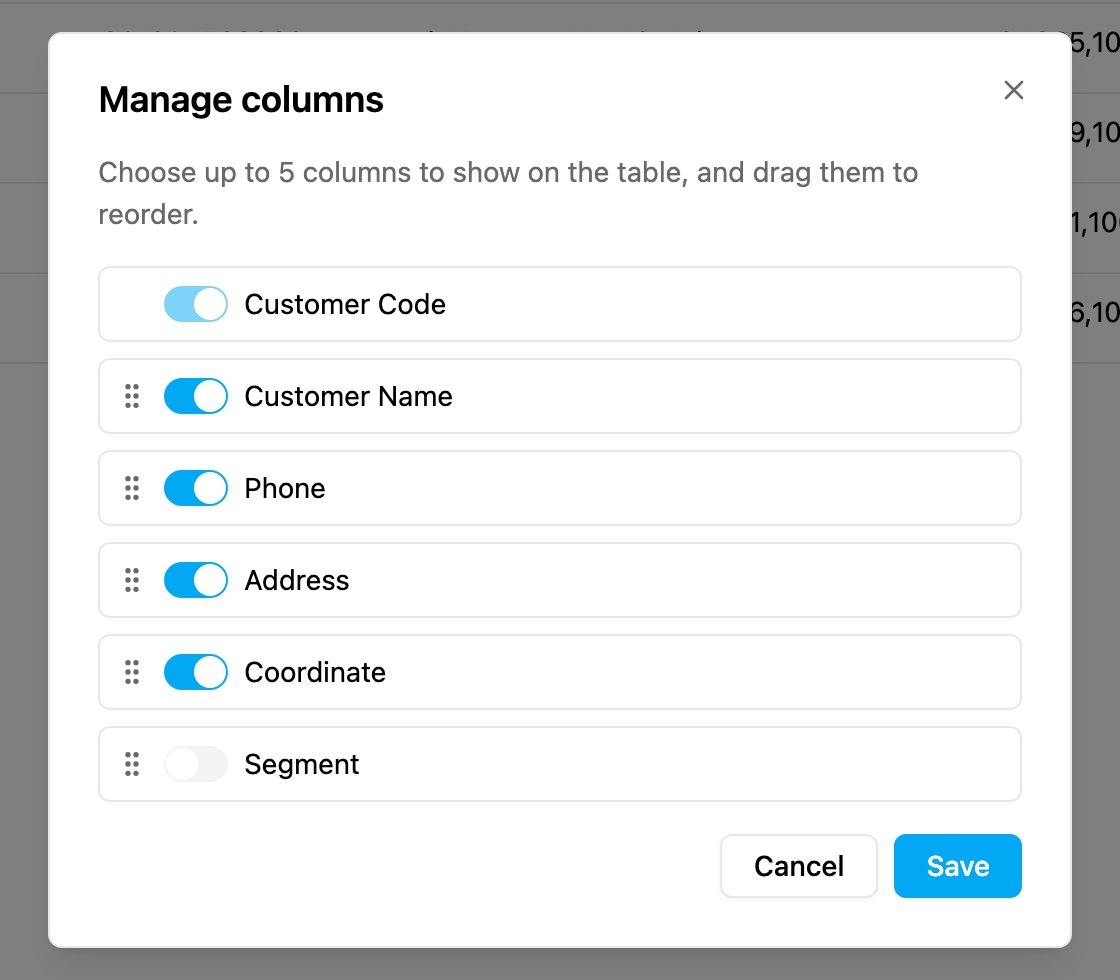
Click **Columns**.
Turn a field on to show it on the table, and drag the handles to reorder. Up to 5 columns can be shown; once 5 are on, turn one off to free a slot. The Title column is always shown and can't be hidden. Click **Save**: the choice applies to everyone, because it changes the data type's **Show on table** settings. It needs the **Edit data type** permission.
## A data type with links
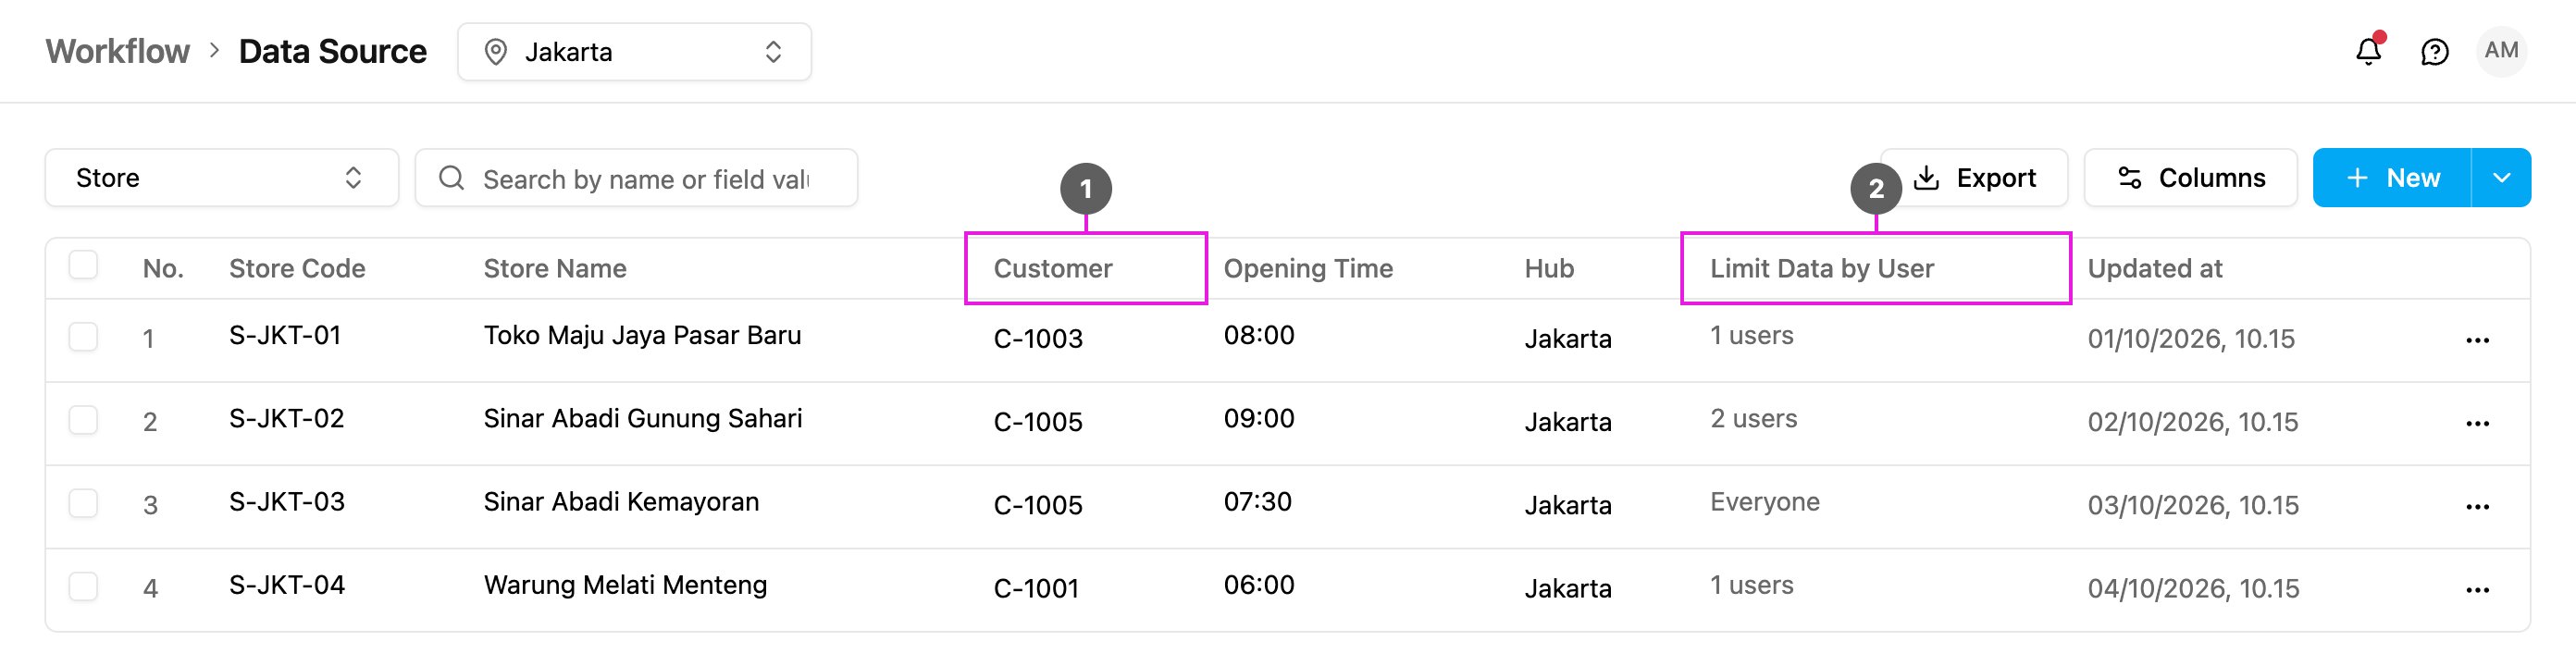
This **Store** data type links each store to a **Customer** and limits each store to chosen users:
1. **Customer**: a Relation field. It shows the linked customer. See [Linked records](/pages/workflow/data-source/linked-records).
2. **Limit Data by User**: **Everyone**, or the number of users who can see the record, for example *2 users*.
## In this section
* [Adding records](/pages/workflow/data-source/adding-records)
* [Bulk add and edit](/pages/workflow/data-source/bulk-add-and-edit)
* [Editing and deleting](/pages/workflow/data-source/editing-and-deleting)
* [Linked records](/pages/workflow/data-source/linked-records)
* [Export](/pages/workflow/data-source/export)
This documentation is built and hosted on [Mintlify](https://mintlify.com), a developer documentation platform.