

Required permission:
- View tracking
- View alert (for the Alert tab)
- Resolve alert (to resolve an alert)
- View Chat on Web (for the chat button and the Chat tab)
The user list
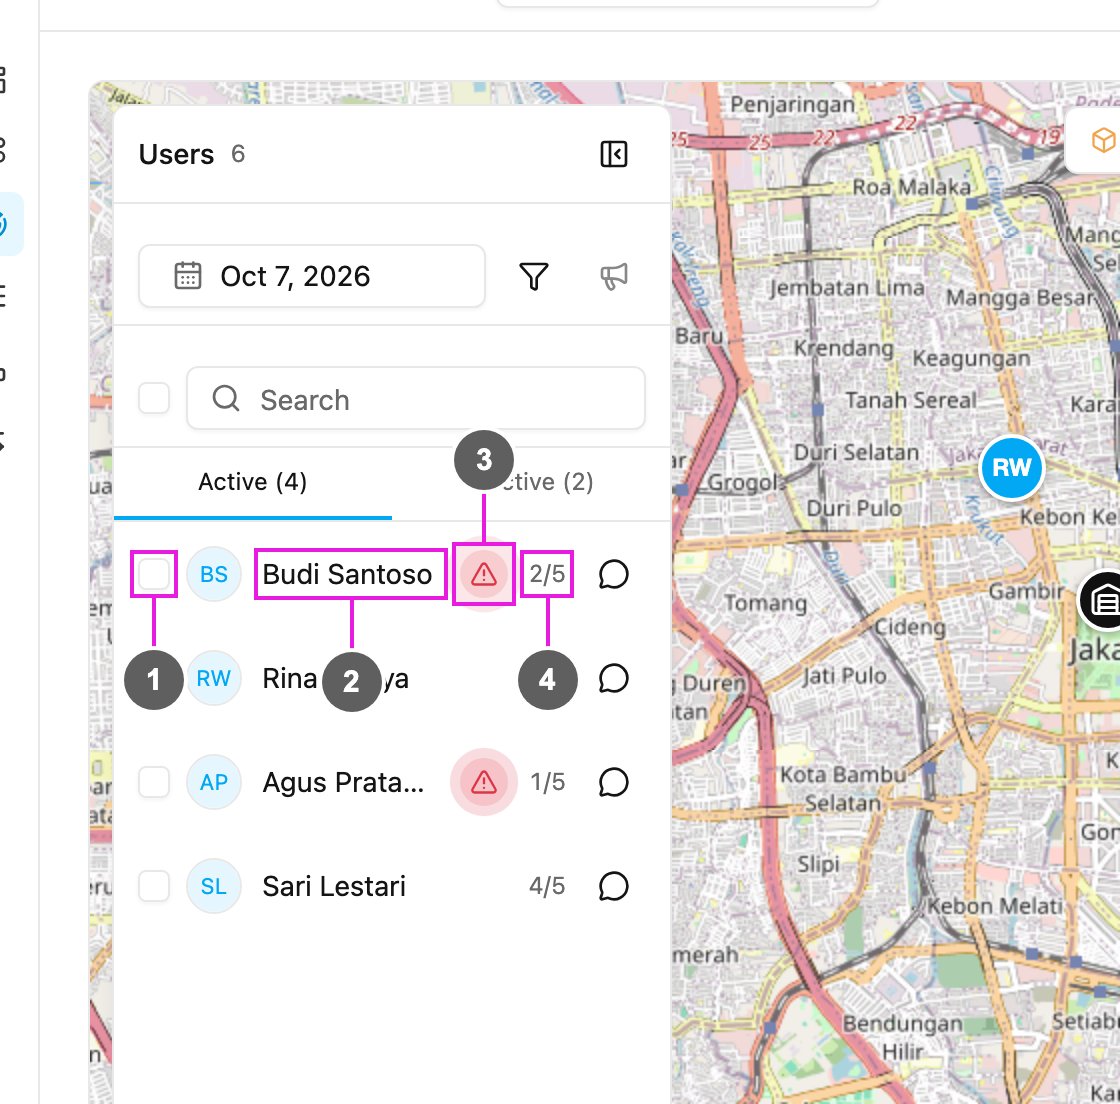
- Checkbox: tick field workers to send them one message with Broadcast. See Broadcast.
- Name: click to select the field worker. Click again to go back to everyone.
- Alert sign: the field worker has an unresolved alert on that day.
- Done / total: done tasks out of all the field worker’s tasks on that day, for example 2/5. It is hidden when they have no task.
A selected field worker
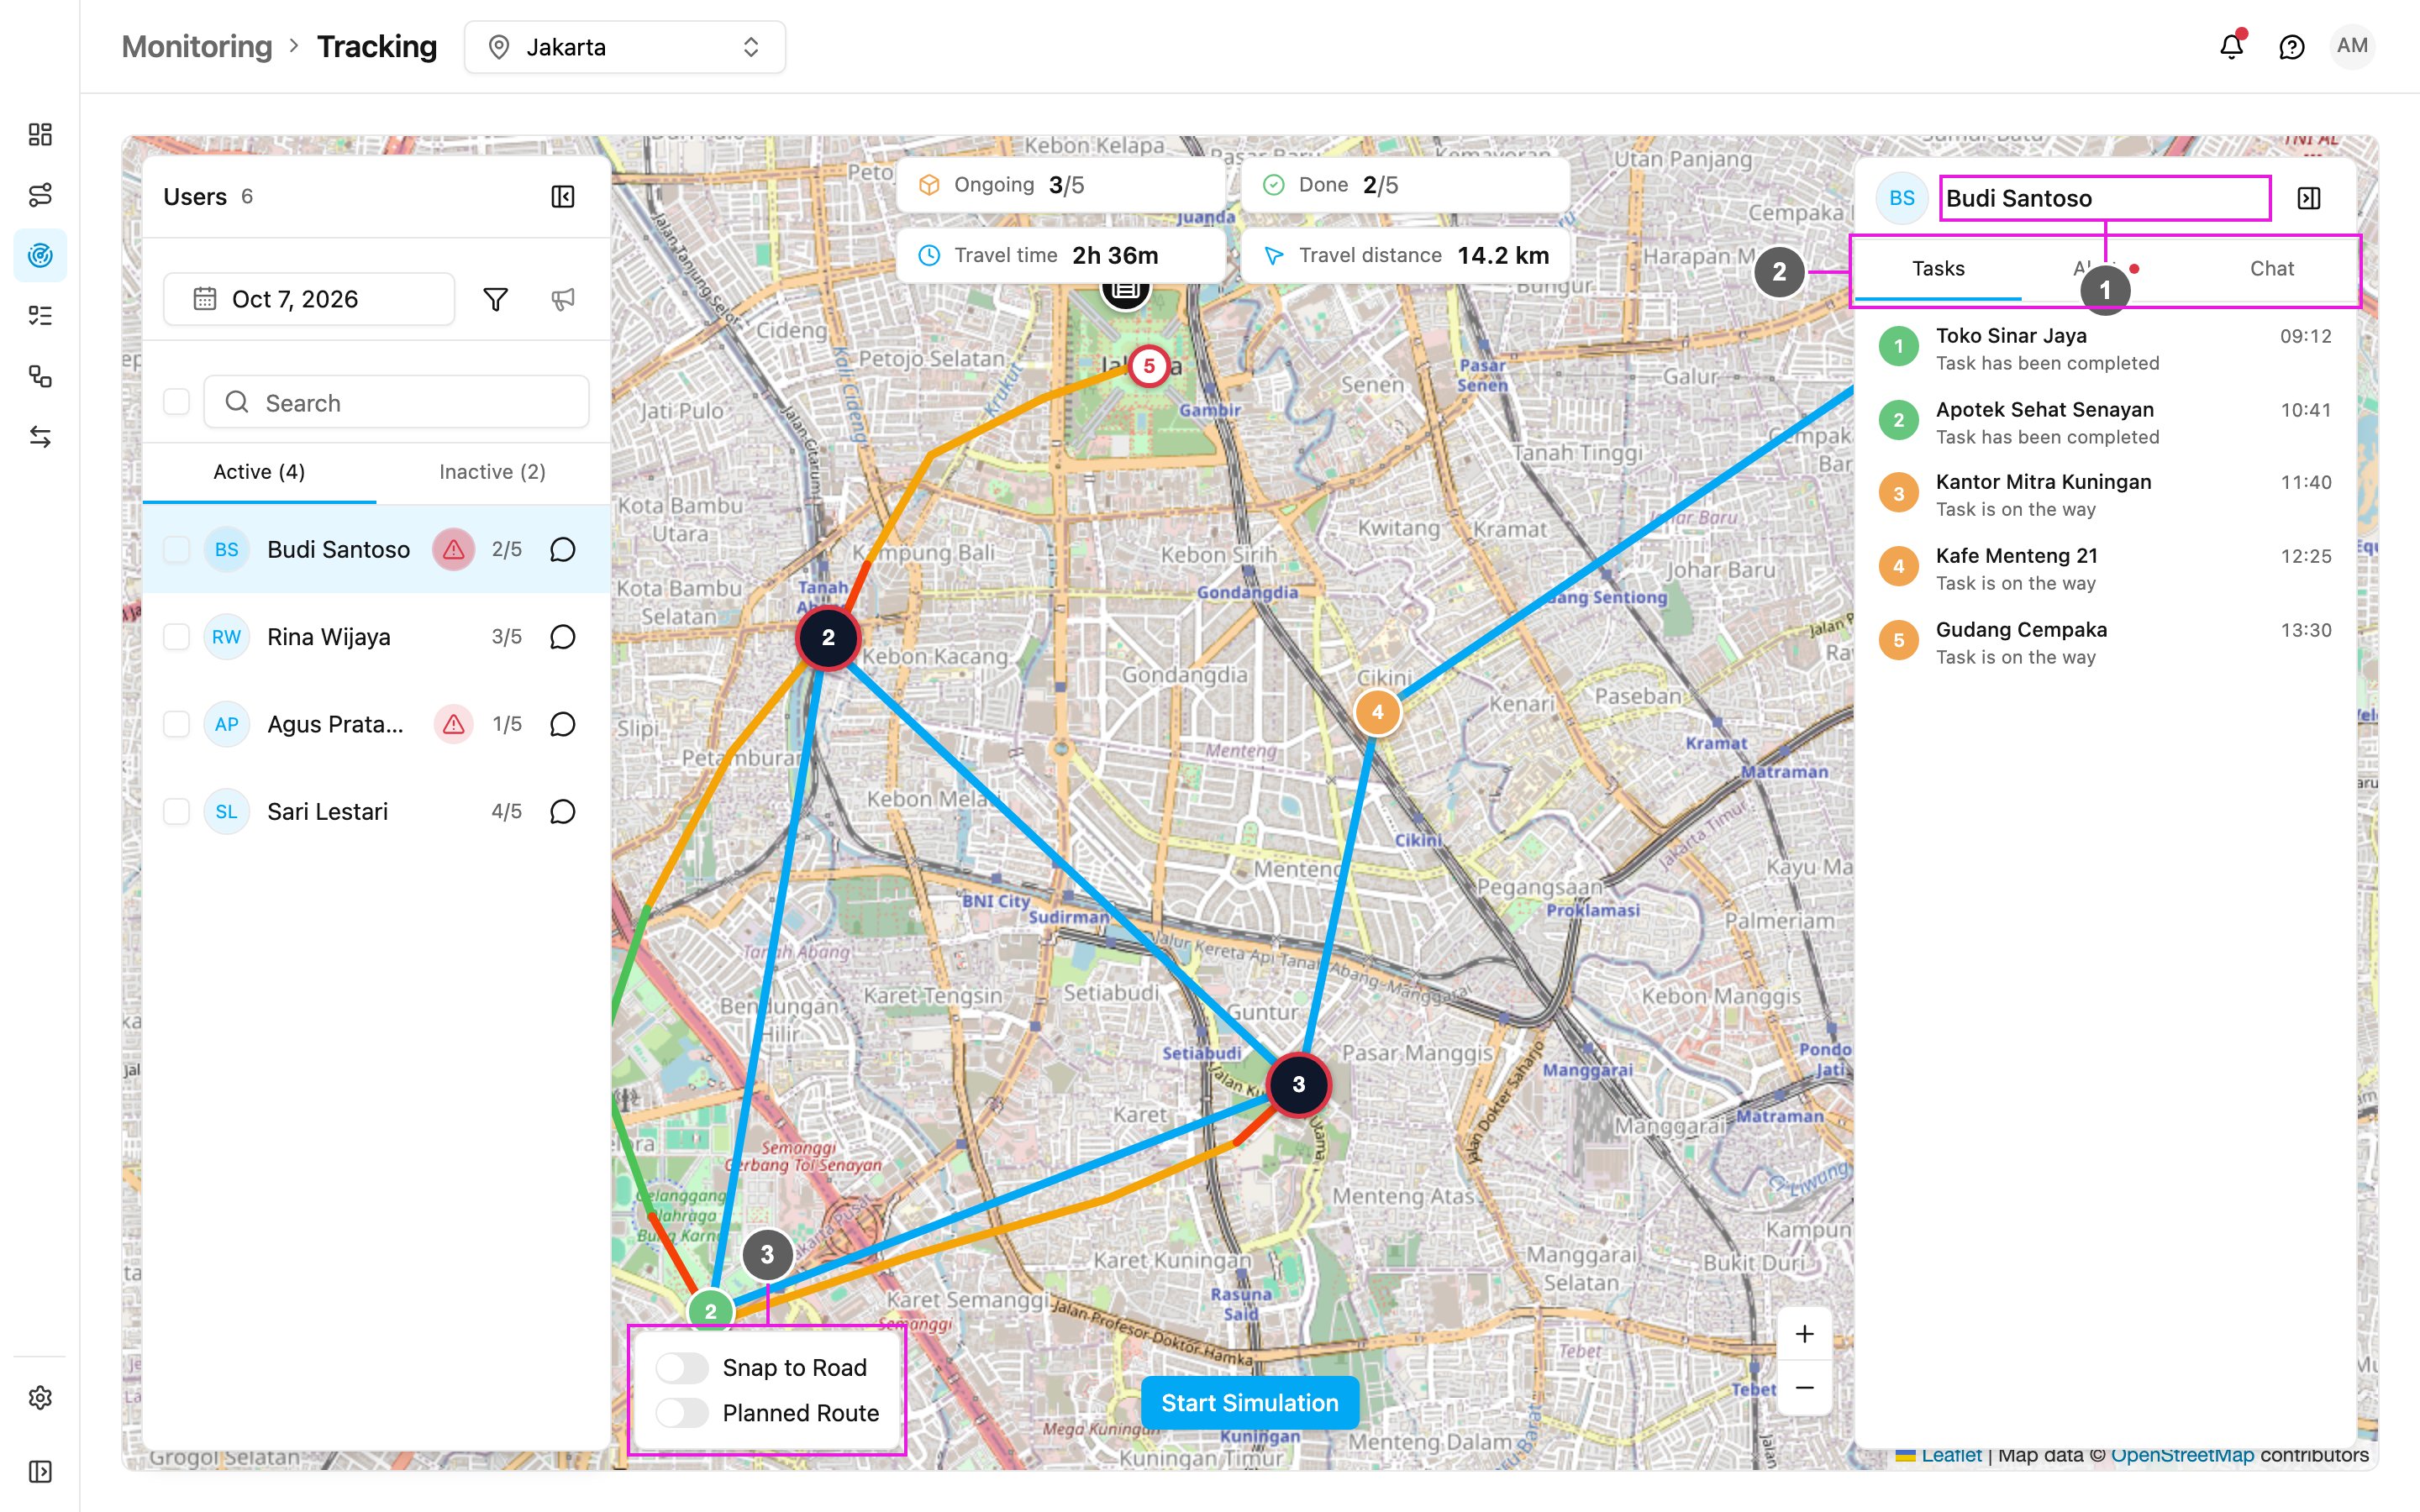
- Name: the field worker the panel is about. Below it are their role, their teams in this hub and their phone number. The button on the right hides the panel. Show it again with the same button.
- Tasks / Alert / Chat: the panel’s tabs. A red dot on Alert means there is an unresolved alert.
- Snap to Road / Planned Route: change how the route is drawn. See Map Icons and Routes.
- their latest location (the user icon),
- the actual route they travelled, coloured by speed,
- a blue line to their remaining tasks,
- a numbered icon for each task, and a numbered ring for each alert.
Tasks
The Tasks tab lists the field worker’s tasks of that day in planned order. Each row shows:- Number: the task’s place in the list, coloured by status (green done, orange ongoing, grey not assigned).
- Title: the task title, or the task type’s name if the task has no title.
- Progress: Task has been completed, Task is near the destination or Task is on the way.
- Time: when the task was done, or its planned arrival time if it is not done yet.
Alert
The Alert tab lists the alerts raised for this field worker on that day: geofence, idle, route deviation, lateness and panic button alerts.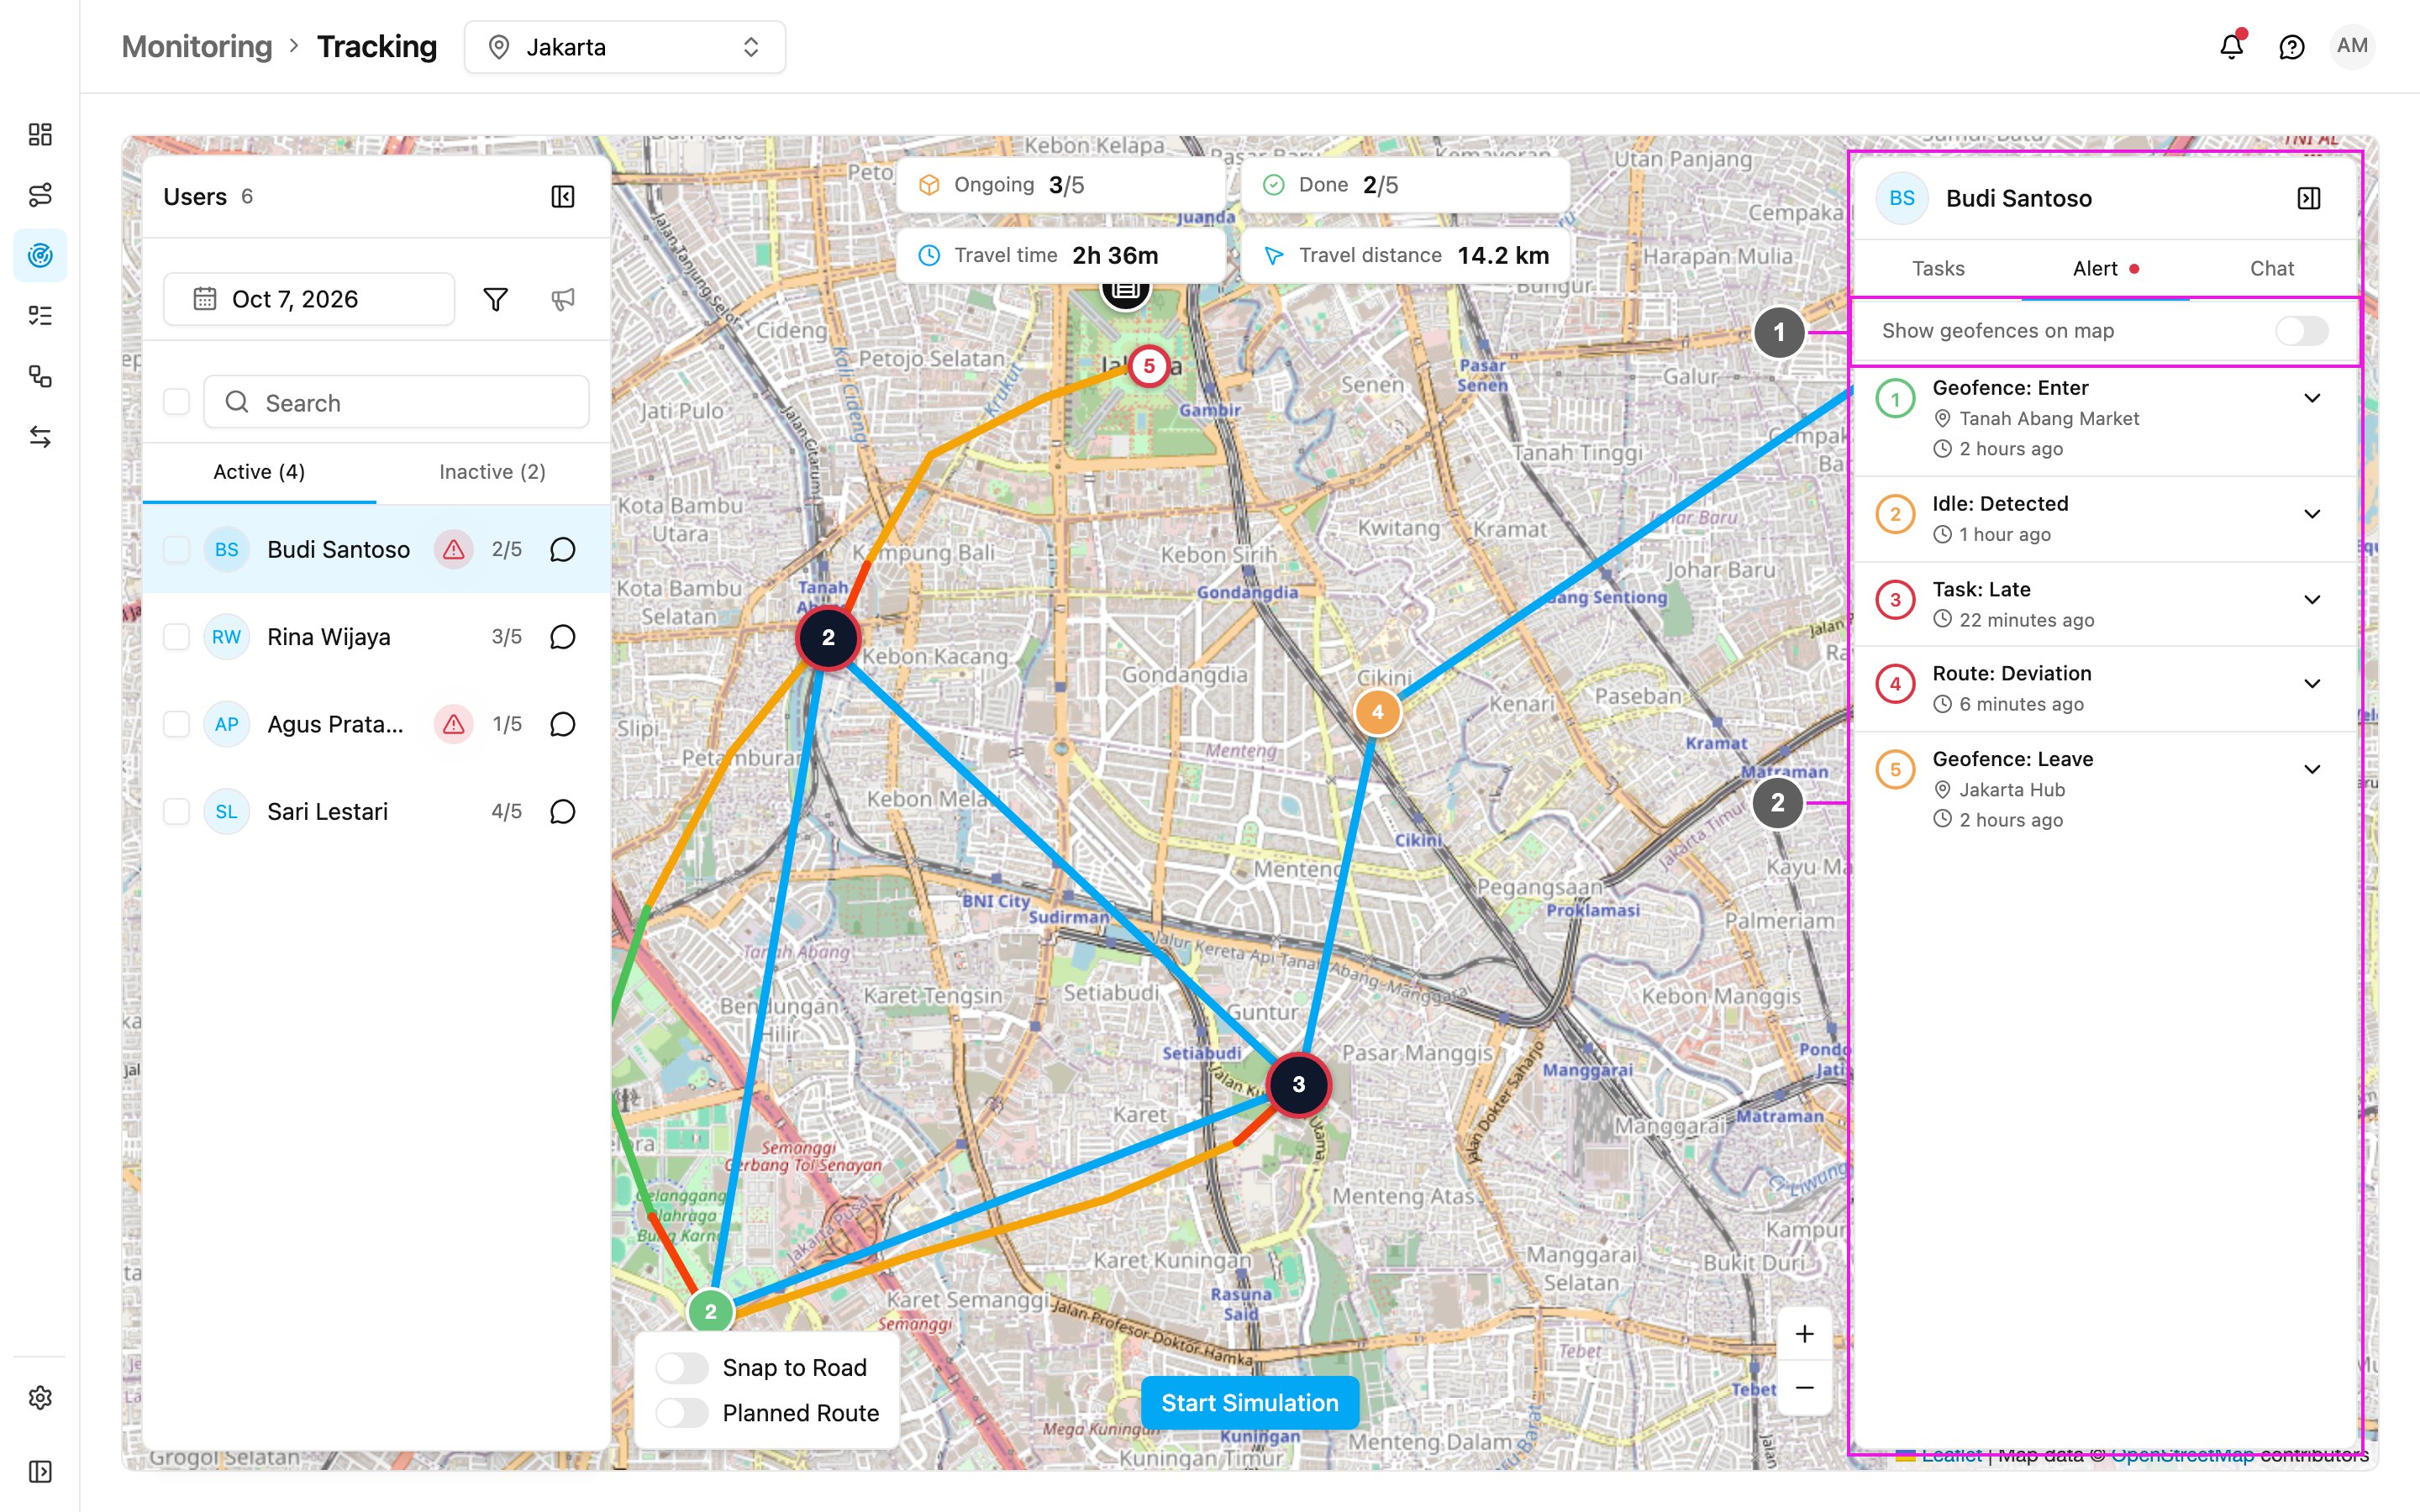
- Show geofences on map: draw your geofences on the map, so you can see the area an alert is about.
- Alert row: the alert type (for example Idle: Detected), the place and how long ago it happened. Click a row to highlight its ring on the map. The arrow opens the row to show the message and the details: event, location, GPS, time, and, once resolved, who resolved it and their notes.