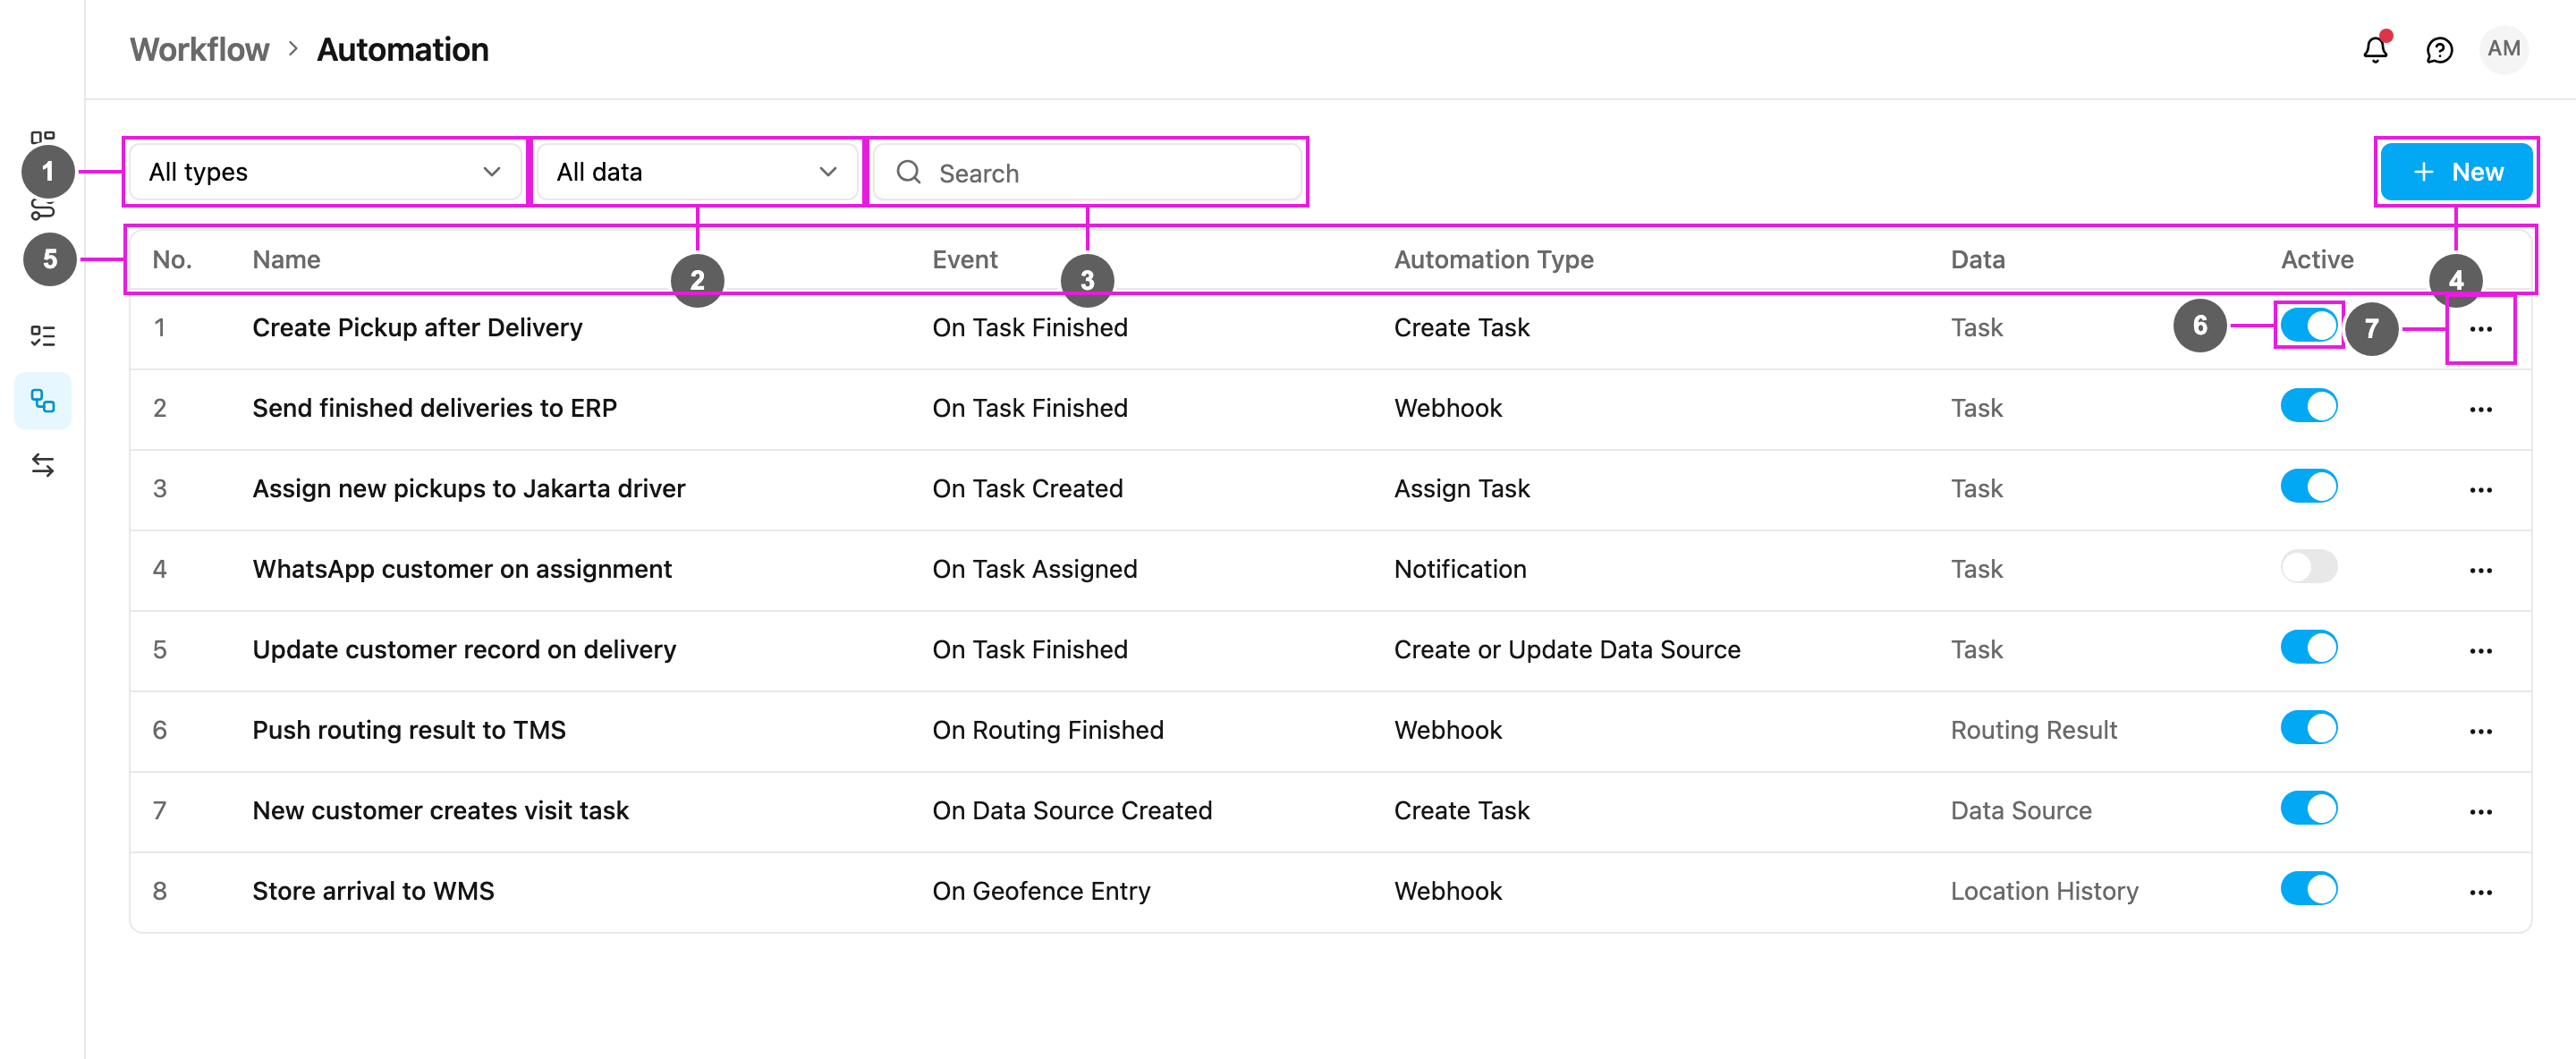
Everything you do with an existing automation starts from its row on Workflow › Automation.
Required permission:
- View automation
- Edit automation, Delete automation
Switching an automation on or off
The Active switch (6) on each row decides whether the automation runs:
- On (blue): the automation runs whenever its event happens.
- Off (grey): the automation is never triggered and its action never runs.
Click the switch to change it. Switch an automation off to pause it without losing its settings.
Click ⋯ (7) at the end of a row:
- Edit: open the automation to view or change it.
- Log: open the automation log.
- Delete: delete the automation.
Viewing and editing
Click Edit. The Edit automation form opens with the same fields as when it was created. You can change the name, the task type (or data type, or geofence group), the rules and the automation detail, then click Submit.
Event and Automation Type are locked when editing. To use a different event or automation type, create a new automation instead.
Deleting
Click Delete, then confirm Delete this automation? (”… will be removed permanently.”). The automation’s log is deleted with it, so download any log entries you want to keep first.