

Required permission:
- View flow
- Edit flow
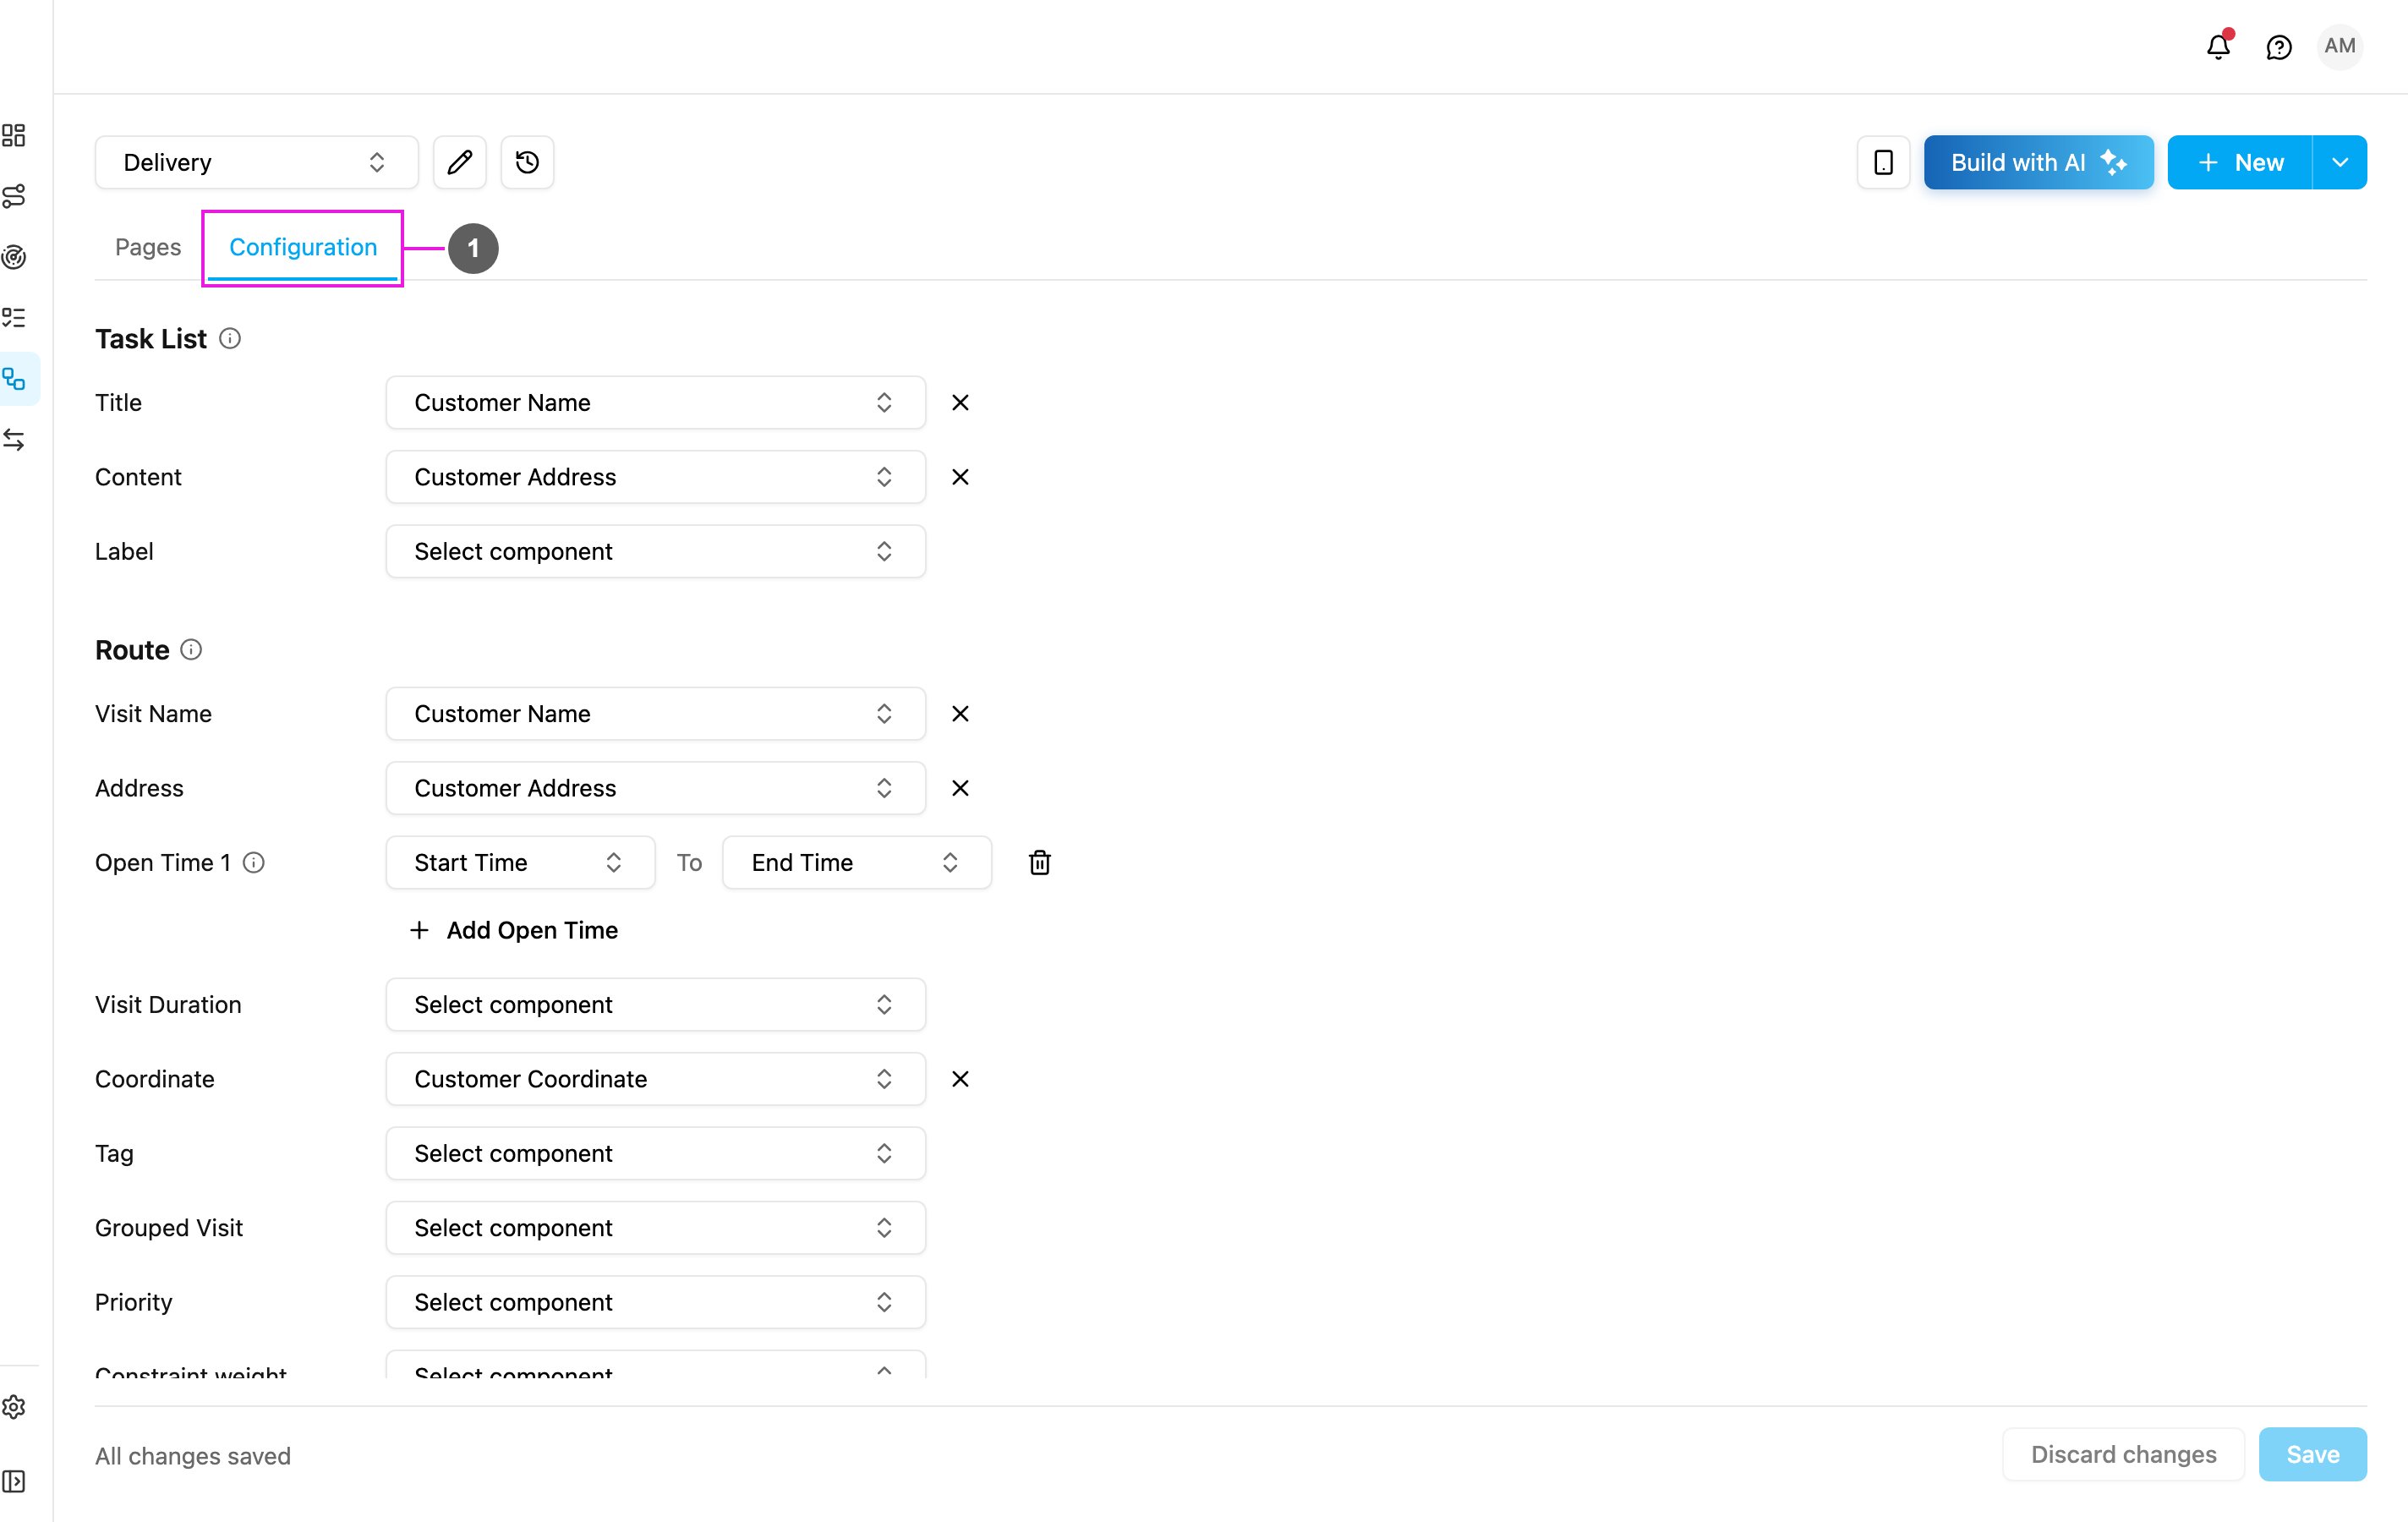
- Configuration: the tab with every section below, from top to bottom: Task List, Route, Time, Extended data and API Example.
Task List
Task List decides how each task reads in the task list, on the web app and on the field app. For example, use the customer name as the title and the customer’s address as the content.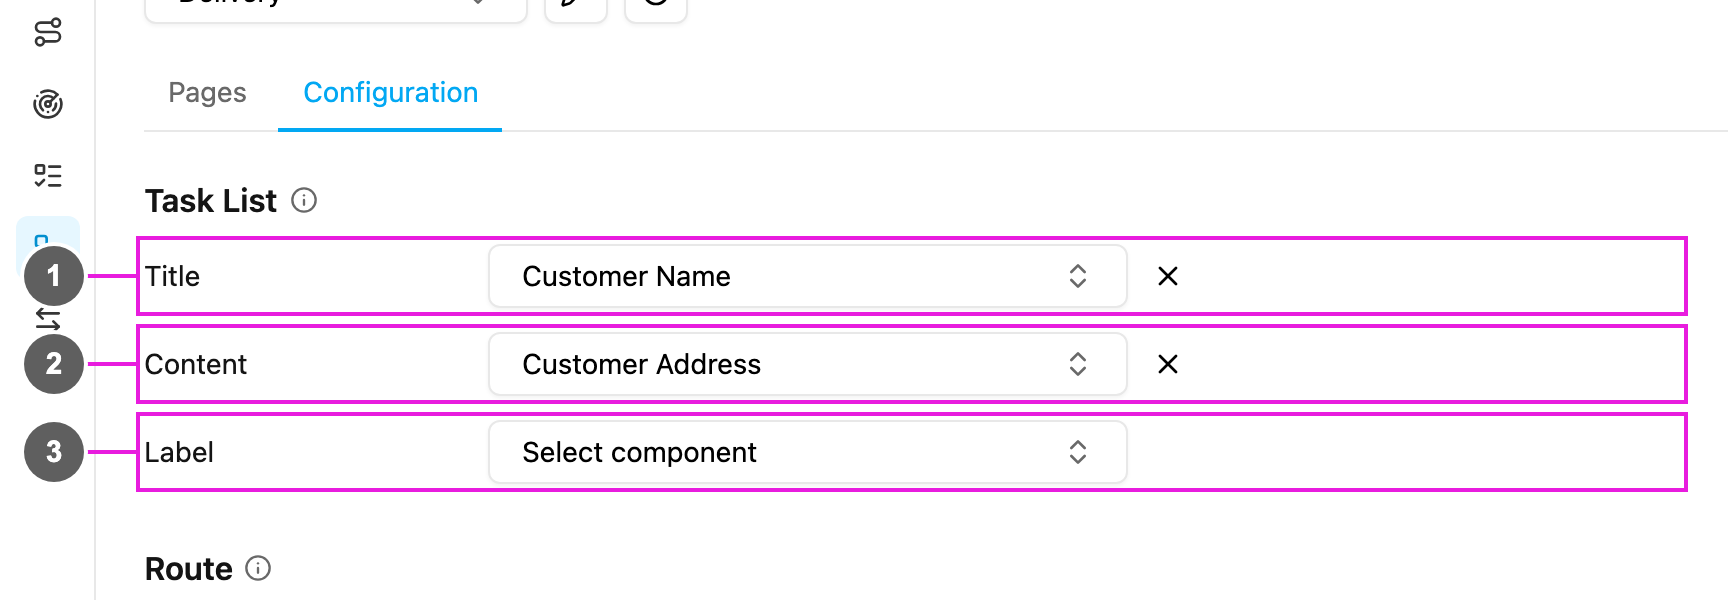
- Title: the first, bold line of every task row, usually the customer name or an order ID.
- Content: the second line, usually the address or a short description.
- Label: a small tag under the content, usually a phone number, a label code or another short identifier.
- Title: the value of the component mapped to Title, here the customer’s name.
- Content: the value mapped to Content, here the delivery address.
- Label: the value mapped to Label, here the parcel number.
Route
Route connects Initial page components to the fields of a visit in Routing, so tasks of this task type can be planned and optimized. Route is optional, but we strongly recommend at least Visit Name, Address and Coordinate. Without them routing still runs, but those values are not saved on the task’s visit. Only Initial page components can be picked, because routing reads the task as it was created. If the Initial page is turned off, Route says Initial page is turned off for this task type. Route mapping is not available.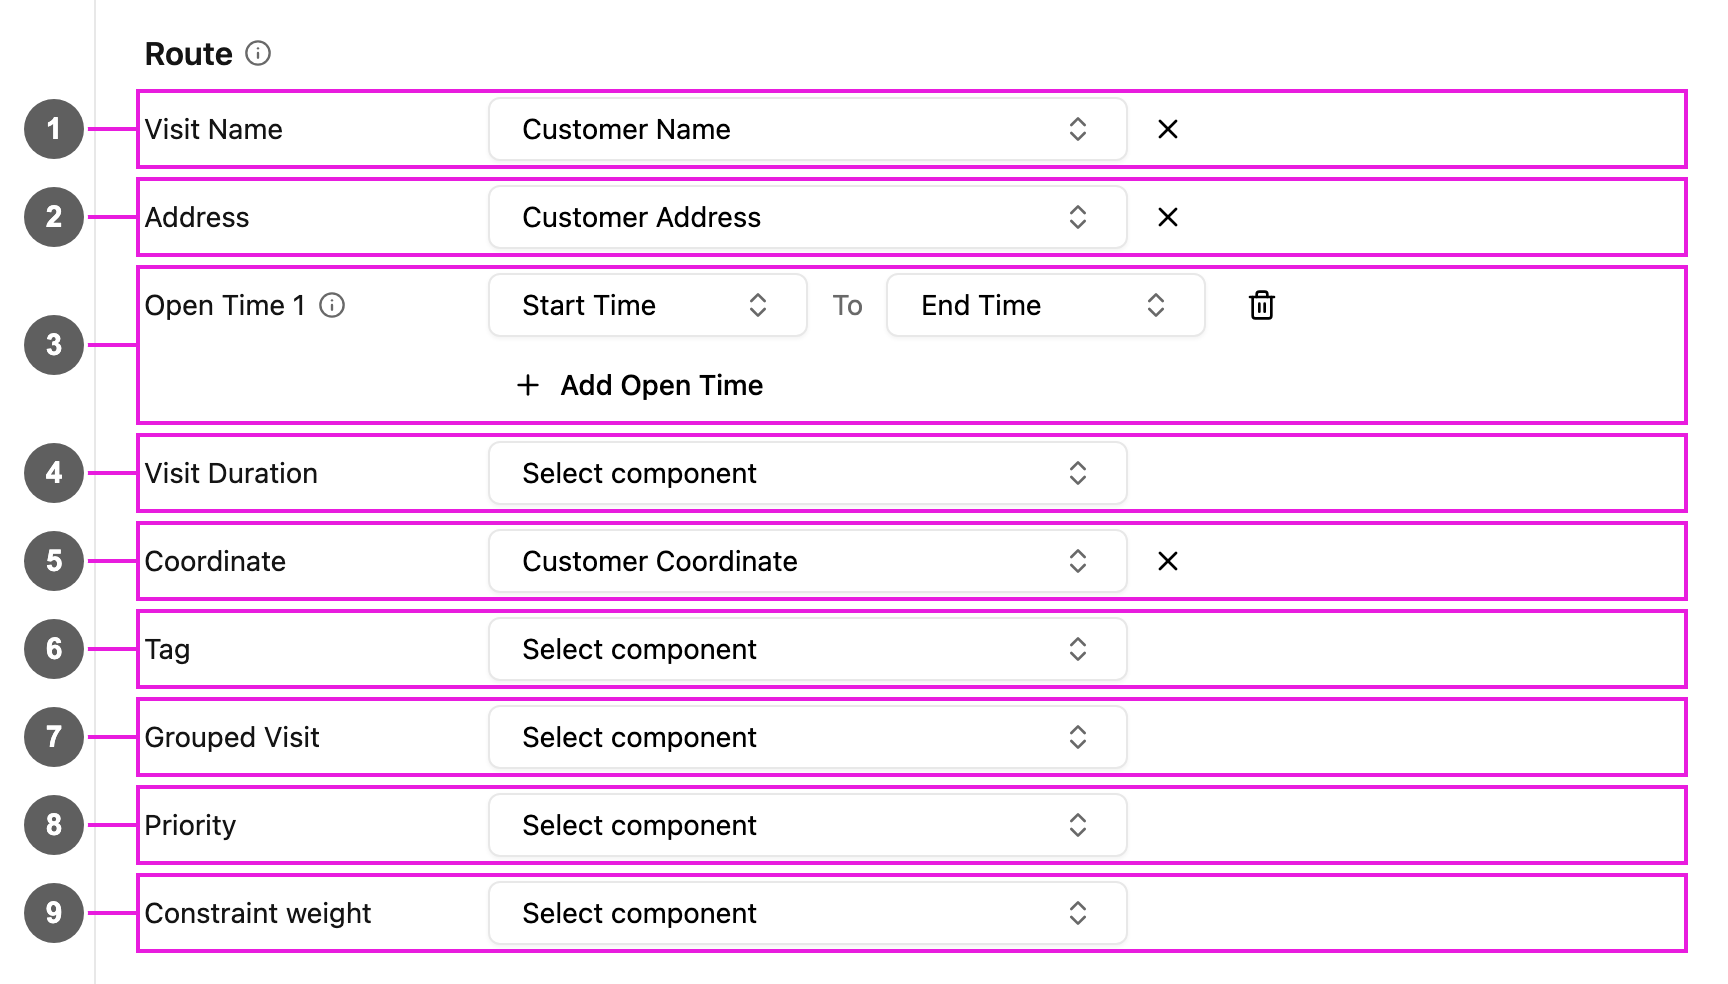
- Visit Name: shown as the visit’s Name. Only a Text input can be picked. If it is empty, the visit takes its name from the task list Title.
- Address: shown as the visit’s Address. A Text or Address input can be picked. If it is empty, the visit has no address and you type one for each visit by hand; Save also warns Routing Address Mapping Not Configured.
- Open Time: the time window in which the visit should be done. Pick the component for the window’s Start Time in the first box and its End Time in the second. Only Time inputs can be picked. Add Open Time adds another window, up to three (Open Time 1, 2 and 3); the bin removes one.
- Visit Duration: shown as the visit’s Visit Time, the minutes spent at the visit after arriving. Only a Number input can be picked, and its value must be a whole number because it is minutes.
- Coordinate: shown as the visit’s Coordinate. Only a Coordinate input can be picked. We recommend turning on geocoding for it so the visit lands in the right place on the map.
- Tag: the visit’s tags, used to match visits with vehicles or other criteria during optimization. A Text input or any Select can be picked.
- Grouped Visit: visits with the same value are planned together. Only a Text input can be picked.
- Priority: the priority of the visit group. Only a Number input can be picked.
- Constraint …: one row for each capacity constraint set up in Routing › Configuration, such as Constraint weight, Constraint volume or Constraint width. Only a Number or Currency input or select can be picked. The value is checked against each vehicle’s capacity, and can have one decimal place.
Time
Time sets the default start and end of every task created from this task type, in whole hours.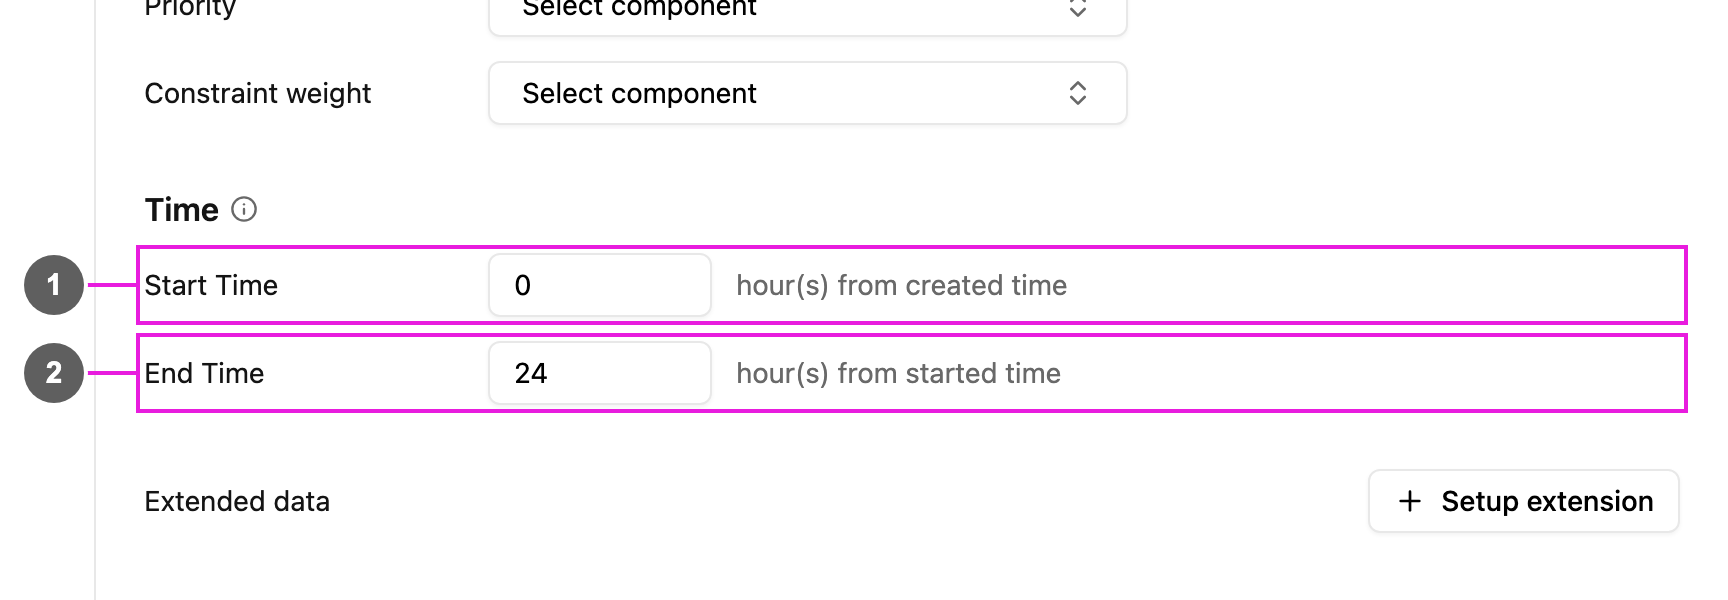
- Start Time: hours from when the task is created until it starts and shows to the assigned field worker. The default 0 means the task can be worked on right after it is created. Use, for example, 8 to show it only at the start of the next working day.
- End Time: hours from the start until the task’s deadline. The default 24 means the task expires one day after it starts. Use a smaller number for a tighter deadline.
These are defaults, filled in when each task is created. The person creating a task can still change its start and end time before saving it.
Data source
A component can fill itself, and other components, from records in Data Source. When a field worker picks a record, such as a customer, store or product, the mapped fields fill in automatically, so nobody retypes information that already exists. Only Input, List and Bill components can use a data source. The setting is in the component’s own properties, not on the Configuration tab: select the component in the builder and turn on Use data source.The data type and its records must exist before you can use them here. See Data Type and Data Source.
- Lookups of master data: customers, stores, products, staff.
- Fill several fields at once: pick a customer once, and their phone number, address and coordinate fill in.
- Consistent data: field workers pick from a checked list instead of typing free text.
Input
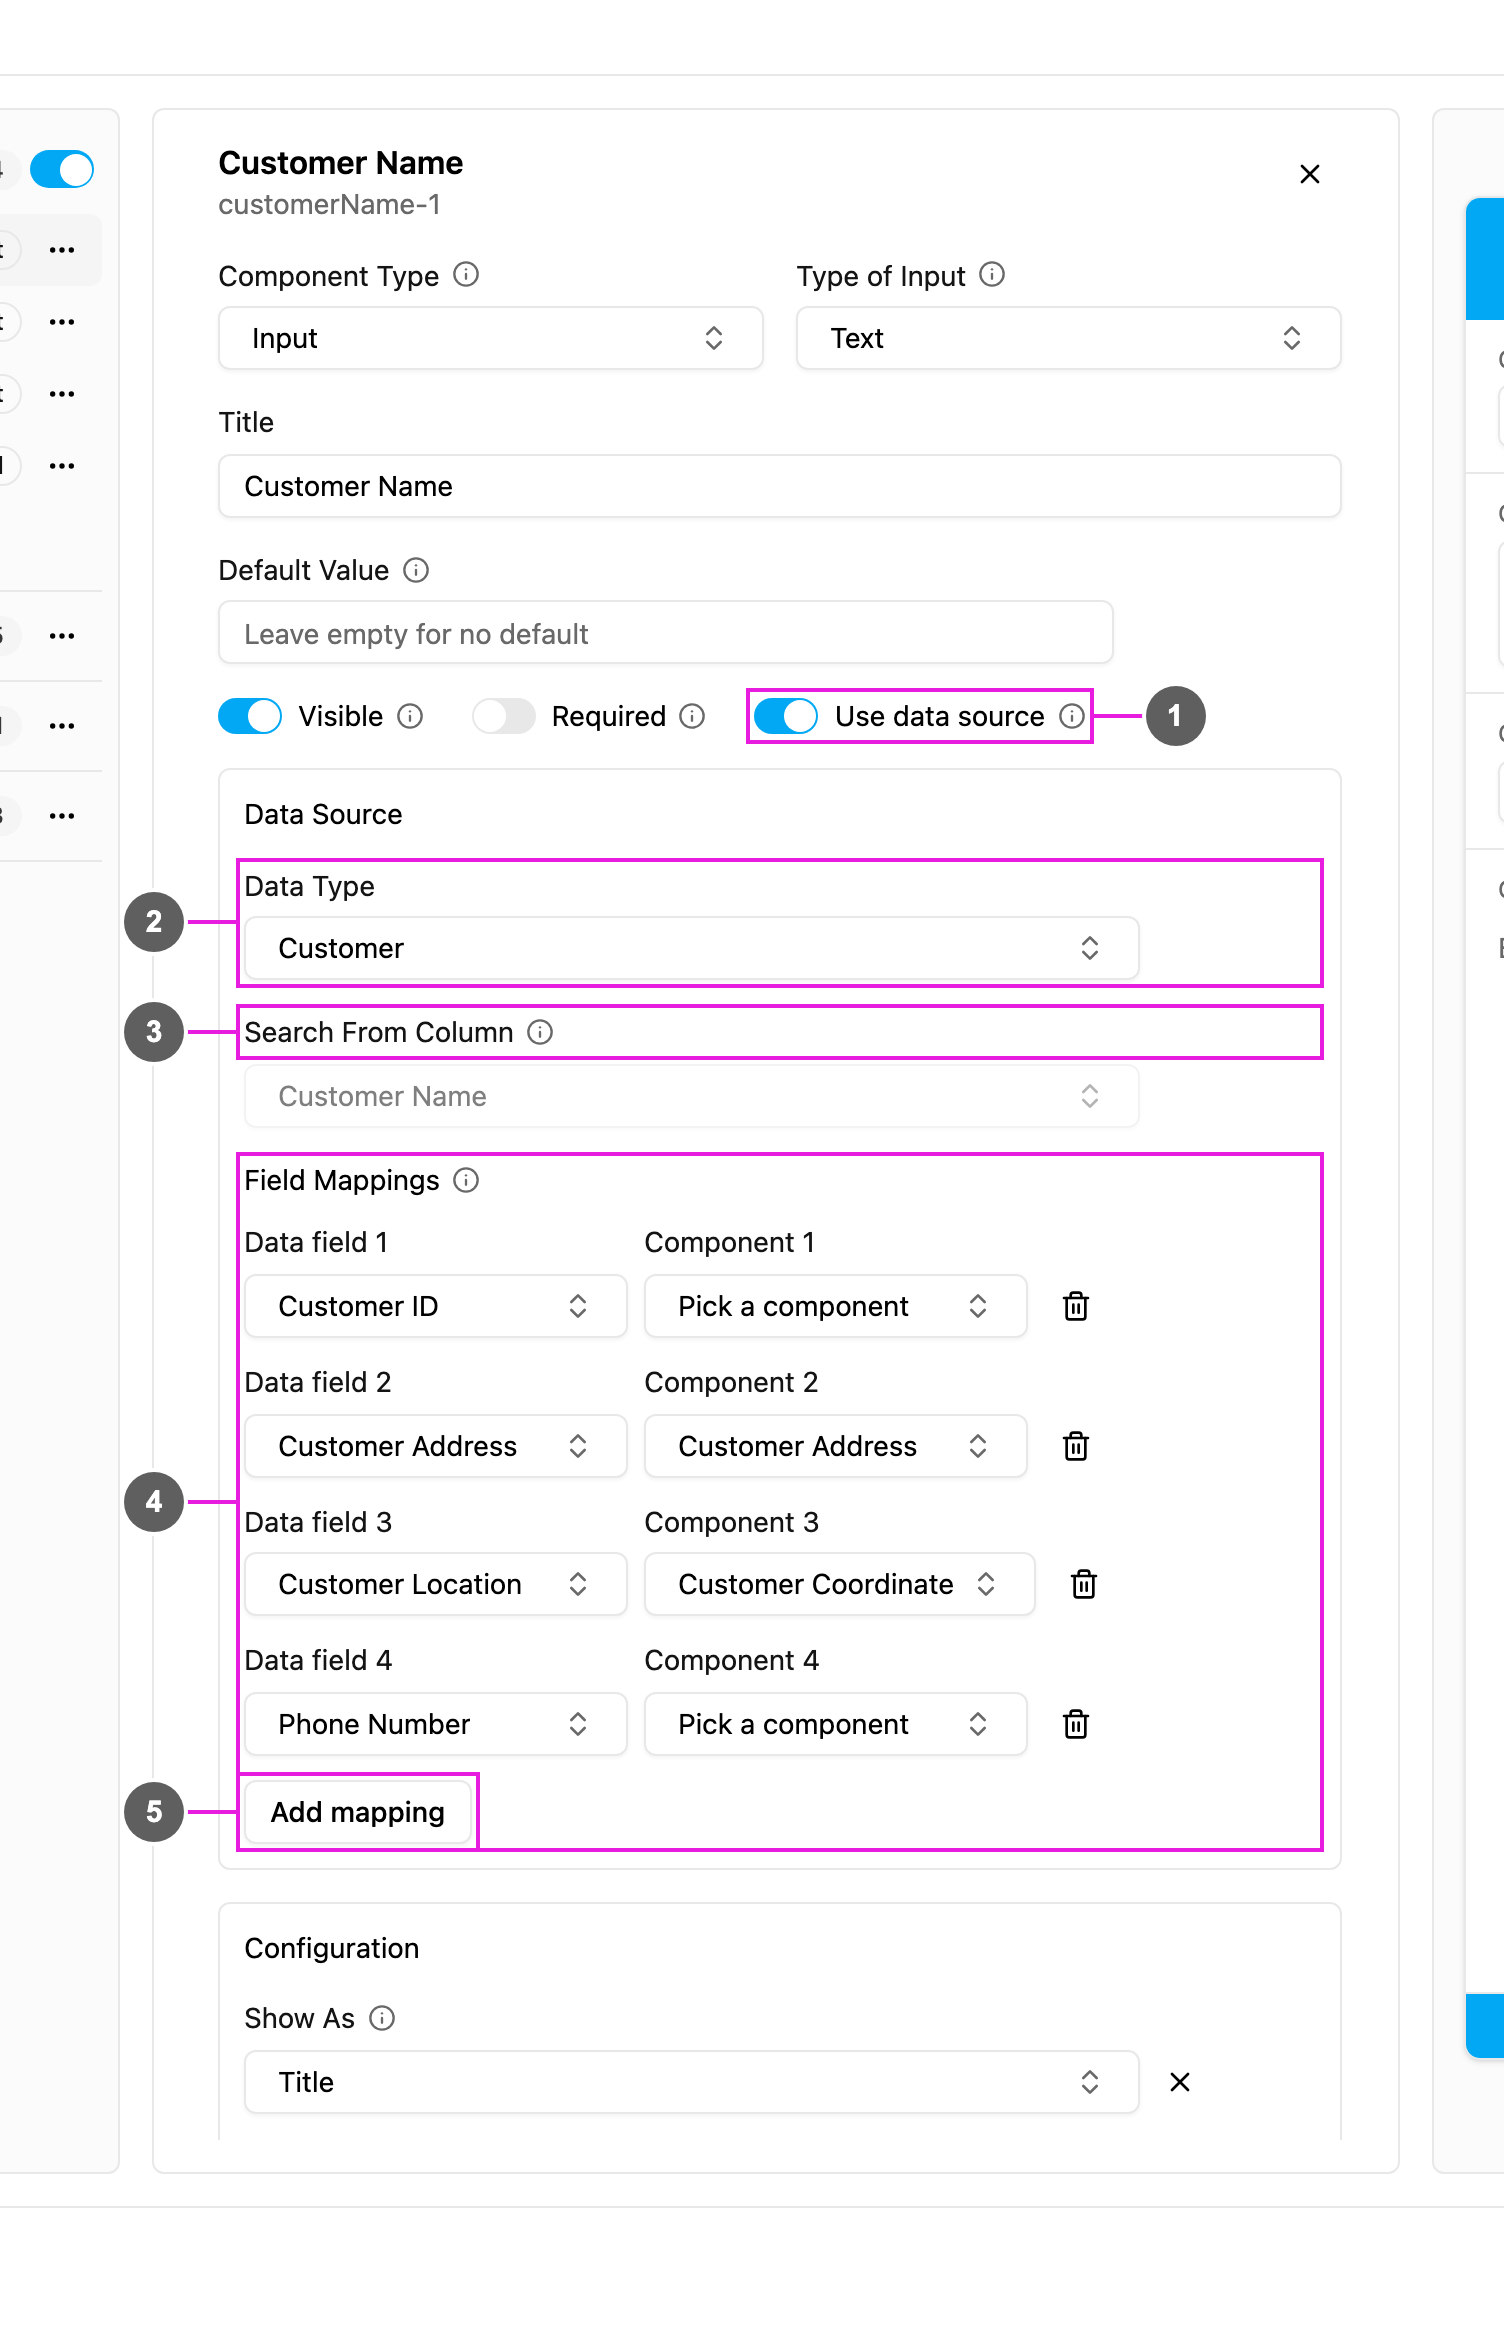
- Use data source: turn it on to show the Data Source settings below.
- Data Type: the data type whose records are used, such as Customer.
- Search From Column: the field of the record that people search or scan by. Typing or scanning into this component opens the list of matching records.
- Field Mappings: each row fills one Component of this task type from one Data field of the picked record. Here, picking a customer fills Customer Address and Customer Coordinate.
- Add mapping: add another row. The bin removes a row.
- Select the Input component in the builder and turn on Use data source.
- In Data Type, pick the data type.
- In Search From Column, pick the field people will search by.
- Under Field Mappings, click Add mapping for each value to fill, and pick a Data field and the Component that receives it.
- Click Save.
List
A List can take its items from a data source, so the field worker picks products from a master list instead of typing each one. Two fields must be mapped:
The data type needs at least one Text and one Number field.
Set up a List data source
- Select the List component and turn on Use data source.
- Pick the Data Type and the Search From Column.
- Under Field Mappings, map Item title to a Text field and Item quantity to a Number field.
- Click Save.
- Data Type: Product
- Search From Column: SKU Code (the operator scans the barcode)
- Item title: Product Name
- Item quantity: Stock Available
Bill
A Bill works like a List with one more mapped field for the price. Three fields must be mapped:
The data type needs one Text and two Number fields. Discounts and extra costs are not read from the data source; set them on the Bill component itself. See Bill.
Set up a Bill data source
- Select the Bill component and turn on Use data source.
- Pick the Data Type and the Search From Column.
- Under Field Mappings, map Item name to a Text field, and Item quantity and Item price to Number fields.
- Optionally add the discounts and costs every bill should have.
- Click Save.
- Search From Column: SKU Code
- Item name: Product Name, Item quantity: Default Qty, Item price: Unit Price
- Costs on the Bill: a Loyal Customer Discount of 5,000 and a Delivery Fee of 15,000
Extended data
Extended data adds your own fields to the task type itself, such as a Region or a Business Unit, so you can record and report extra information about each task type. The same feature exists on hubs, users, roles and vehicles. The first time, click Setup extension. It needs the Create data type permission; without it the section is hidden until someone sets it up.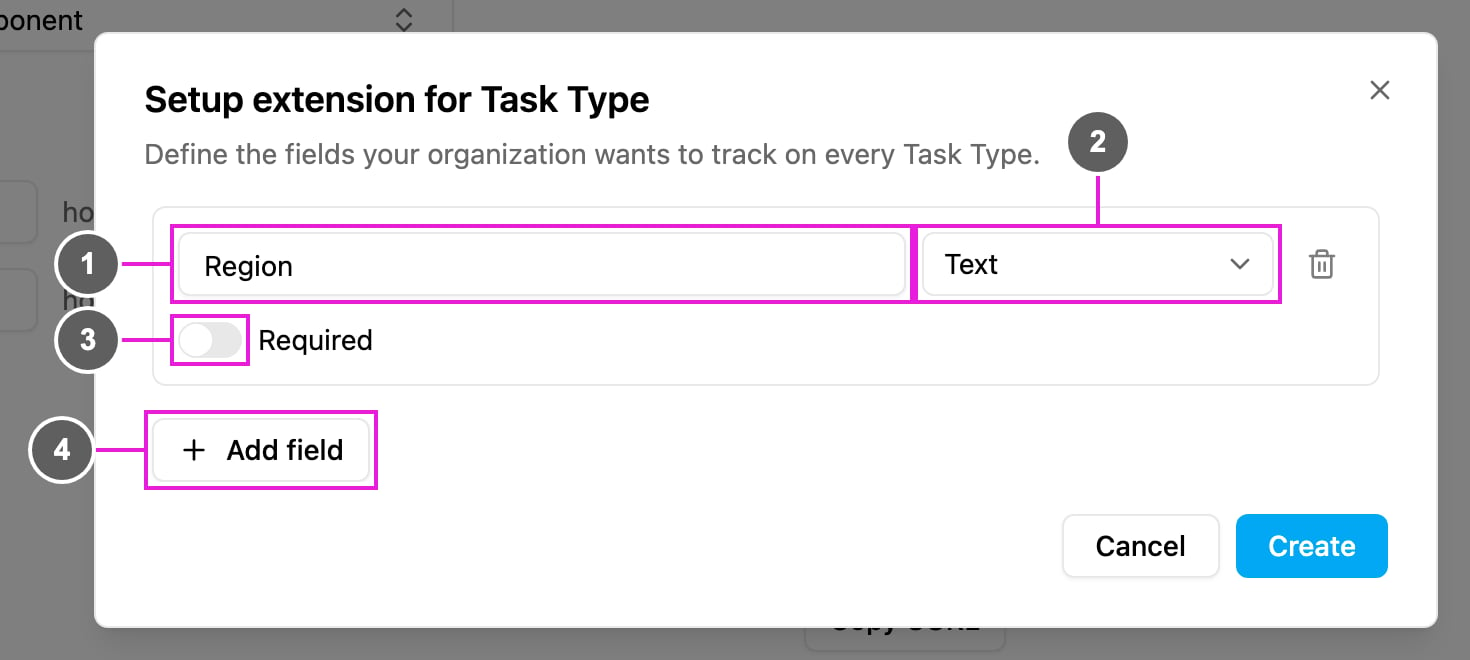
- Field title: the name of the field, for example Region.
- Field type: Text, Number, Option, Multi option, Checkbox, Date, Date & time, Time, Coordinate or Phone number. An option field asks for its options, one per line.
- Required: whether every task type must have a value.
- Add field: add another field. The bin removes one.
If the task type saves but its extended data does not, the app tells you so. Open Configuration again and save once more.
API Example
API Example shows how to create a task of this task type through the API: a ready-made request and a table of every field it takes.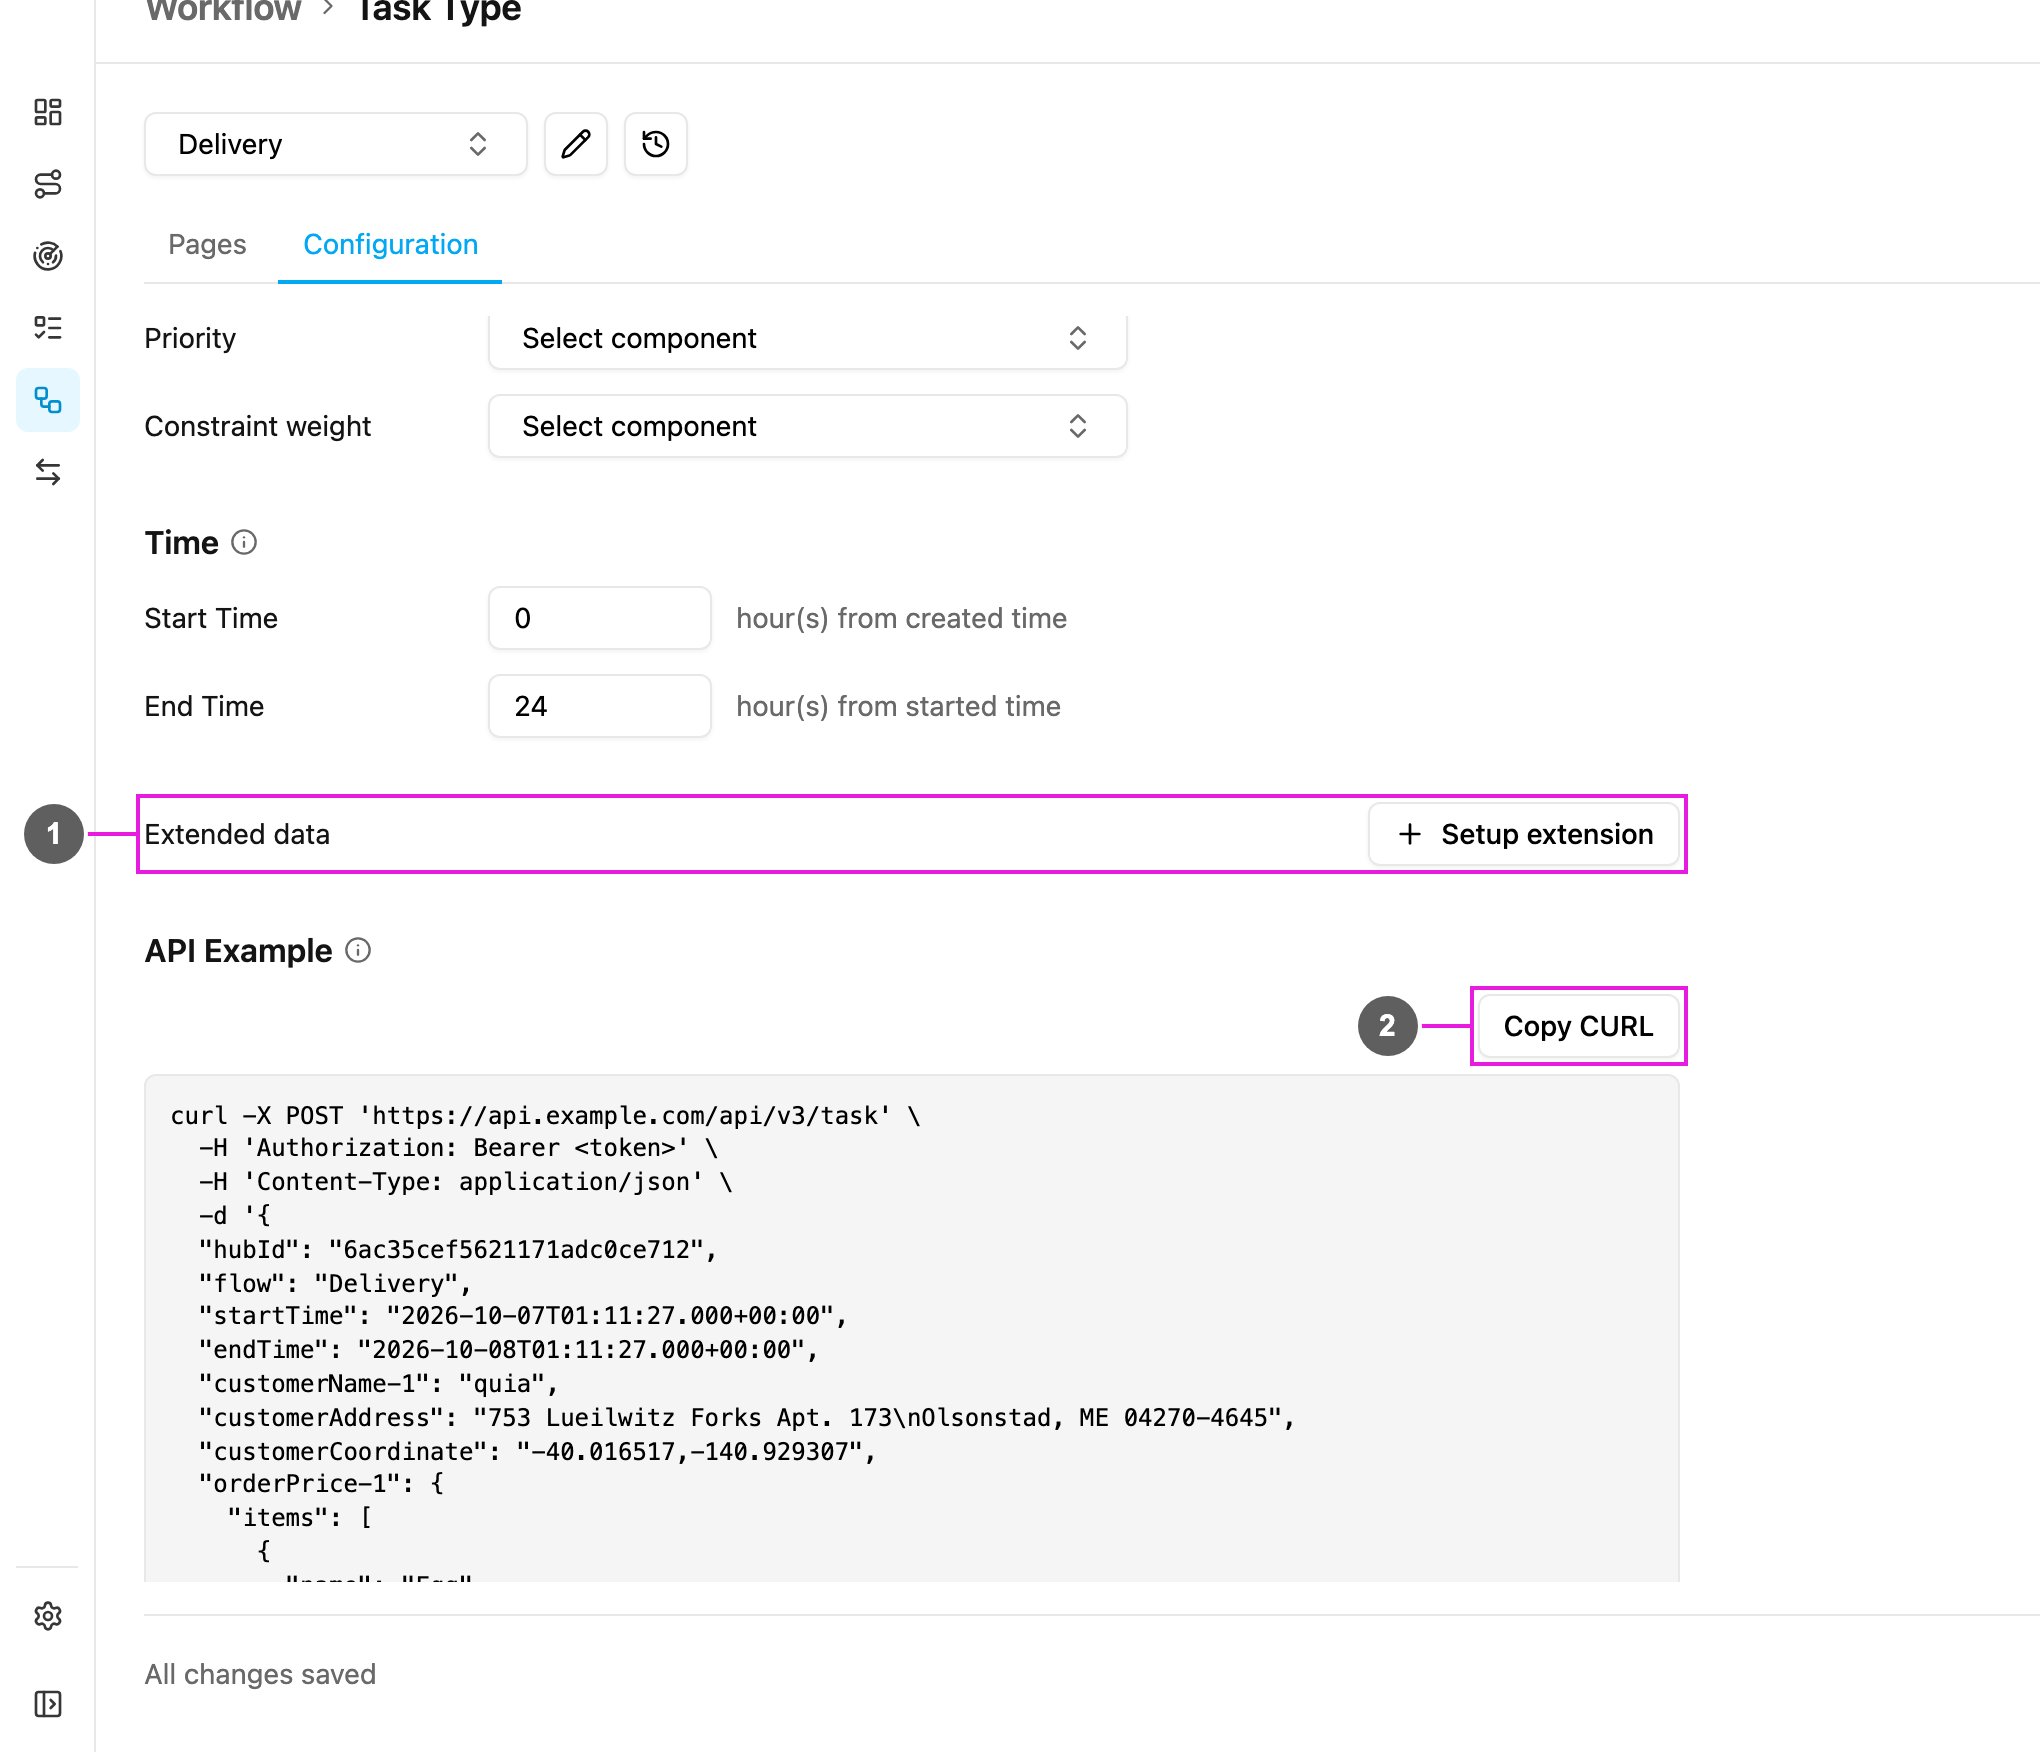
- Extended data: the section above, with its Setup extension button.
- Copy CURL: copy the example request to the clipboard. Replace
<token>with your own access token before you run it.
- Field: the key to send. For components, it is the component’s ID.
- Type: the kind of value the field takes, with its format and an example underneath.
- Description: what the field is for.
- Required: whether the request fails without it. A component marked Required in the builder is required here too.