Required permission:
- View schedule
- Create schedule
- Click New to create one schedule, as described on this page.
- Click the arrow beside New and choose Bulk to create many at once from a spreadsheet. See Bulk Create Task Schedules.
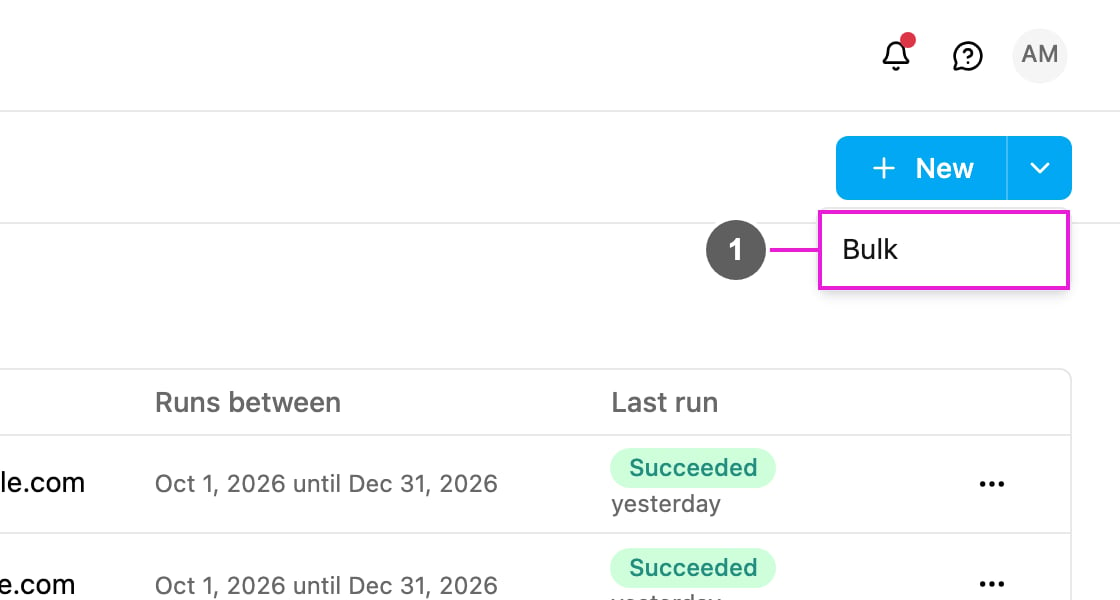
- Bulk: create many schedules from a spreadsheet.
The New task schedule form
Click New. Pick a Task Type first: the fields of that task type’s initial page appear in the form.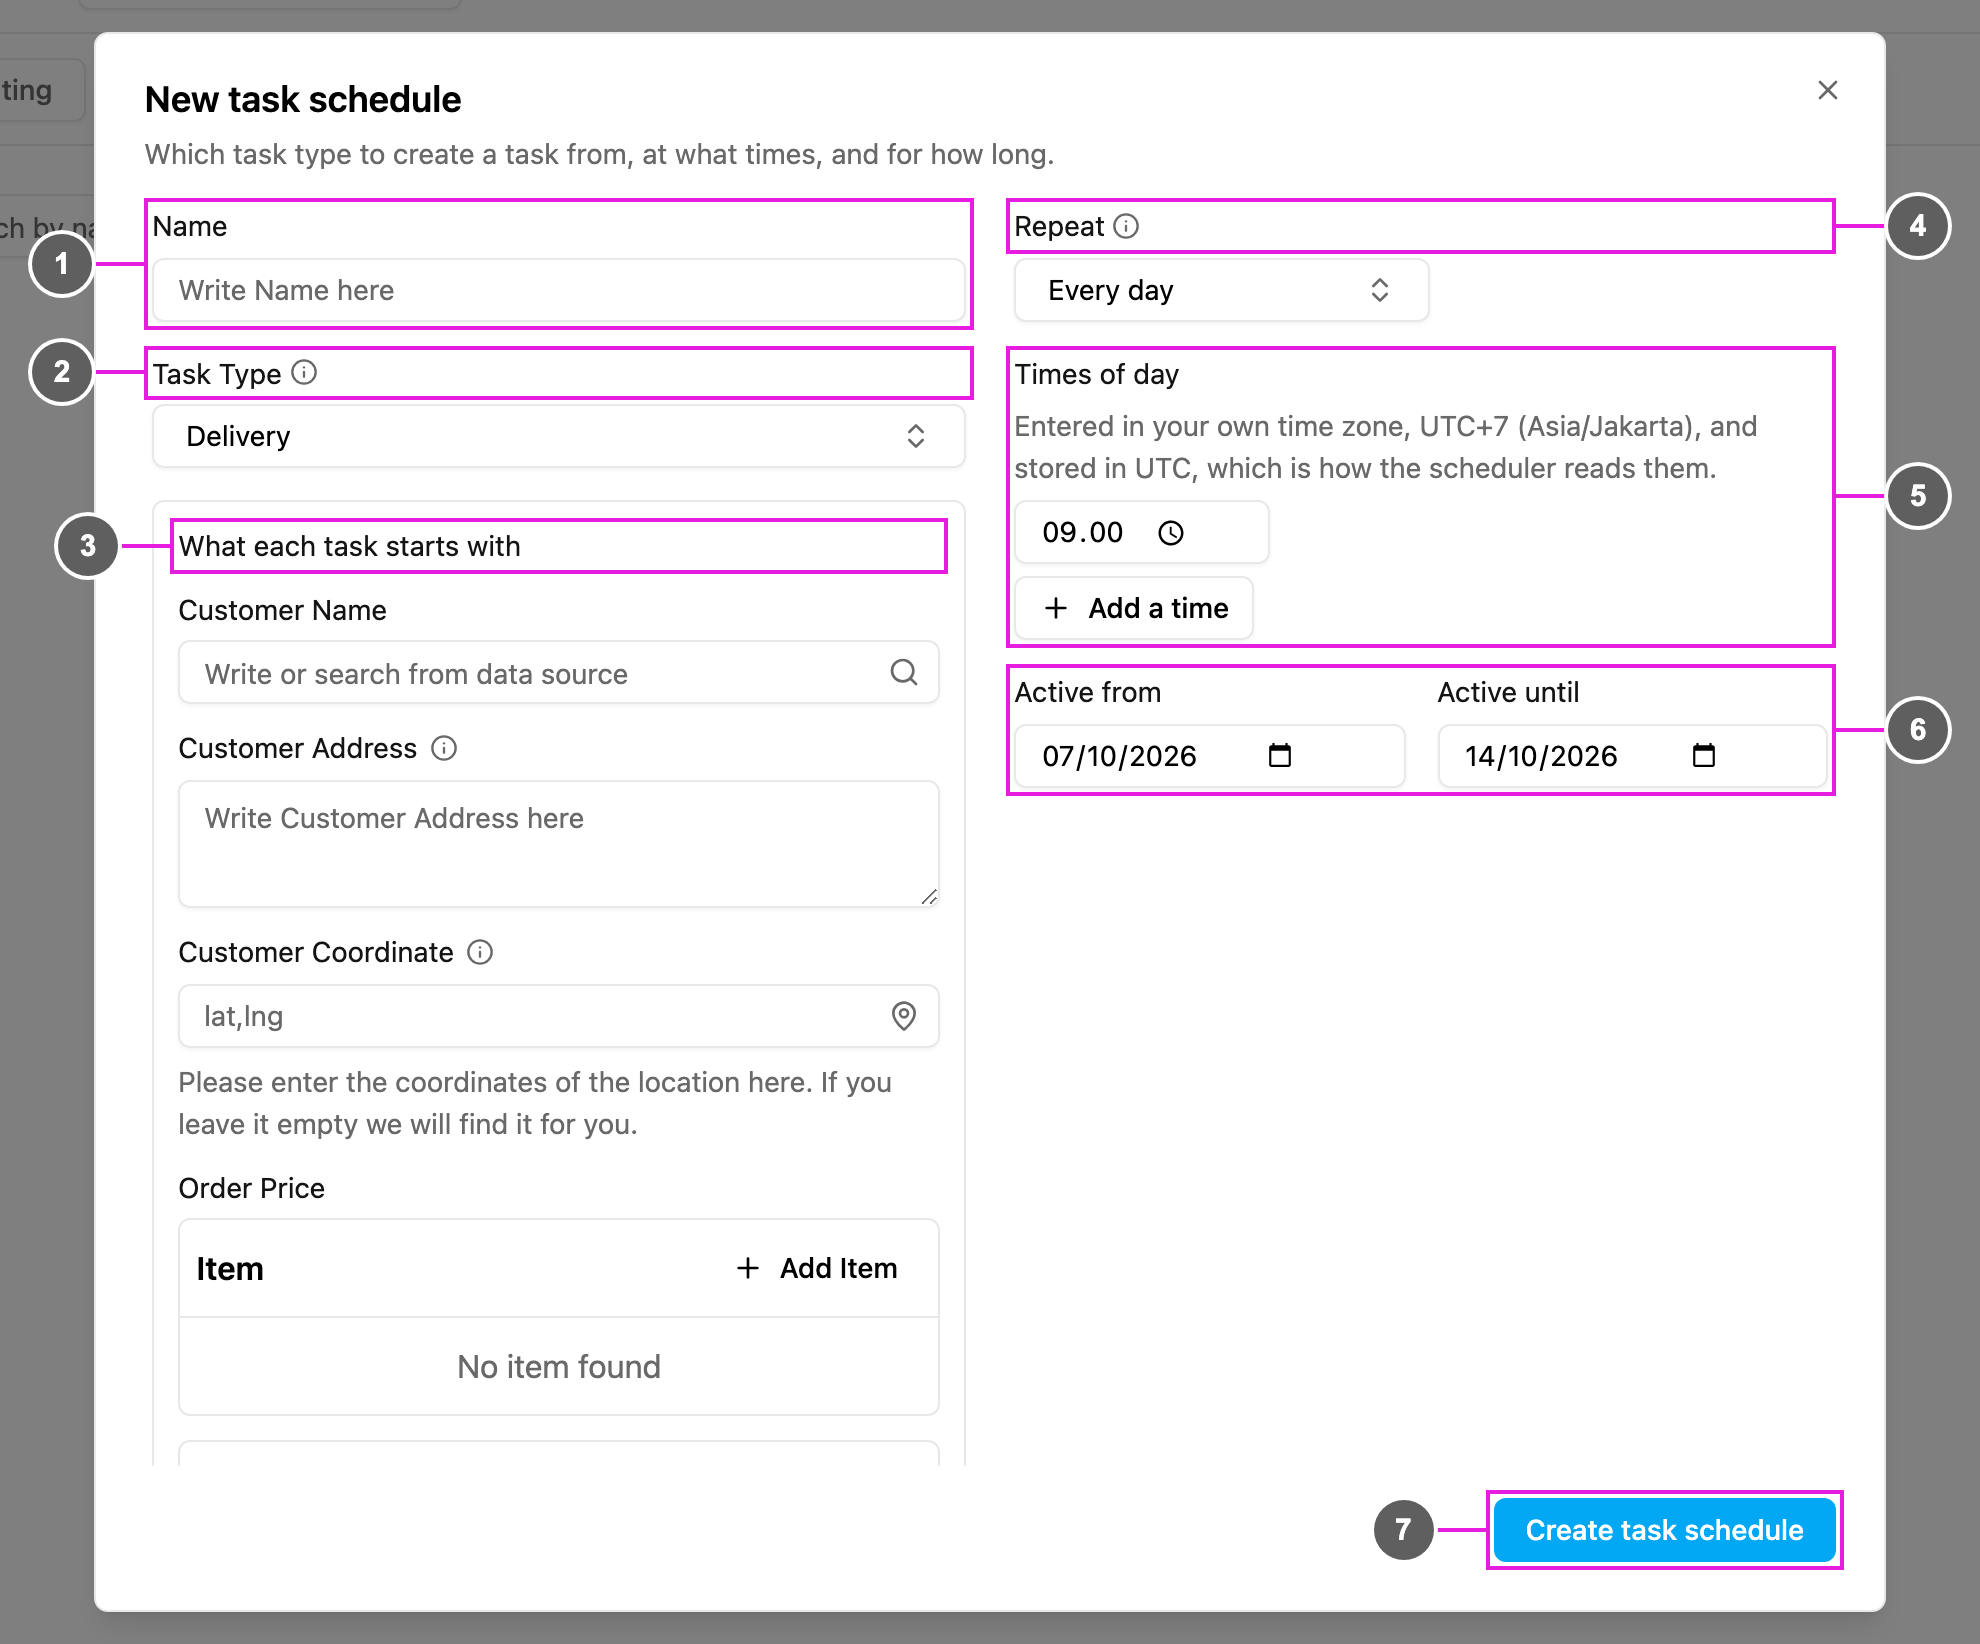
- Name: a name that tells this schedule apart from your other schedules, for example “Daily Store Restock”.
- Task Type: the task type every run creates a task from, for example Pickup or Delivery. Every run creates one task.
- What each task starts with: the fields of the task type’s initial page. What you fill in here is copied into every task the schedule creates, for example the customer, address and order items. Fields left empty stay empty on each task. Data source fields let you search and pick a record, and coordinates are found from the address when you leave them empty. If the task type has its initial page turned off, the form says so and the tasks start empty.
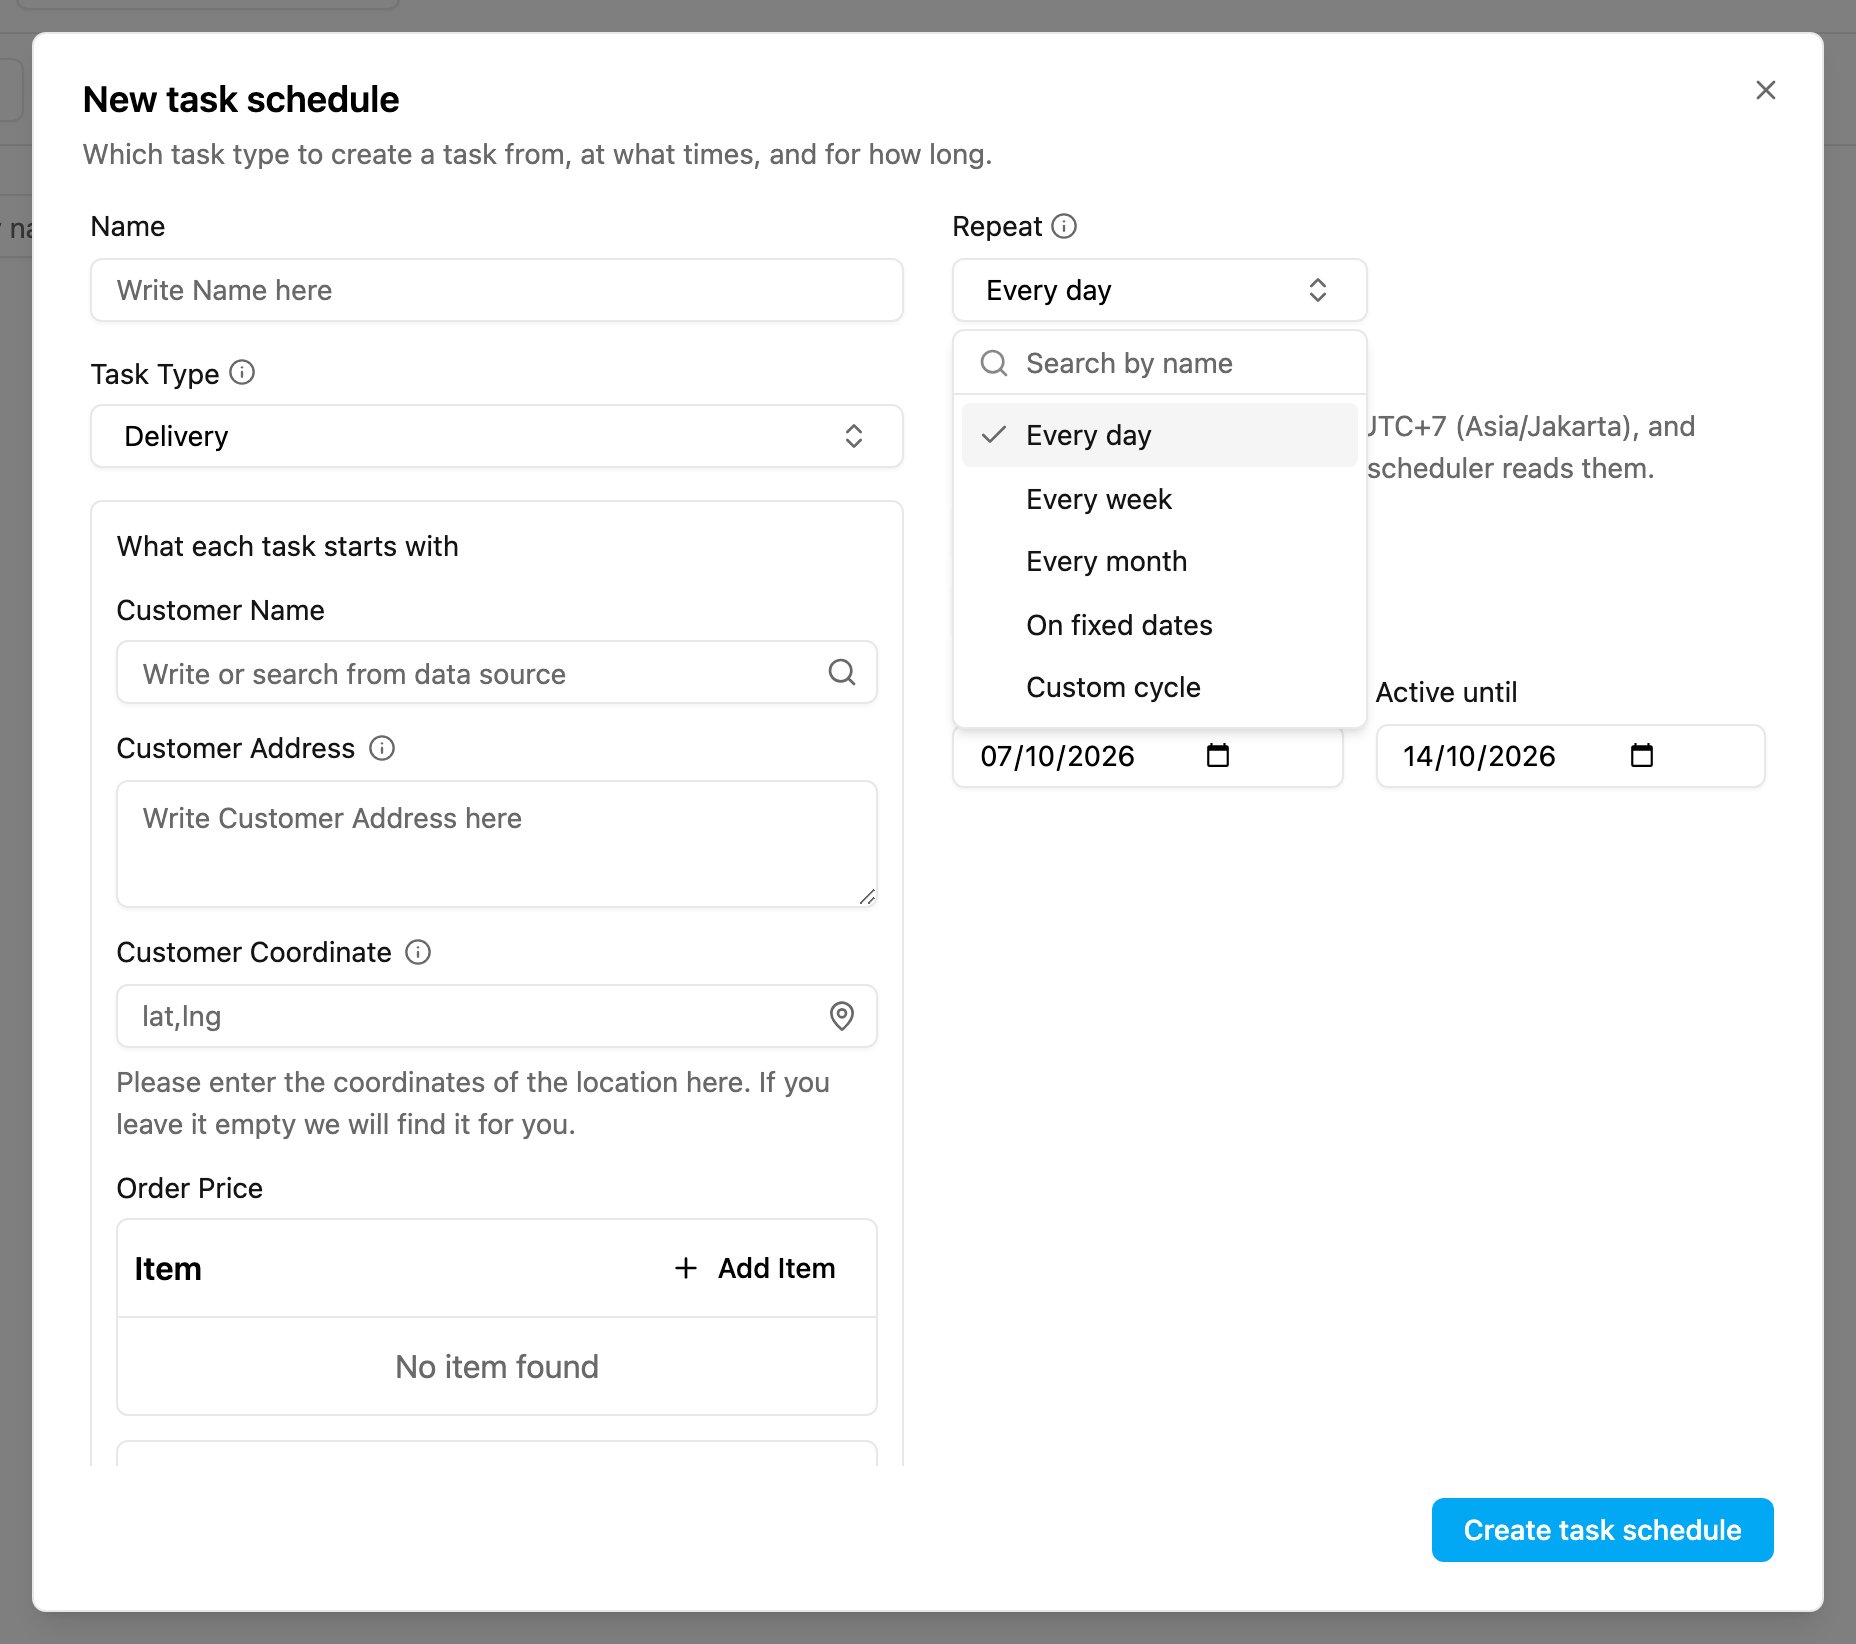
- Repeat: how often the schedule creates a task. See Repeat cycles below.
- Times of day: the time the task is created. Click Add a time to add more times. Times are entered in your own time zone (the form shows it, for example UTC+7 Asia/Jakarta) and stored in UTC.
- Active from / Active until: the period in which the schedule runs. Before Active from and after Active until, no tasks are created. The end has to be at least a day after the start.
- Create task schedule: save the schedule. The message “Task schedule created.” confirms it.
Assignee
Scroll down to the Assignee field, below the task type fields.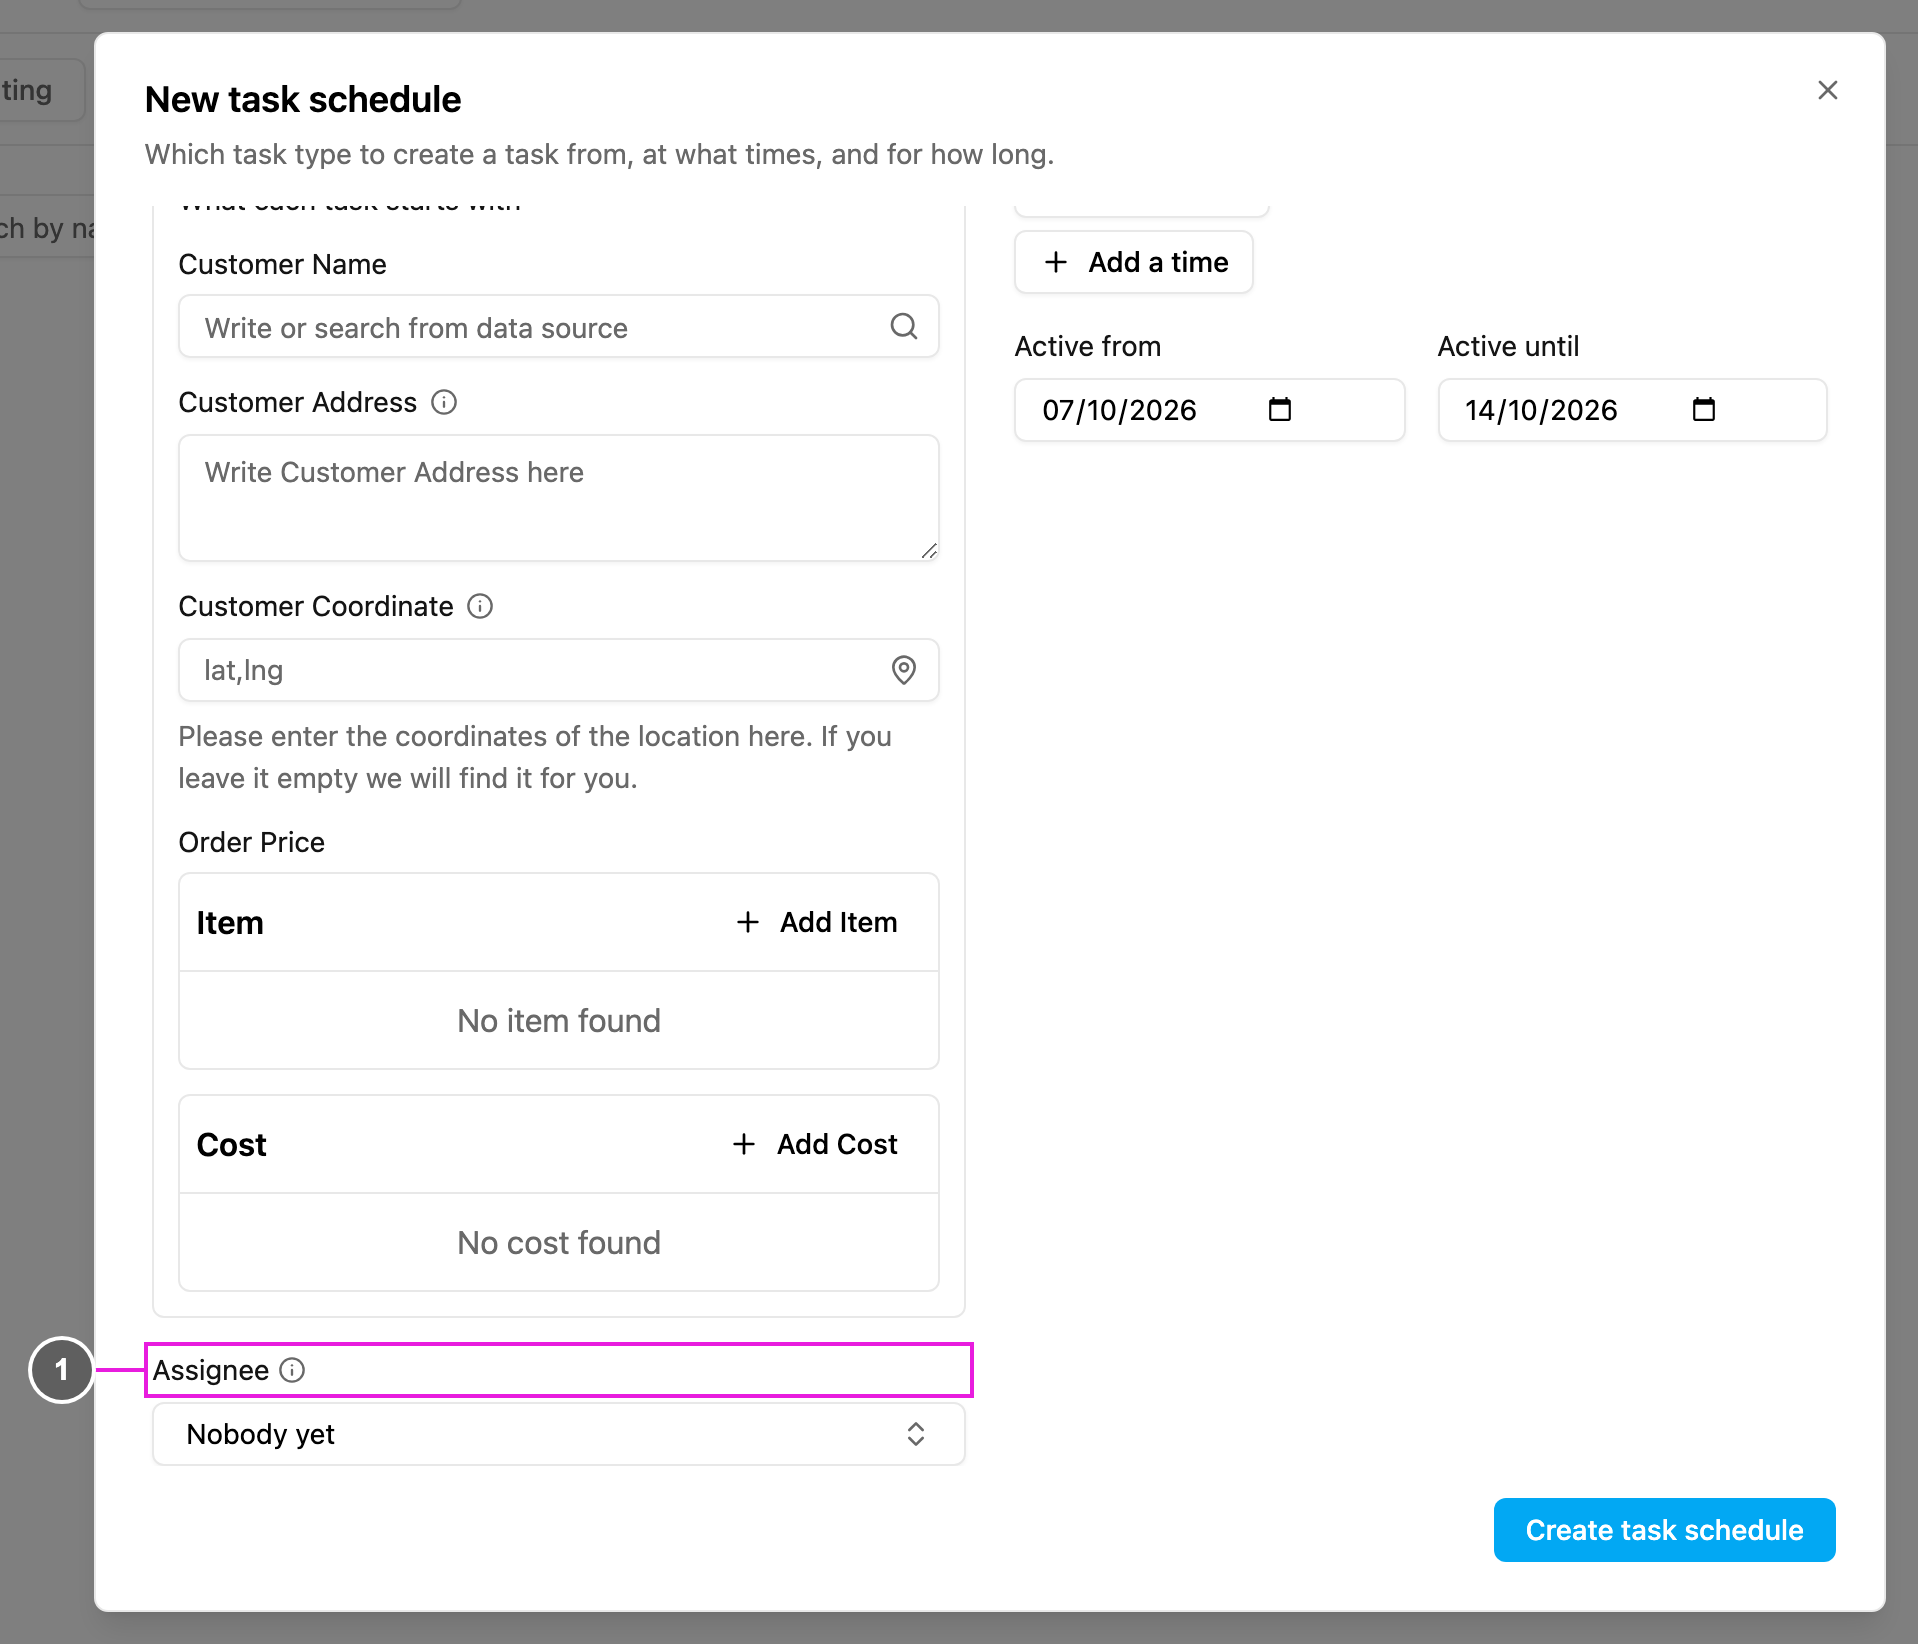
- Assignee: who each created task is assigned to. Pick one or more people from the User and Team sections. The list comes from the hub selected at the top of the page. Leave it on Nobody yet to create unassigned tasks.
Repeat cycles