

The Workflow page has no permission of its own in Settings › Permission: every signed-in user can open it.
The Workflow page is not in the menu. Open it by its address: add
/workflow/task-type/workflow to your web app address, for example https://<your web app>/workflow/task-type/workflow.When to use a workflow
- Pickup → Delivery → Confirmation: different forms for the pickup runner, the delivery driver and the recipient’s confirmation.
- Order fulfilment: packing, dispatch, final delivery and proof of delivery as separate stages.
- Inspection or audit: an opening checklist, field measurements and a report, done by different roles.
- Multi-stage approval: a submission, a supervisor review and a final approval, with data carried forward.
Workflow list
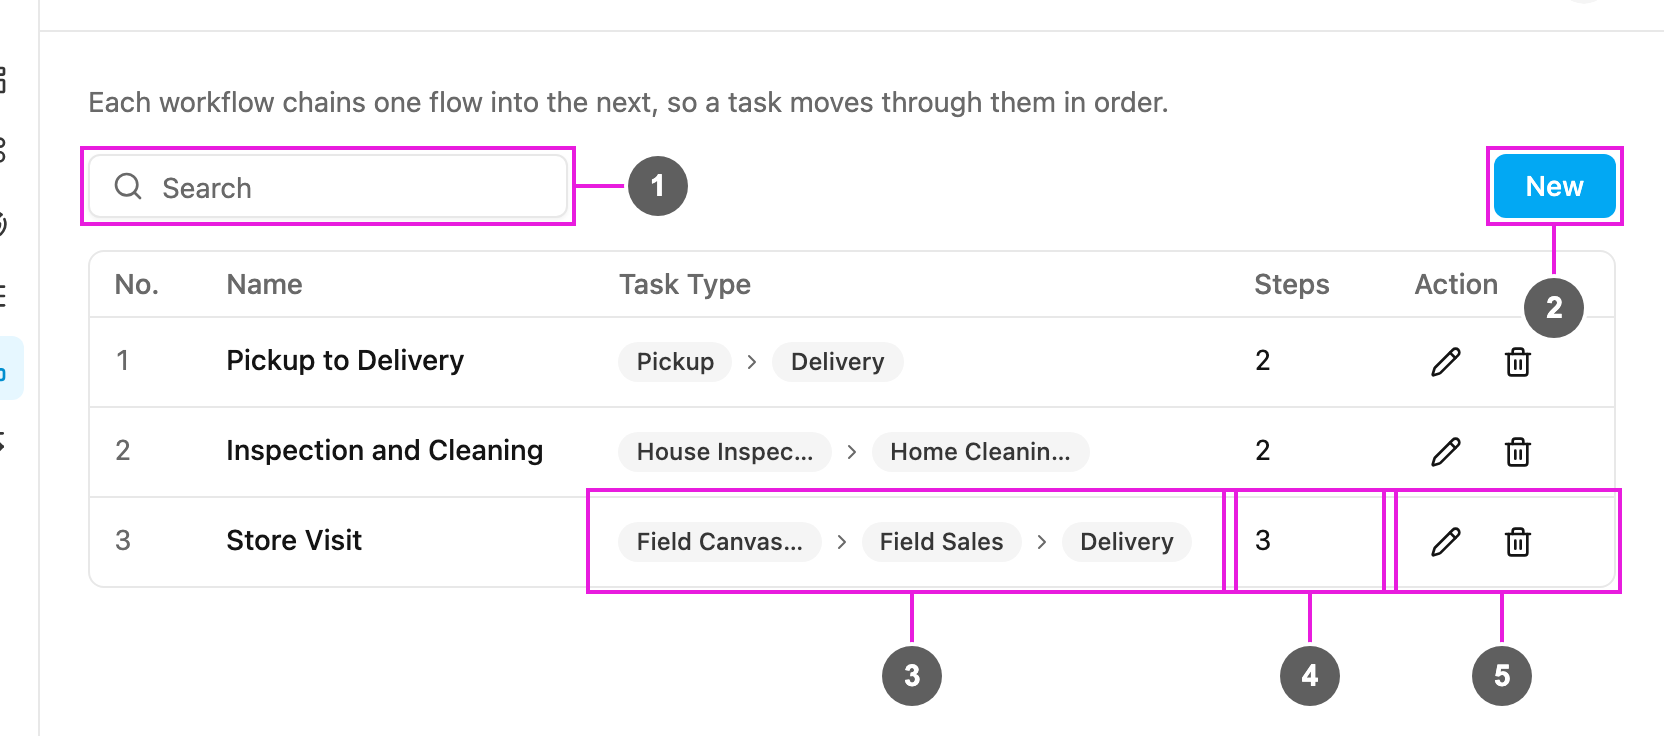
- Search: find workflows by name.
- New: create a workflow.
- Task Type: the task types of the steps, in order. Long names are shortened; hover over one to see it in full.
- Steps: how many steps the workflow has.
- Action: the pencil edits the workflow and the bin deletes it.
- No.: the row number.
- Name: the workflow’s name.
- Task Type: the task type of each step, joined by arrows in step order.
- Steps: the number of steps.
- Action: edit or delete the workflow.
Create a workflow
Click New to open New Workflow.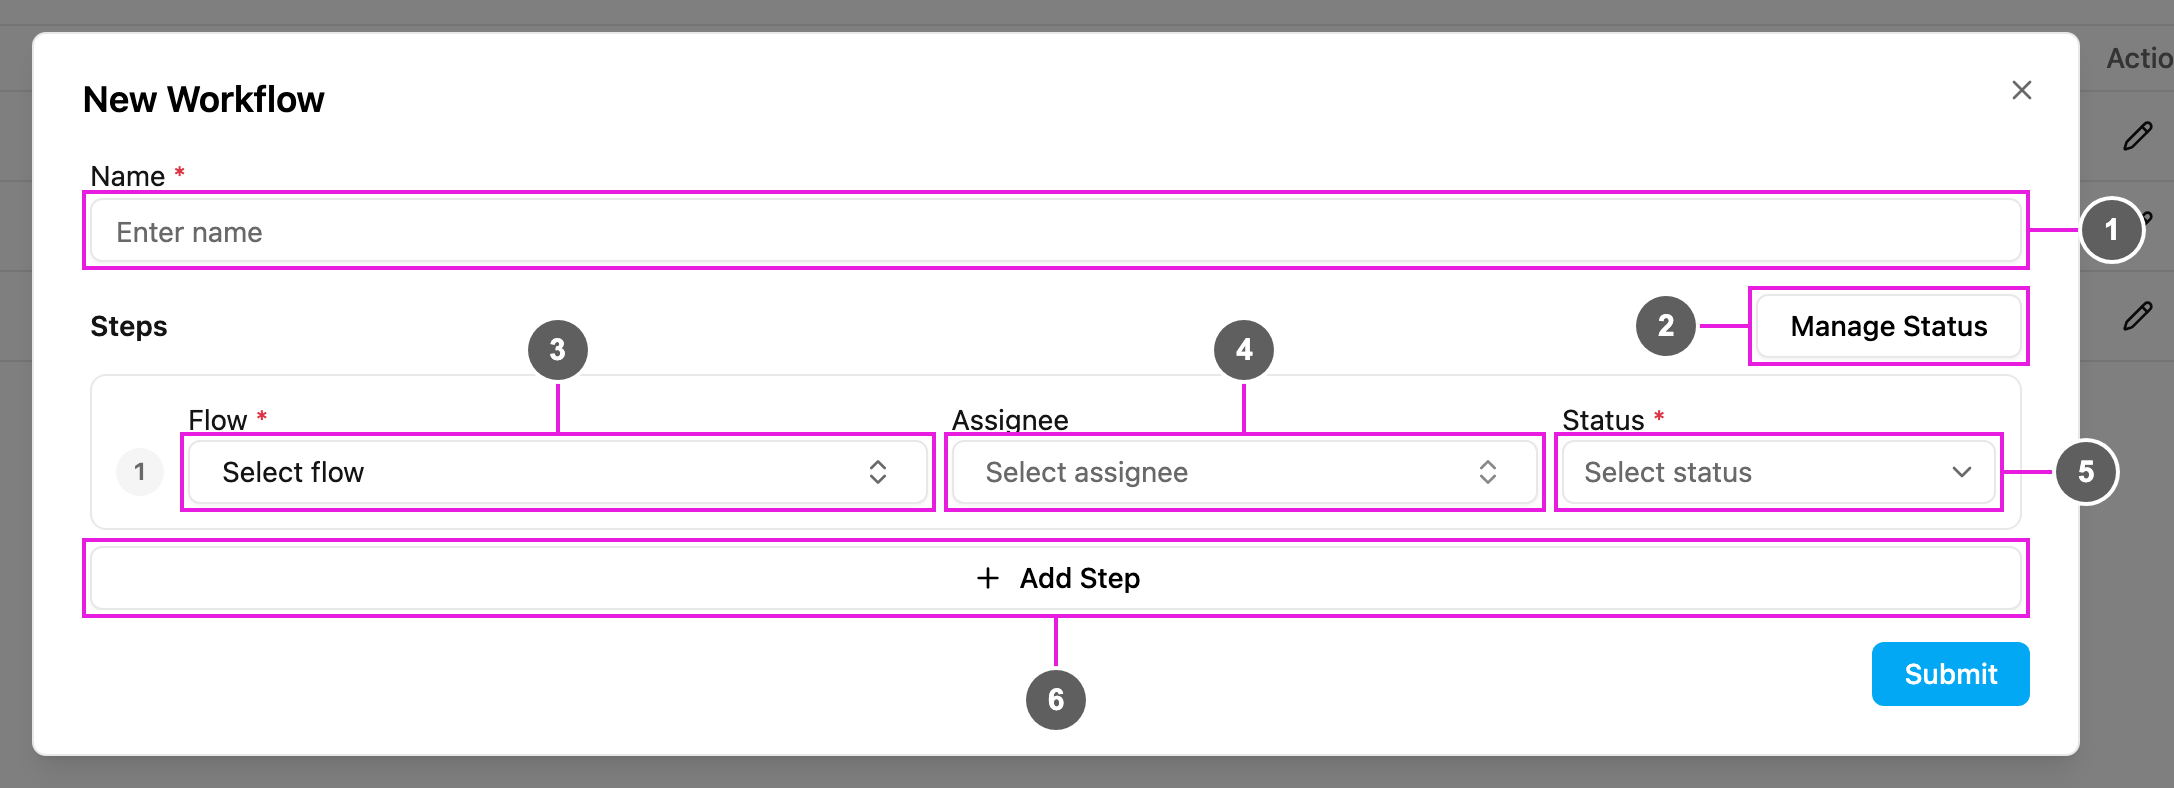
- Name: the workflow’s name, such as Pickup to Delivery or Inspection and Report. Required.
- Manage Status: the statuses a step can be mapped to. See Manage statuses.
- Flow: the task type the field worker fills in for this step. Required. Search the list by name.
- Assignee: one or more users assigned by default to the task this step creates. Optional: leave it empty to pick the assignee when the work is created.
- Status: the status this step’s task counts as when the step is done, for example a custom Picked Up status for a pickup step. Required.
- Add Step: add another step under the last one. Hover over a step to show its bin, which removes it.
Field Configuration
Once a step has a task type, Field Configuration appears under it. Click it to expand it. It lists one box for every field of that task type’s Initial page, and the value you type becomes the field’s starting value when the step’s task is created. Leave a box empty to start the field empty. A task type with no fields says This flow has no fields.Submit
- Check the name and every step.
- Fill in every field marked
*. If something is missing, Submit shows how many fields need attention, with arrows to jump between them. - Click Submit.
Manage statuses
Each workflow starts with three default statuses, Unassigned, Ongoing and Done, which cannot be removed. Add your own for labels that fit your process, such as Picked Up, In Transit or Delivered.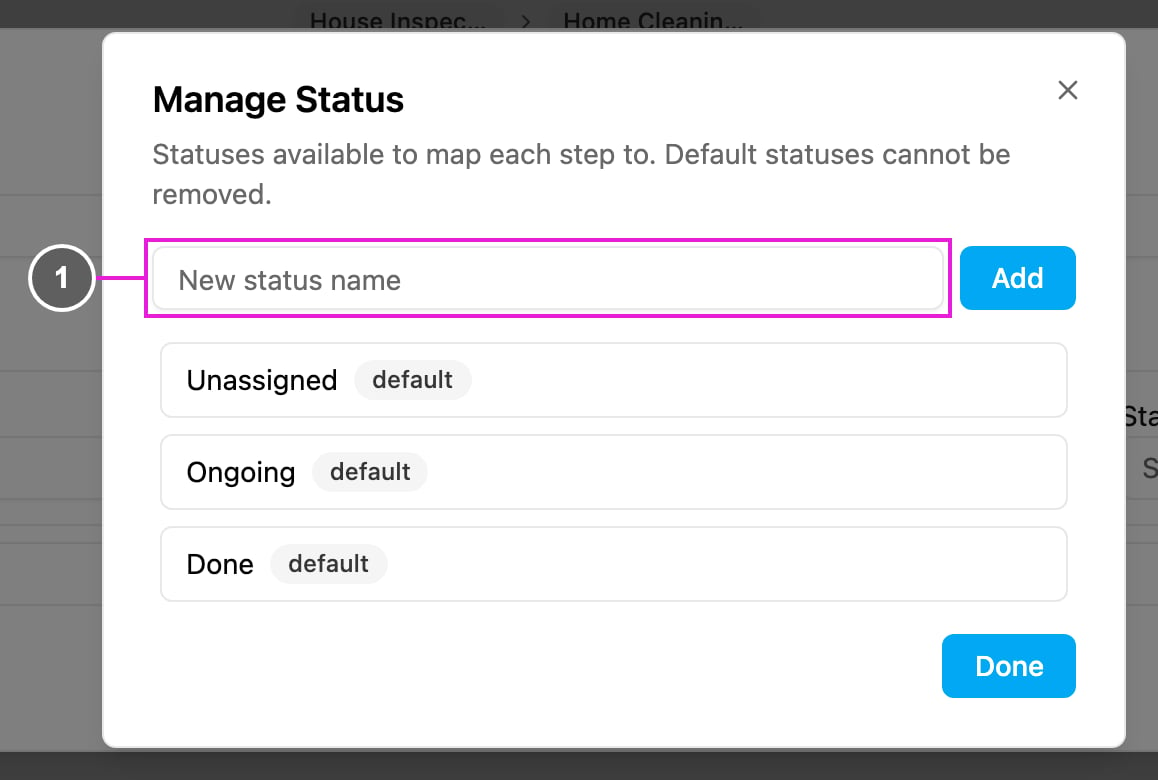
- New status name: type the status and click Add, or press Enter. Keep it short so it stays readable in the step’s Status list.
Edit a workflow
Click the pencil on a workflow’s row to open Edit Workflow with its current values. You can change:- the Name,
- each step’s Flow, Assignee, Status and Field Configuration,
- the statuses, through Manage Status.