

Required permission:
- View data source
- Create data
Add a record
- Open Workflow › Data Source and pick the data type.
- Click New. The Create <data type> dialog opens, for example Create Customer. If the data type already holds as many records as your plan allows, New opens an Upgrade Plan dialog instead, for example You have reached your limit of 100 data for this data type on the Free plan. Click Upgrade now to change the plan.
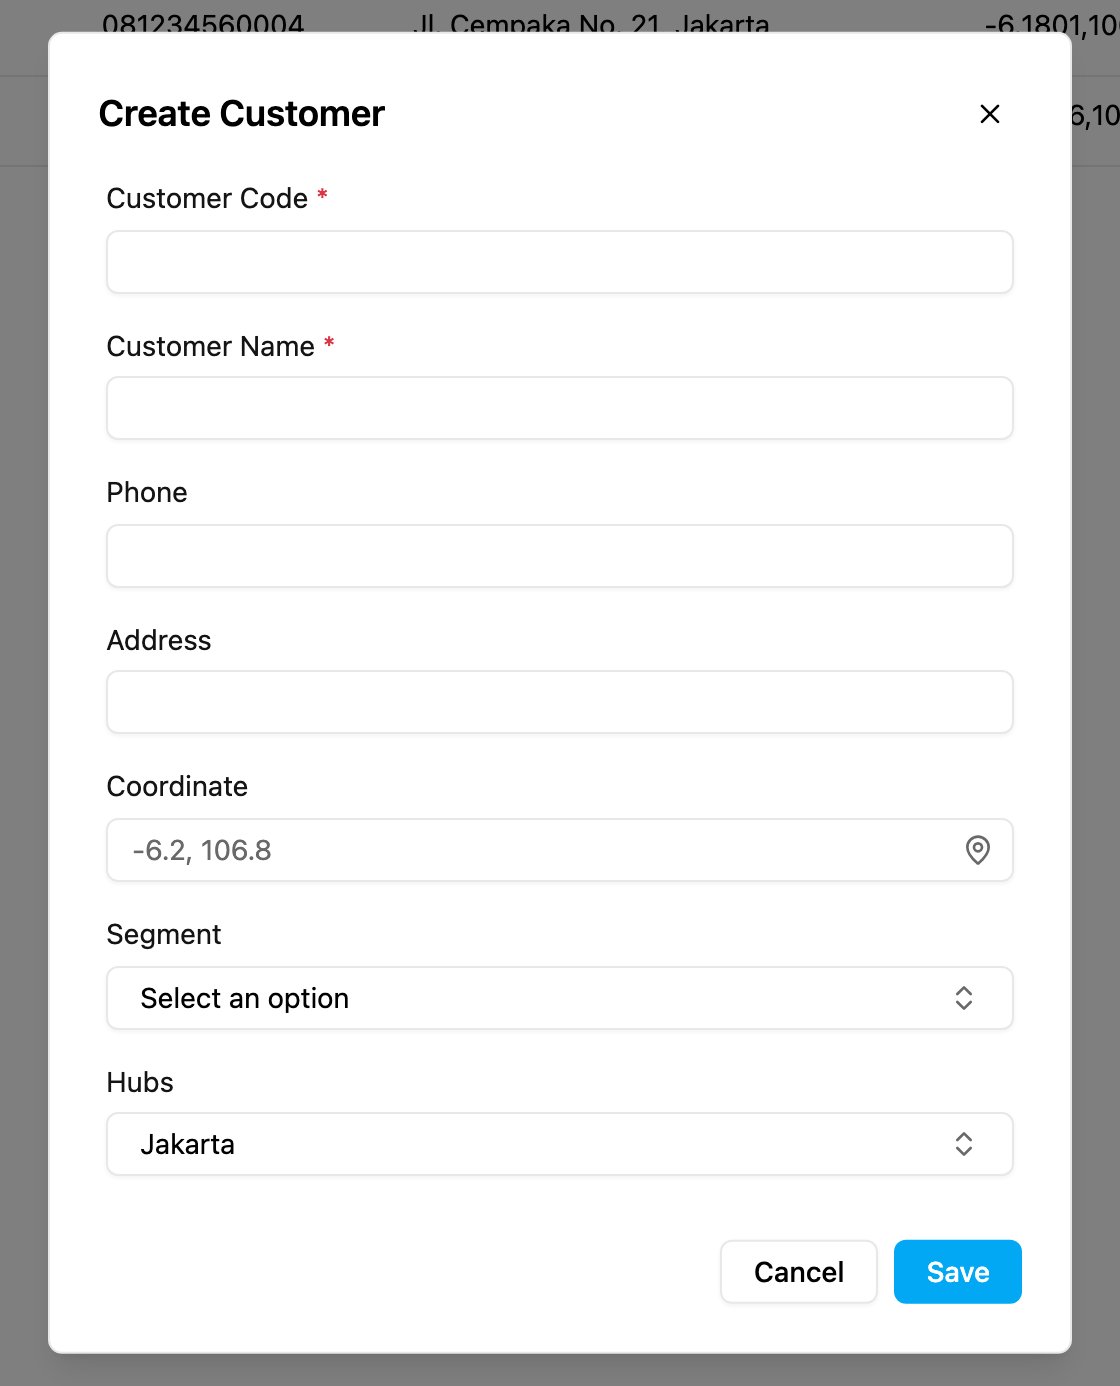
- Fill in the fields. The form has one input for each field of the data type, in the order set on the data type:
- Fields marked * are required. The first one is the Title, the code that identifies the record. It can hold letters, numbers,
-,_and single spaces between words. - Coordinate takes a latitude and longitude, such as
-6.2088,106.8456. Click the pin to pick the point on a map. - Option and Multi option fields open a list of their choices.
- Relation fields open a list of records to link. See Linked records.
- The data type’s rules apply: a number between its minimum and maximum, a phone number of 10 to 16 digits, and so on.
- Fields marked * are required. The first one is the Title, the code that identifies the record. It can hold letters, numbers,
- Hubs: the hubs the record belongs to. It starts with the hub you are working in, and at least one hub is required. This field only appears for data types limited by hub.
- Click Save. The web app says Record created and the record appears in the list.
Limit records by user
When the data type has Limit Data by User on, the dialog also has a Limit Data by User section.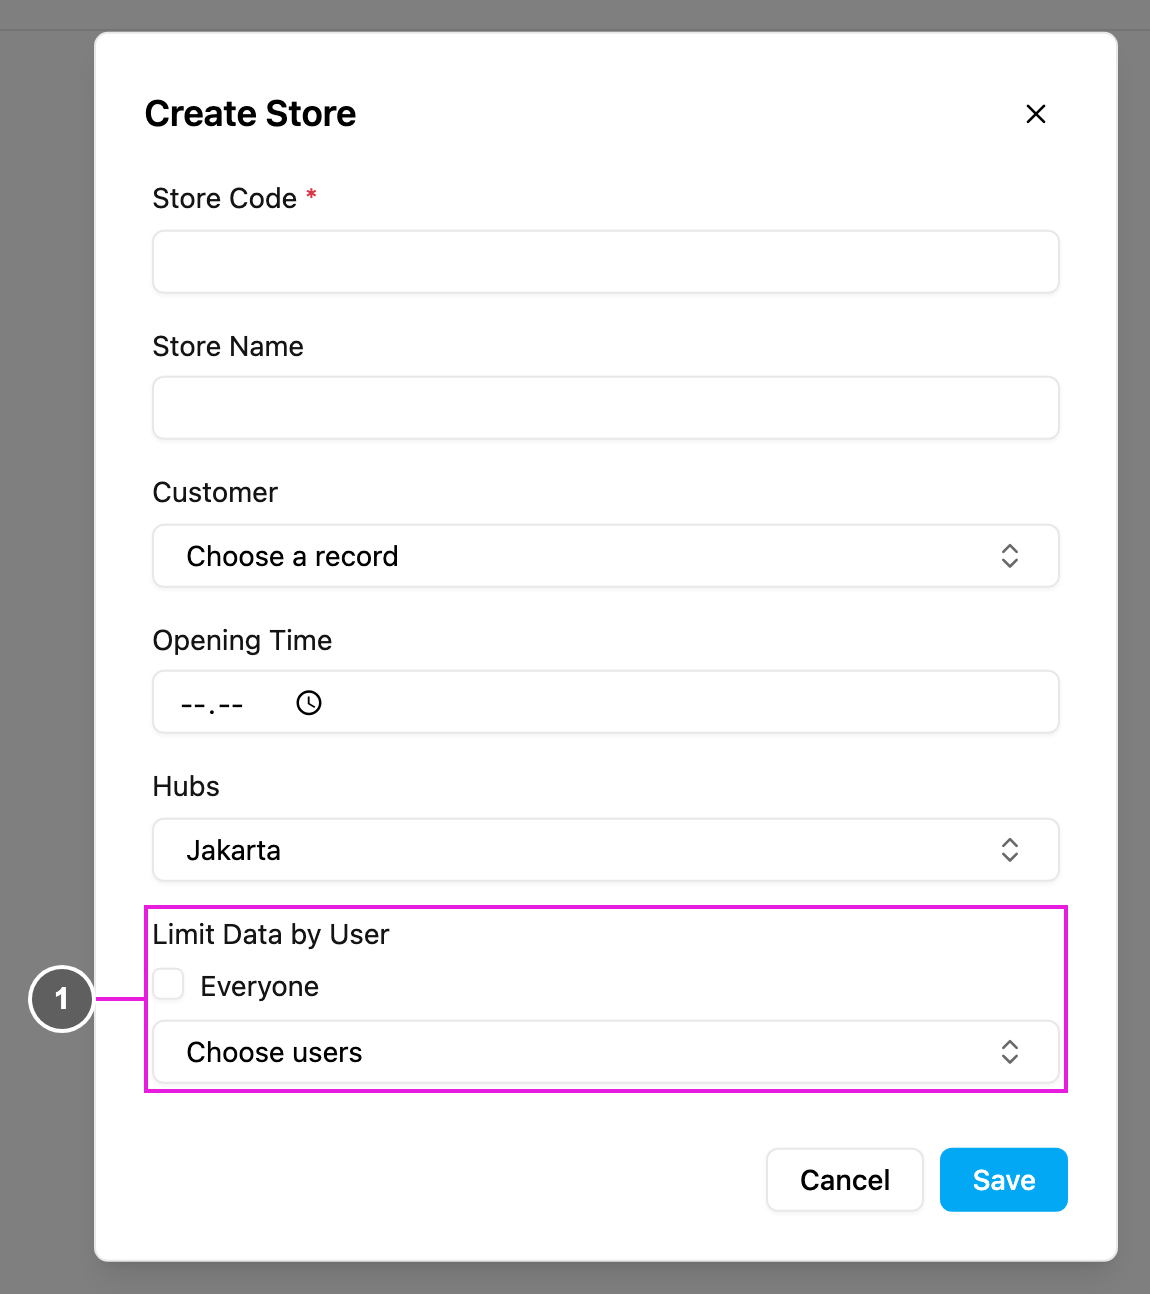
- Everyone: ticked, everyone who can see the data type sees this record. Untick it and use Choose users to pick the users who can see it. Teams appear in the list too, with their member count, for example Sales (4), to pick all their members in one click.