

Required permission:
- View data type
- Edit data type to edit, Delete data type to delete
Edit a data type
On Workflow › Data Type, click the pencil on a data type’s row. The web app first asks Edit this data type? because changing its fields may affect existing records. Click Continue.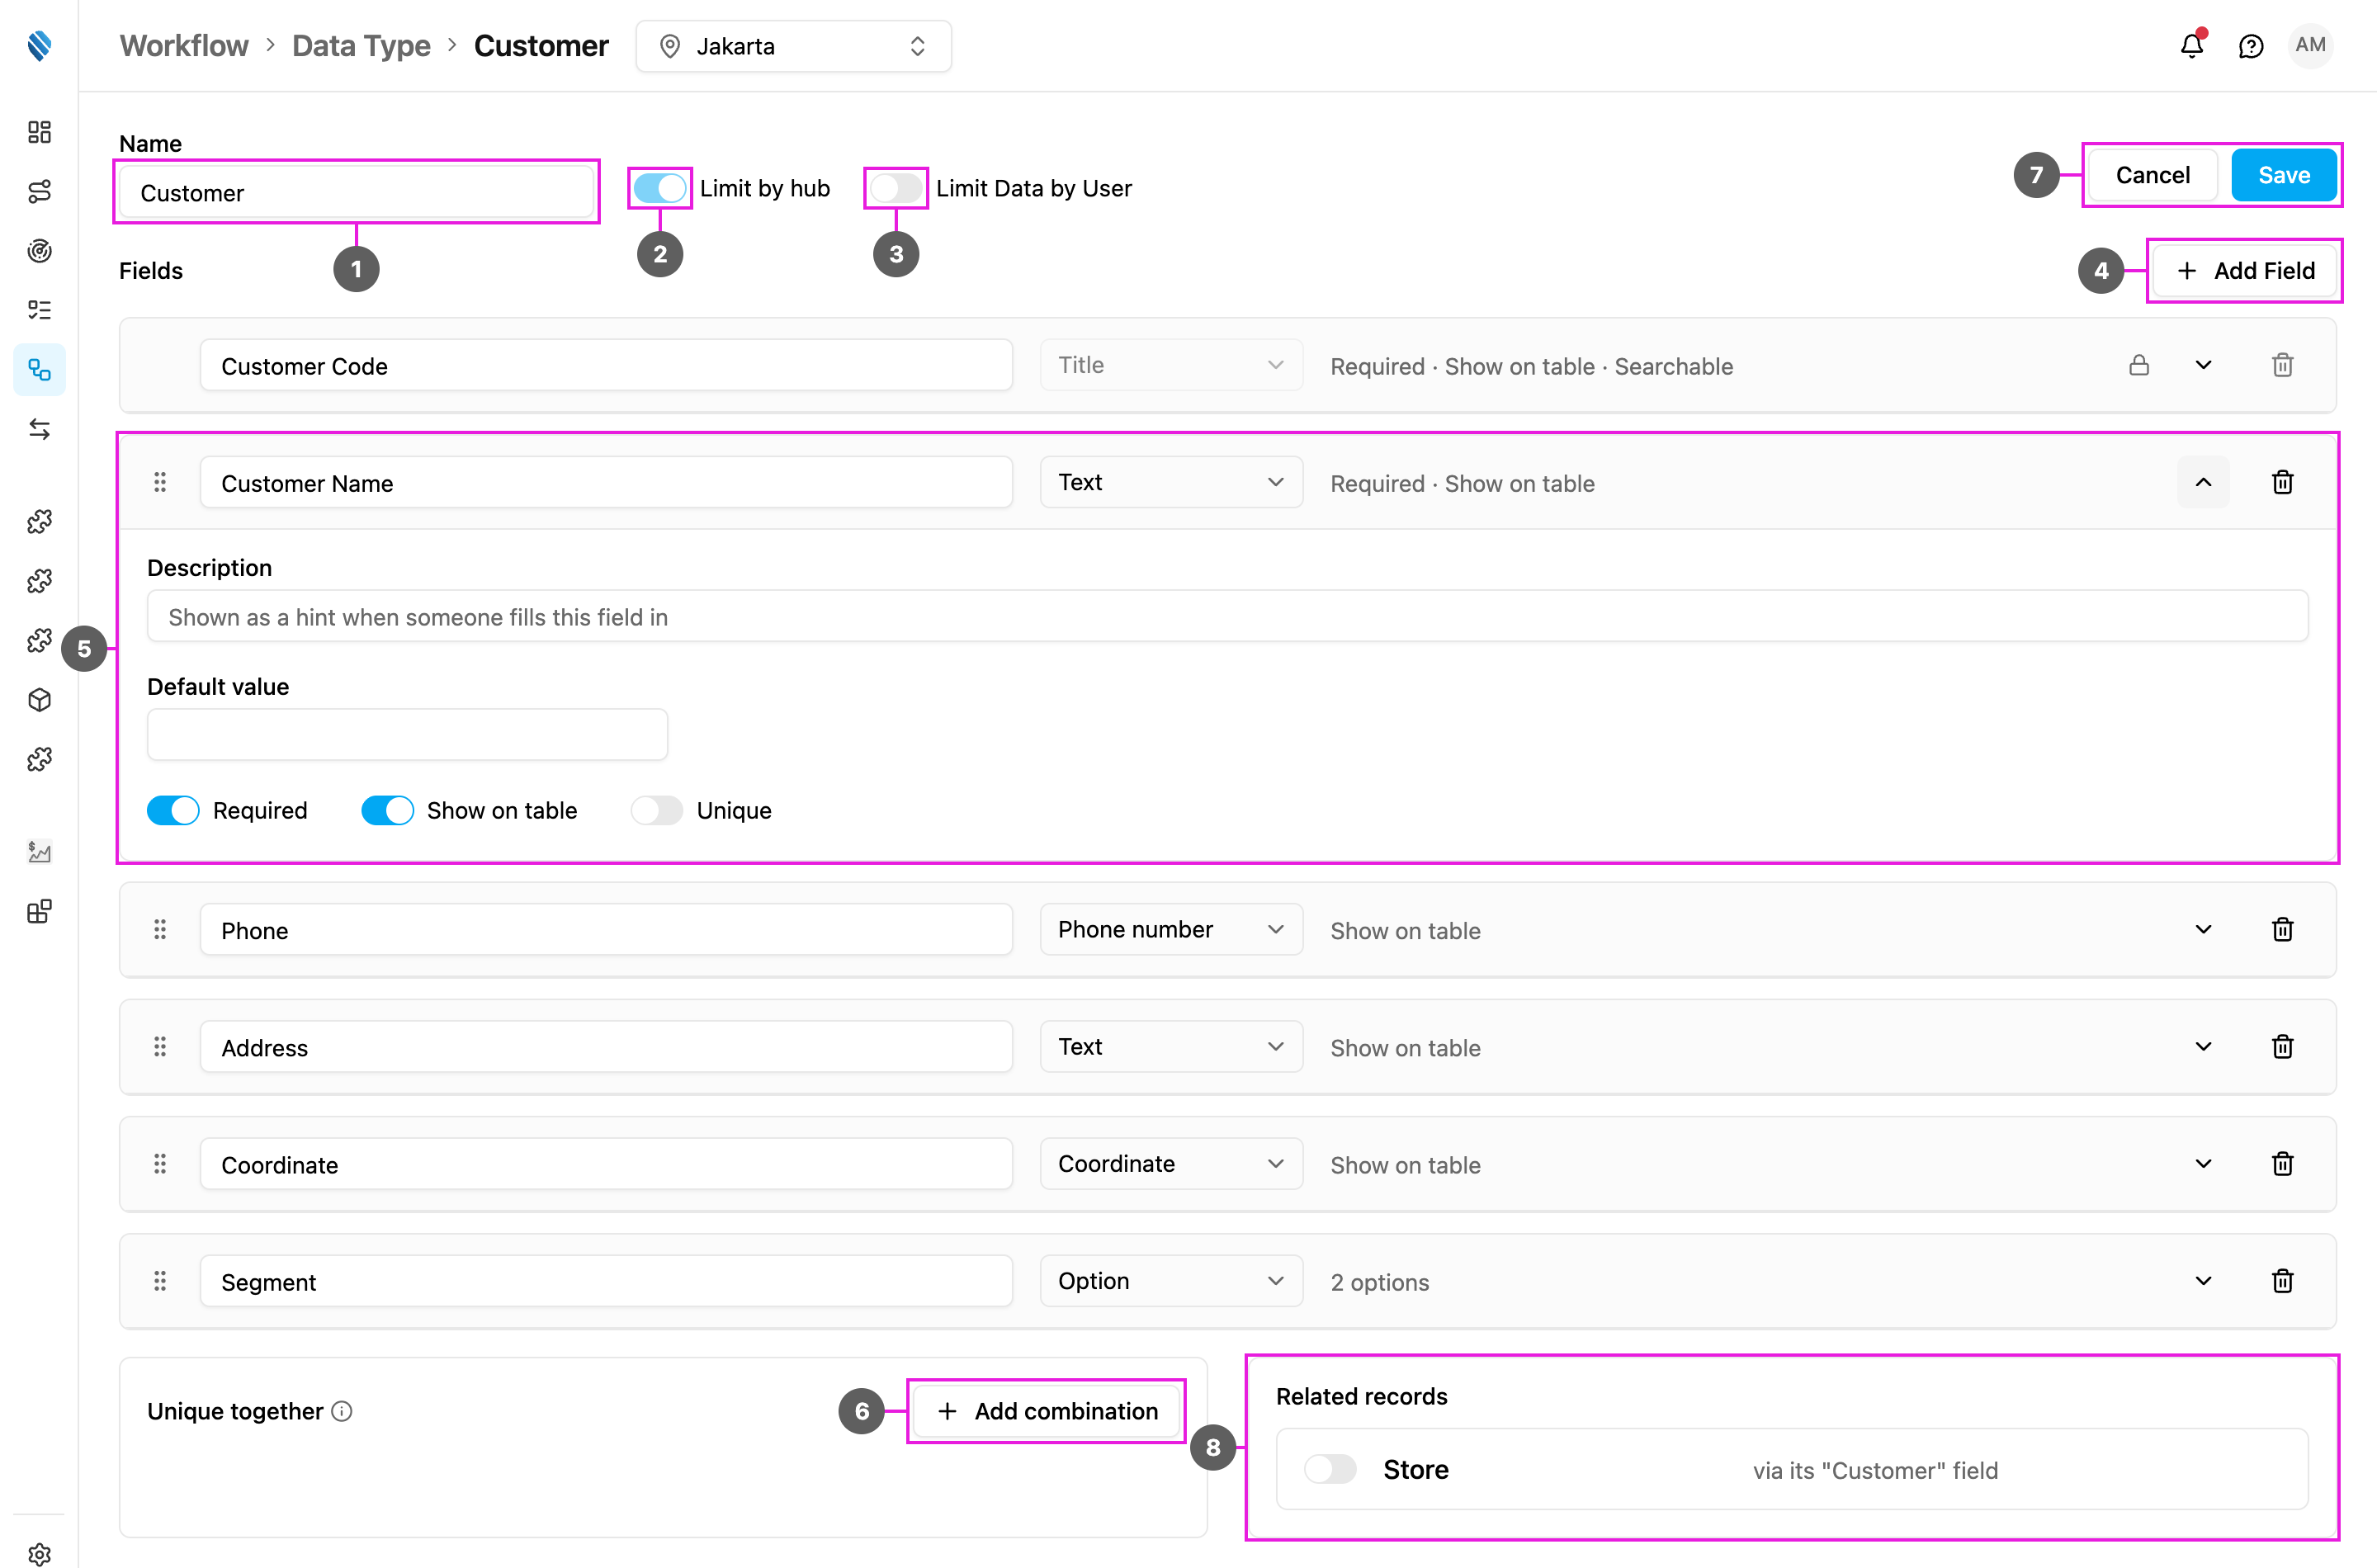
- Name: rename the data type. The name of a Master Data type follows its entity and can’t be changed.
- Limit by hub: shown but locked. Hover it to see This can only be set when creating the data type. On a Master Data type it follows the entity: users and vehicles are limited by hub, the rest are shared by all hubs.
- Limit Data by User: turn it on or off. Turning it off asks Turn off Limit Data by User?, because it resets the access restriction on every existing record.
- Add Field: add a field. Existing records get the new field empty.
- Expand a field to change its label, type, rules and switches, as in Creating a data type. Drag a row to reorder the fields.
- Add combination: add or remove unique together combinations.
- Cancel or Save. If you leave with unsaved changes, the web app asks Discard unsaved changes?; click Discard changes or Keep editing.
- Related records: choose which linked data types show their records on this one.
- Removing a field asks Remove this field?. The field and its stored value are removed from every record, and this can’t be undone.
- The Title can be relabelled but not removed. Its bin says The identifier field names every record, so a data type always keeps it.
- A Relation field’s target and relationship can’t change. Delete the field and add a new one instead.
- On a Master Data type (User, Hub, Vehicle, Role, Task Type), you edit only the fields you added. Its built-in fields can’t be changed.
- On the sample data types Customer and Product that come with a new organization, the fields they were created with are locked (shown with a lock): only their description can change, and they can’t be removed. You can add your own fields next to them.
Delete a data type
Click the bin on the data type’s row.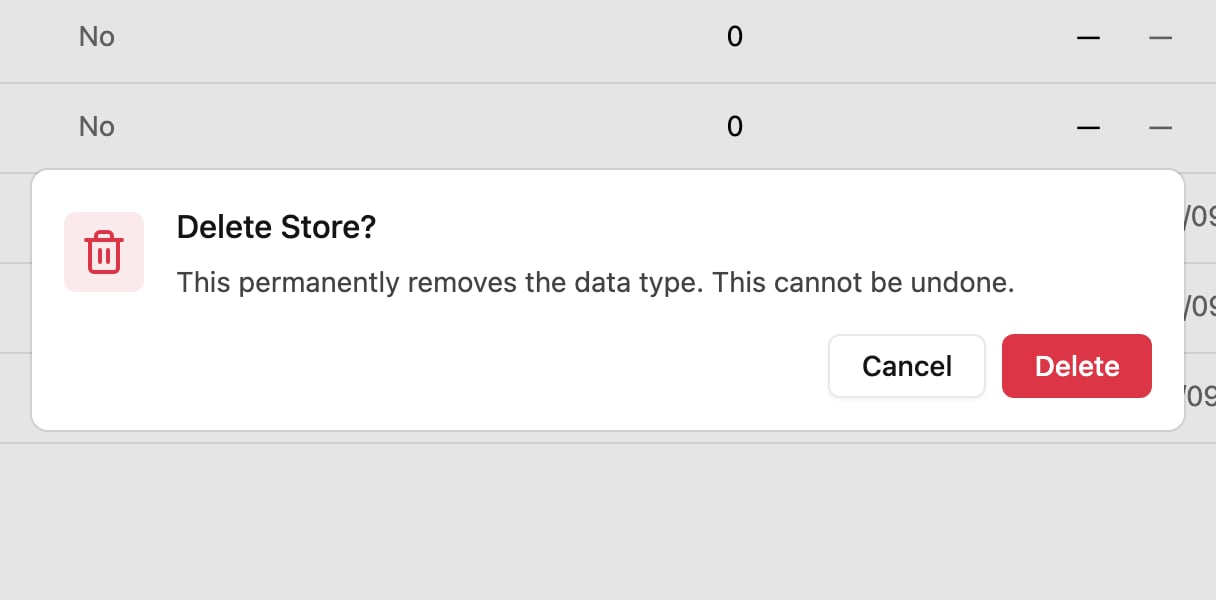
- Task Type: a task type that fills its fields from this data type.
- Automation: an automation that creates or updates its records.
- Data type: another data type with a Relation field pointing here, and which field.
- The Master Data types: User, Hub, Vehicle, Role and Task Type. Hover the bin to see Master Data cannot be deleted.
- The sample data types Customer and Product, as long as they still have every field they were created with. Hover the greyed-out bin to see The Customer data type is a system default and cannot be deleted.