

- Use our template: download a spreadsheet with the right columns for the task type, fill it in and upload it.
- Use your own spreadsheet: upload an Excel file you already have and match each of its columns to a task field.
- Enter the tasks by hand: skip the file and type the tasks into a table.
Required permission:
- View task
- Create task
Open Bulk
- Open Activities › Task.
- Click the arrow beside New and choose Bulk.
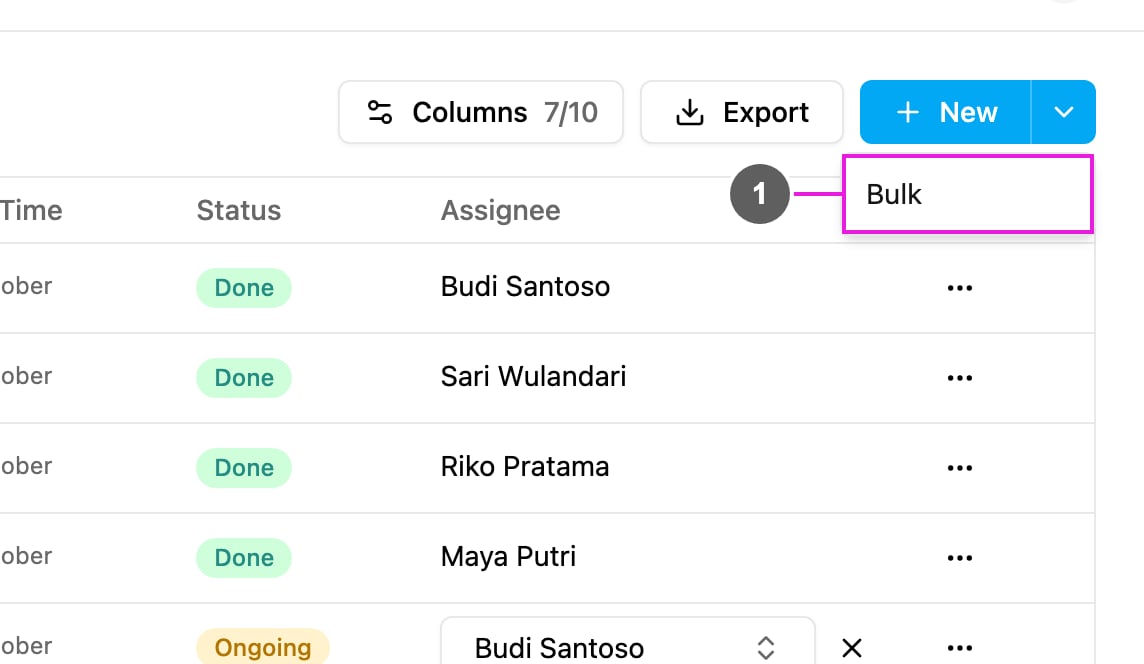
- In Create Bulk Task, pick the task type under Select Task Type. It decides which fields the tasks have.
Step 1: Upload your file
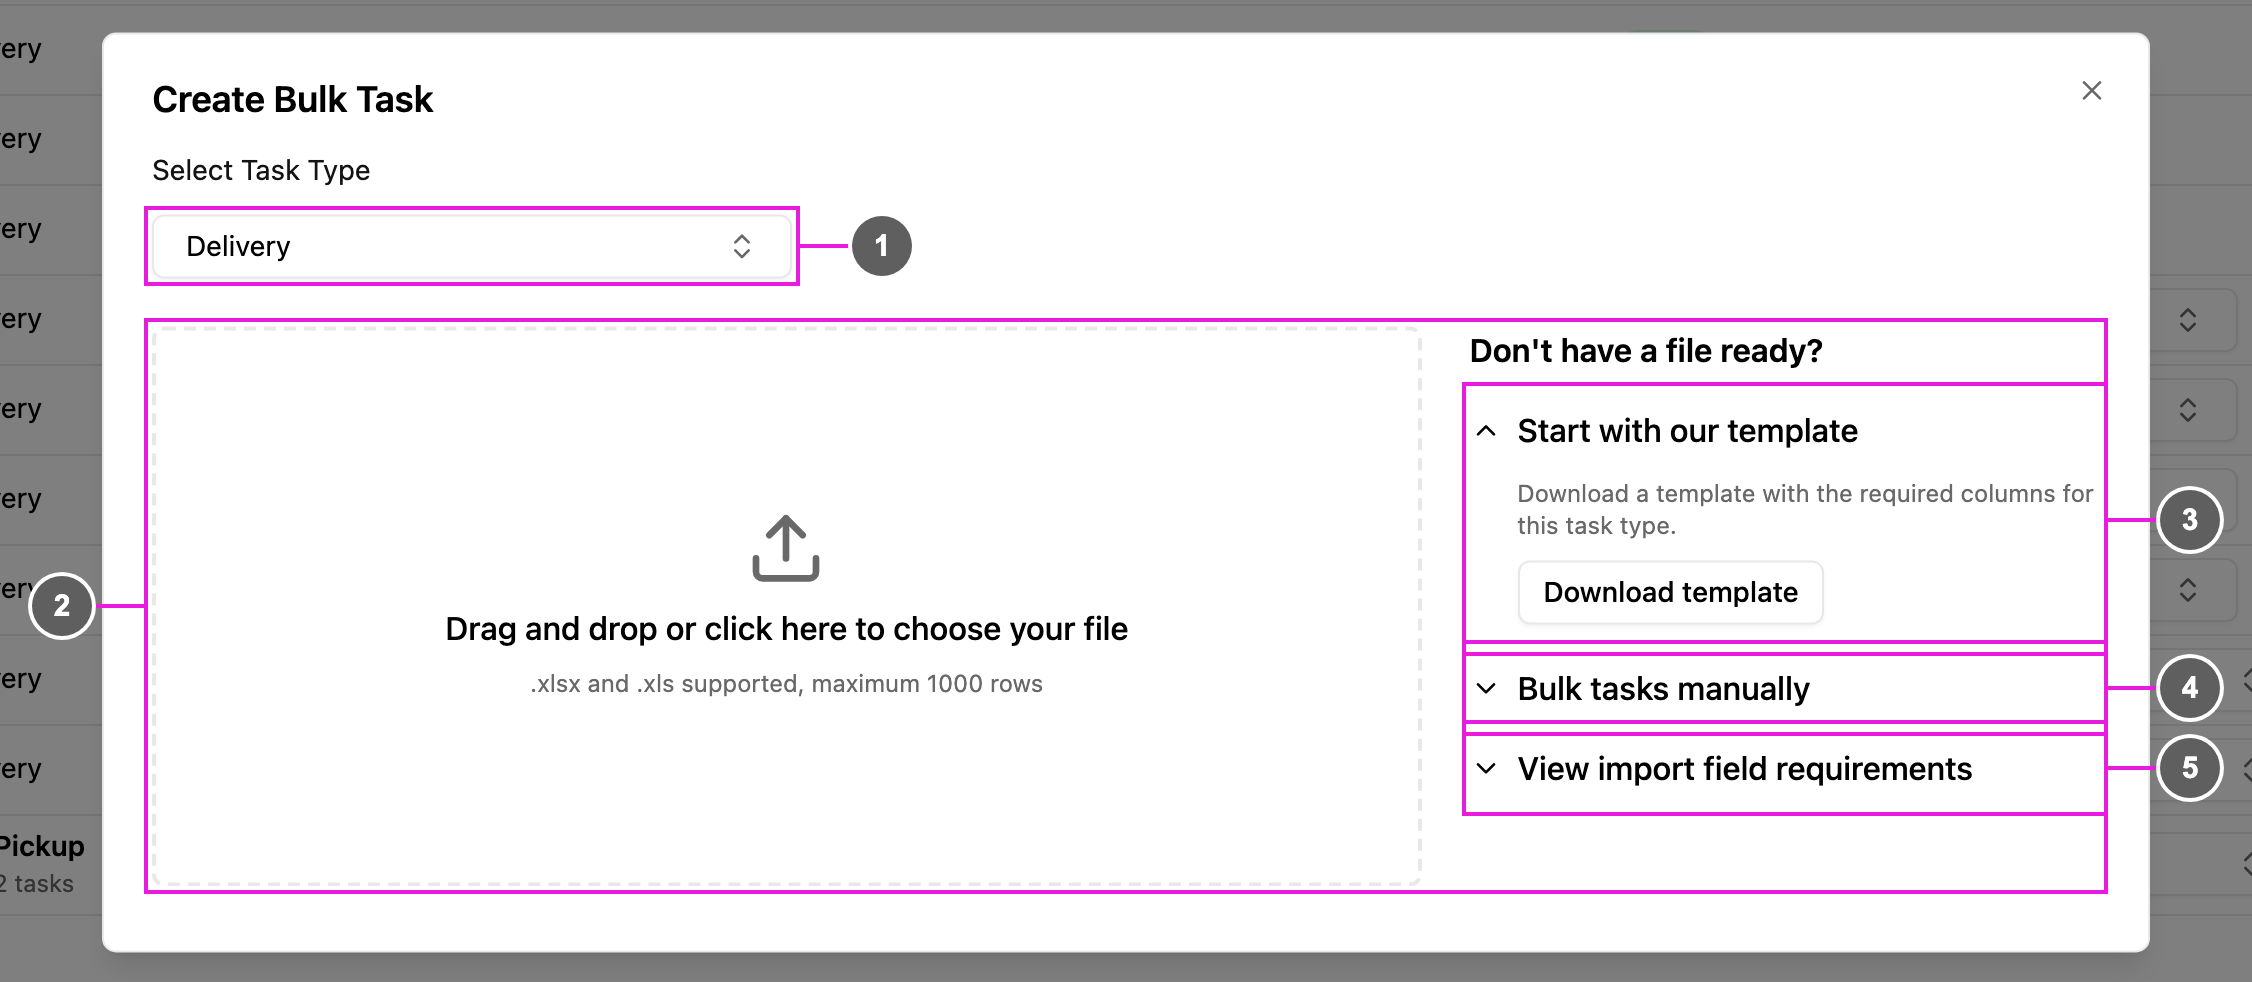
- Select Task Type: the task type every task in the file belongs to.
- Upload area: drag and drop a file here, or click to choose one.
.xlsxand.xlsfiles are supported, with up to 1,000 rows. - Start with our template: Download template gives you a spreadsheet that already has the columns of this task type. Fill it in and upload it.
- Bulk tasks manually: Bulk Manual skips the file and opens an empty table to type the tasks into (step 3). Load sample data fills the table with example rows so you can see how it works.
- View import field requirements: View requirements lists which fields are required, the format each one accepts, and the extra sheets that bills, lists and subpages need.
.xlsx or .xls, has more than 1,000 rows, or has no column headings.
Import field requirements
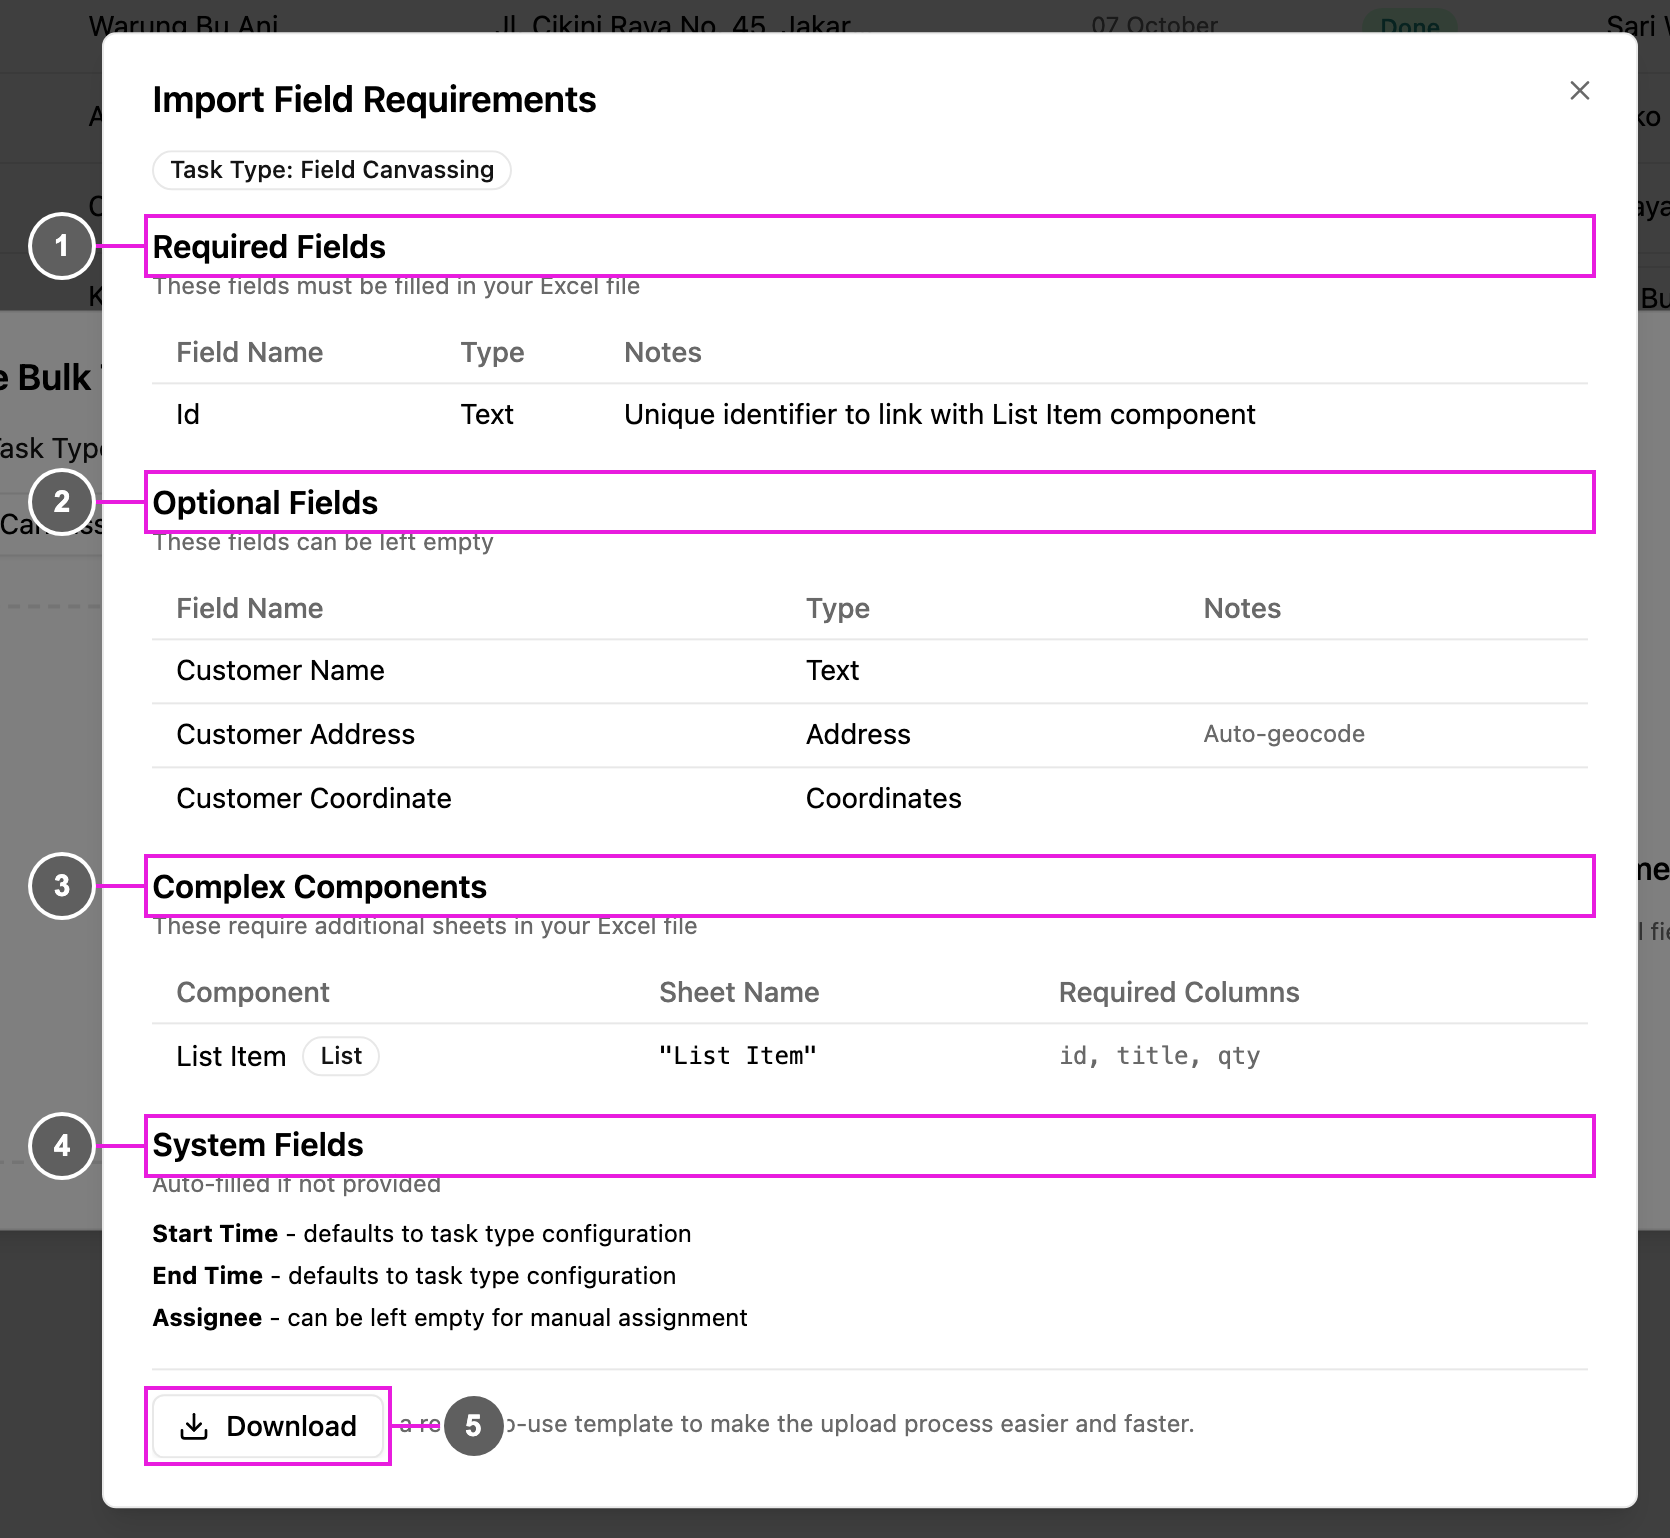
- Required Fields: must be filled in for every row. When the task type has a bill, list or subpage, this includes Id, which links each row to its rows in the other sheets.
- Optional Fields: can be left empty.
- Complex Components: bills, lists and subpages, each with the sheet name and the columns its sheet needs.
- System Fields: Start Time and End Time default to the task type’s configuration when left empty, and Assignee can be left empty to assign later.
- Download: a ready-to-use template.
Step 2: Map your columns
If you uploaded your own spreadsheet, match each task field to one of its columns. Columns with the same name as a field are matched for you.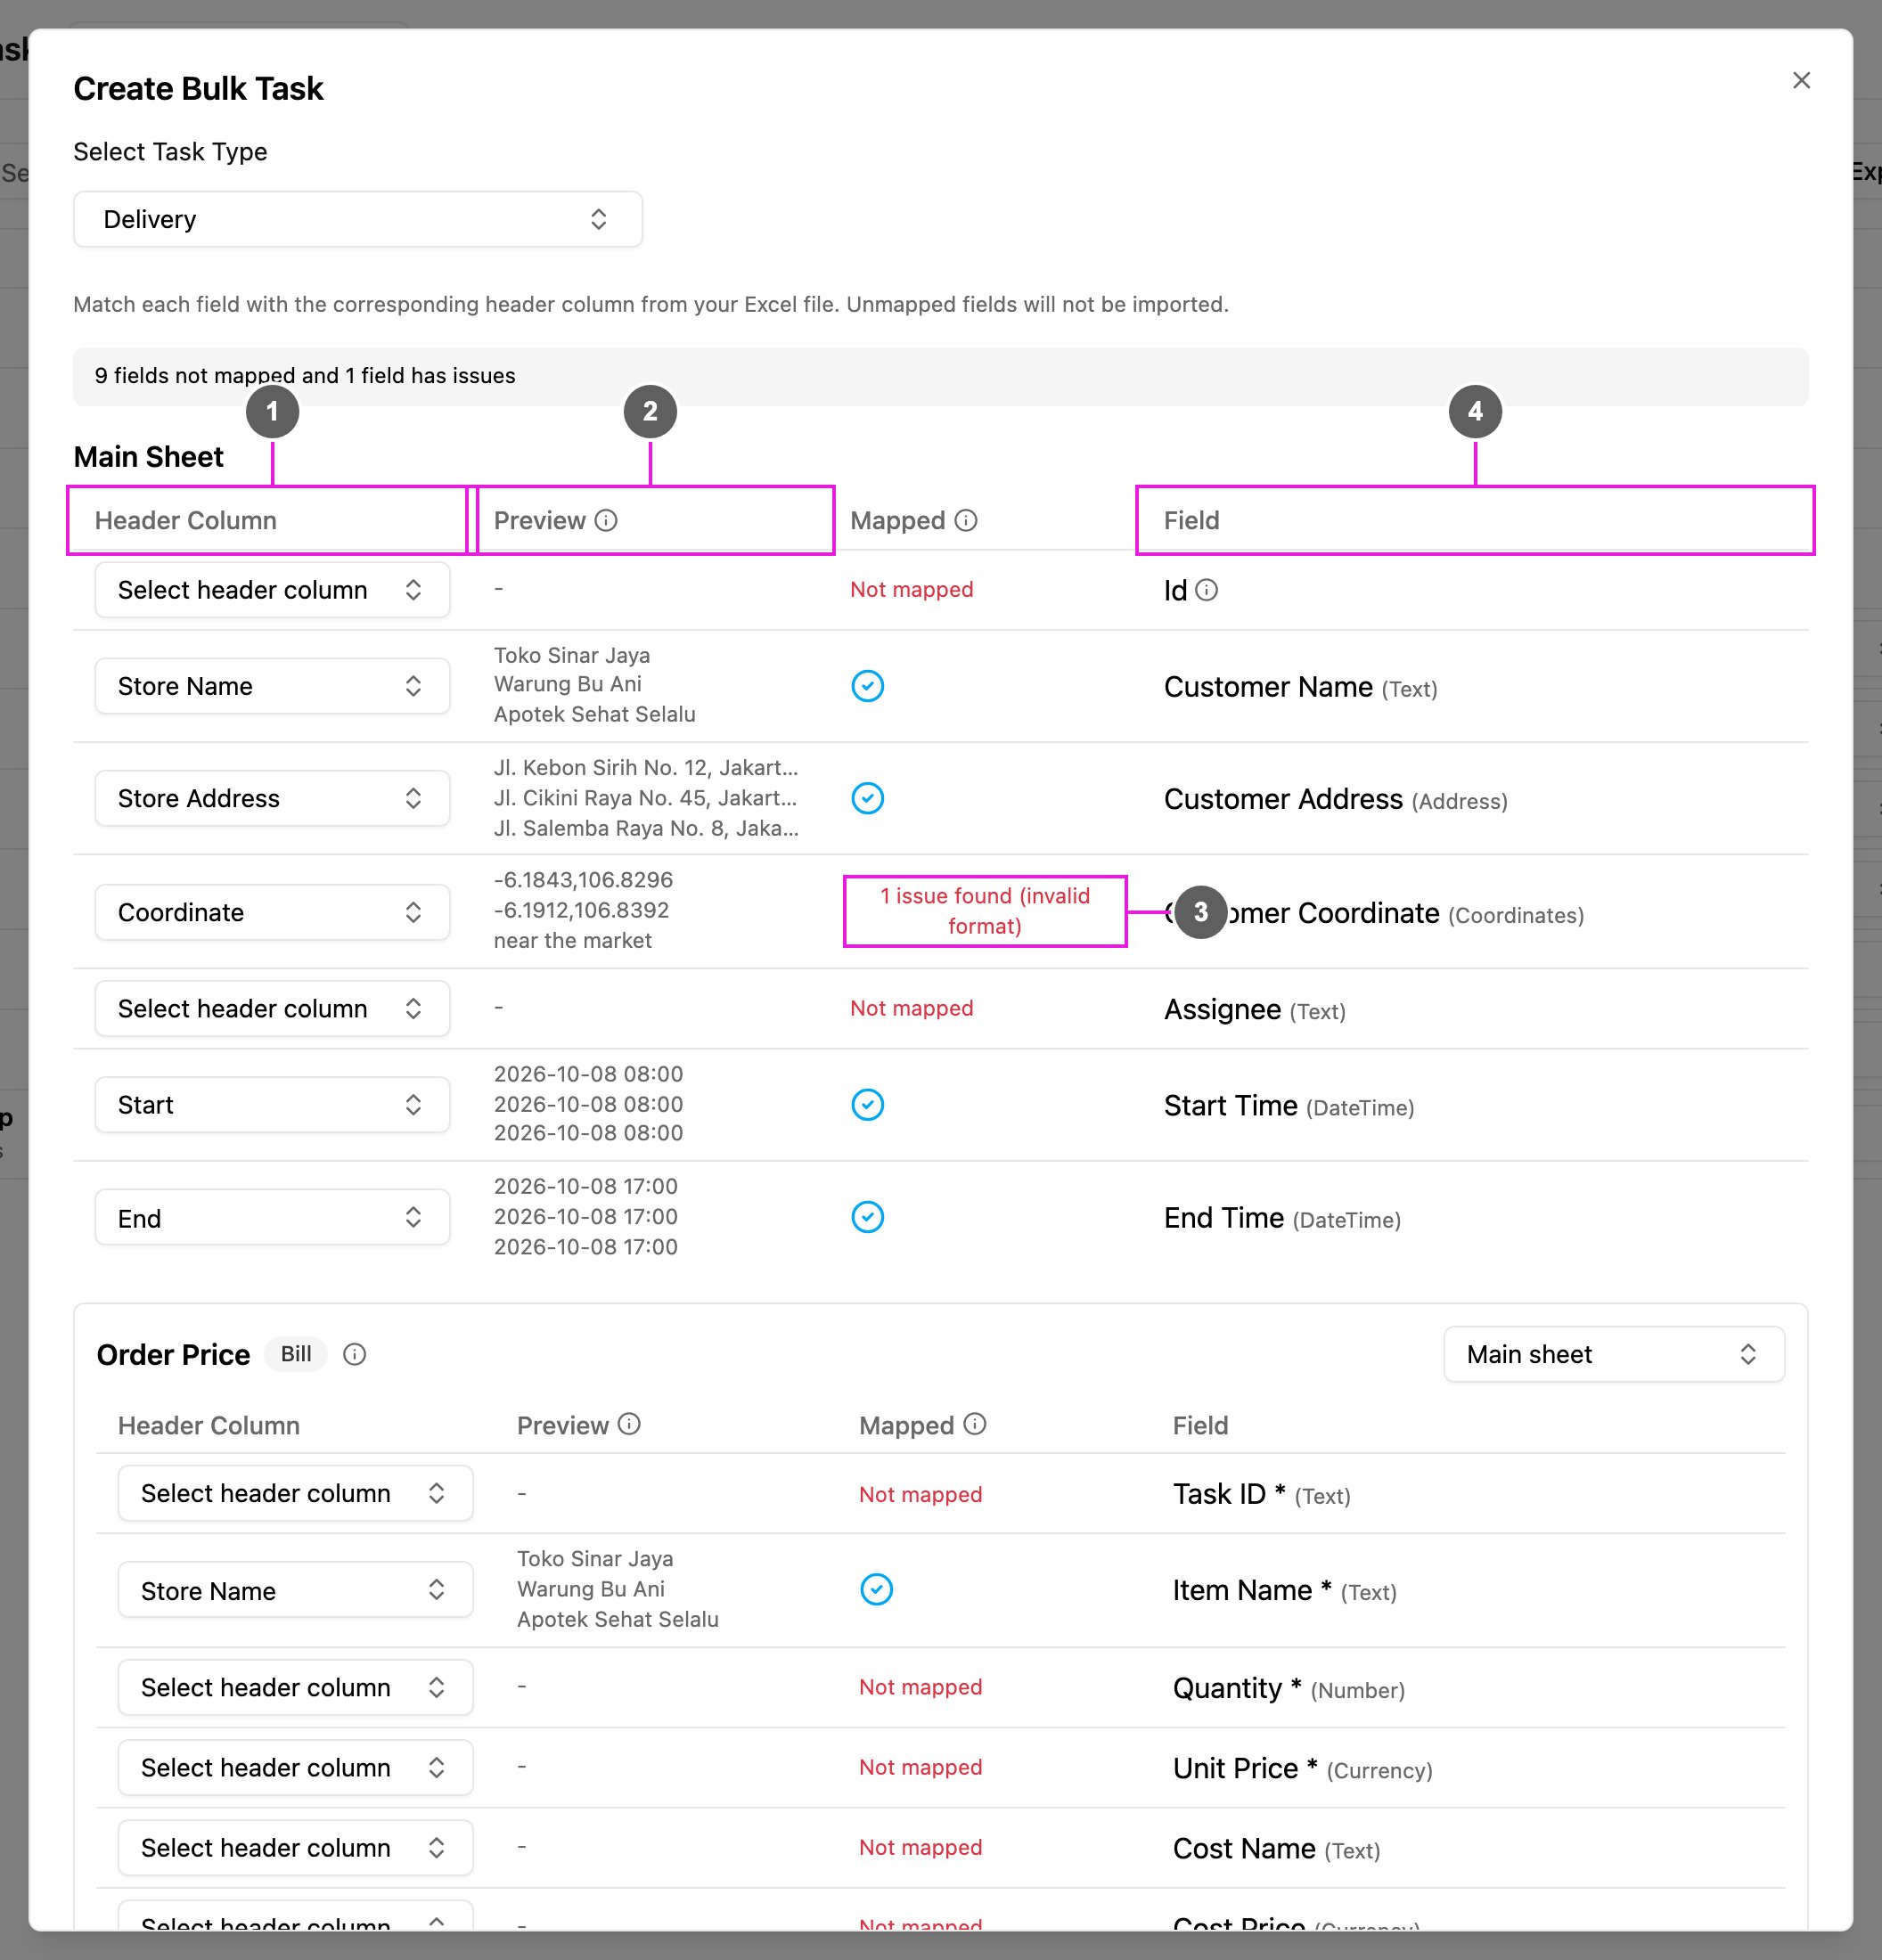
- Header Column: pick which column of your file holds this field.
- Preview: the first 3 rows of that column, so you can check the data looks right.
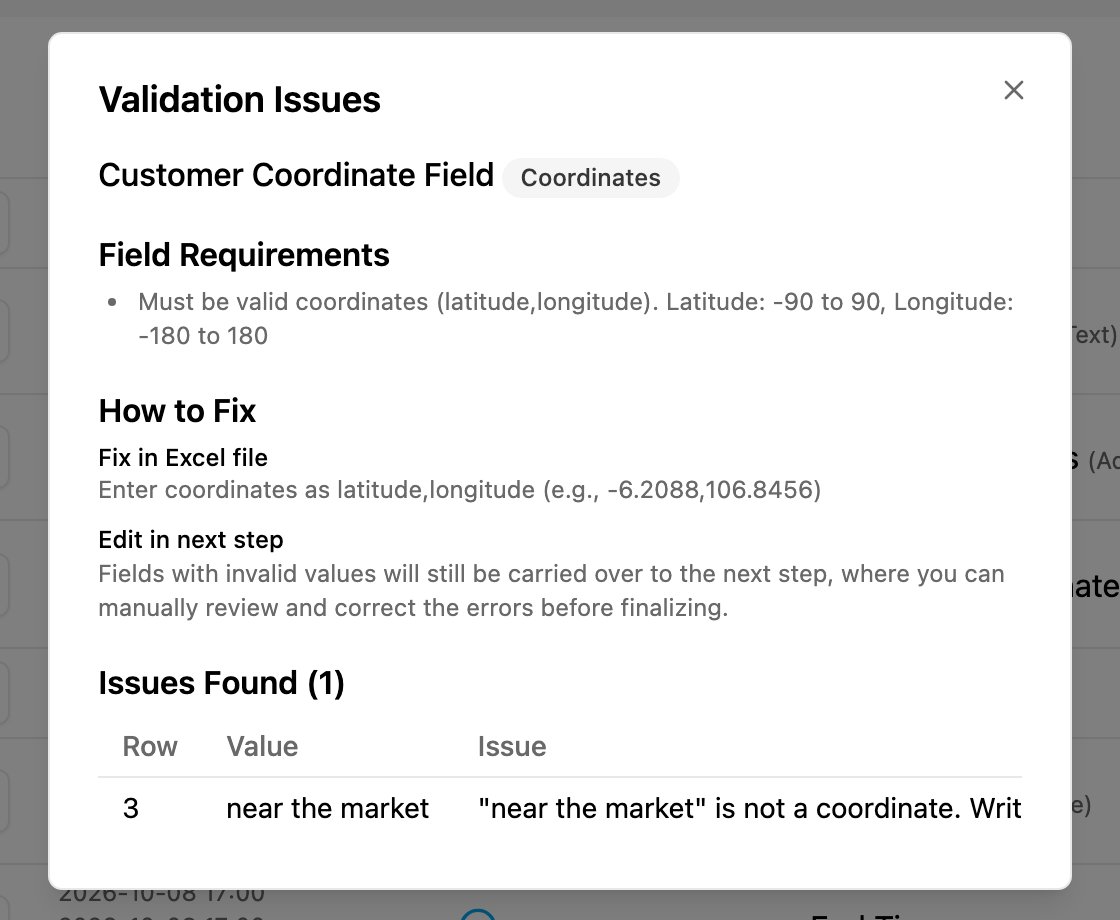
- Mapped: the result for the field. A check means every value is valid. Not mapped means no column is picked. A badge such as 2 issues found (invalid format) shows how many rows have a problem.
- Field: the task type’s field, with its type.
- Next: go to the review.
Bills, lists and subpages
A bill, list or subpage holds several rows per task, so it lives in its own sheet of the file:- Each such component is matched to a sheet with the same name. If none matches, the first sheet is used; pick another under Select sheet….
- Map the component’s own columns to the columns of that sheet.
- The Id column links each row of the extra sheet to its task in the Main Sheet. Give every task a temporary id, such as
TASK1, and repeat it on its rows in the other sheets.
A list inside a subpage
When a subpage contains a list, the list rows go in their own sheet, named after the list’s title. Sheet names are cut to Excel’s 31-character limit and the characters/ \ * ? [ ] are removed. An entry column links each row to a subpage entry: entry=1 is the task’s first row in the subpage sheet, entry=2 the second, and so on.
Example: a task type with an Inspection subpage that contains a quantity list titled Parts.
Main sheet:
Inspection sheet (two rows, so two subpage entries for TASK1):
Parts sheet:
This creates 1 task with 2 subpage entries: entry 1 has 2 list items and entry 2 has 1.
A bill inside a subpage
A bill inside a subpage also gets its own sheet, named after the bill’s title, with the sameid and entry columns. The reason column tells items from costs: - for an item, Cost or Discount for a cost.
Example
Charges sheet for a Delivery subpage:
This creates 1 task with 1 subpage entry that has 2 items and 2 costs. The total is worked out from the items and costs.
List and bill rows whose
entry is out of range or not a number, or whose id matches no task, are left out. The other rows are still imported.Step 3: Review, edit and submit
The tasks appear in a table, one row per task, with the values from your file.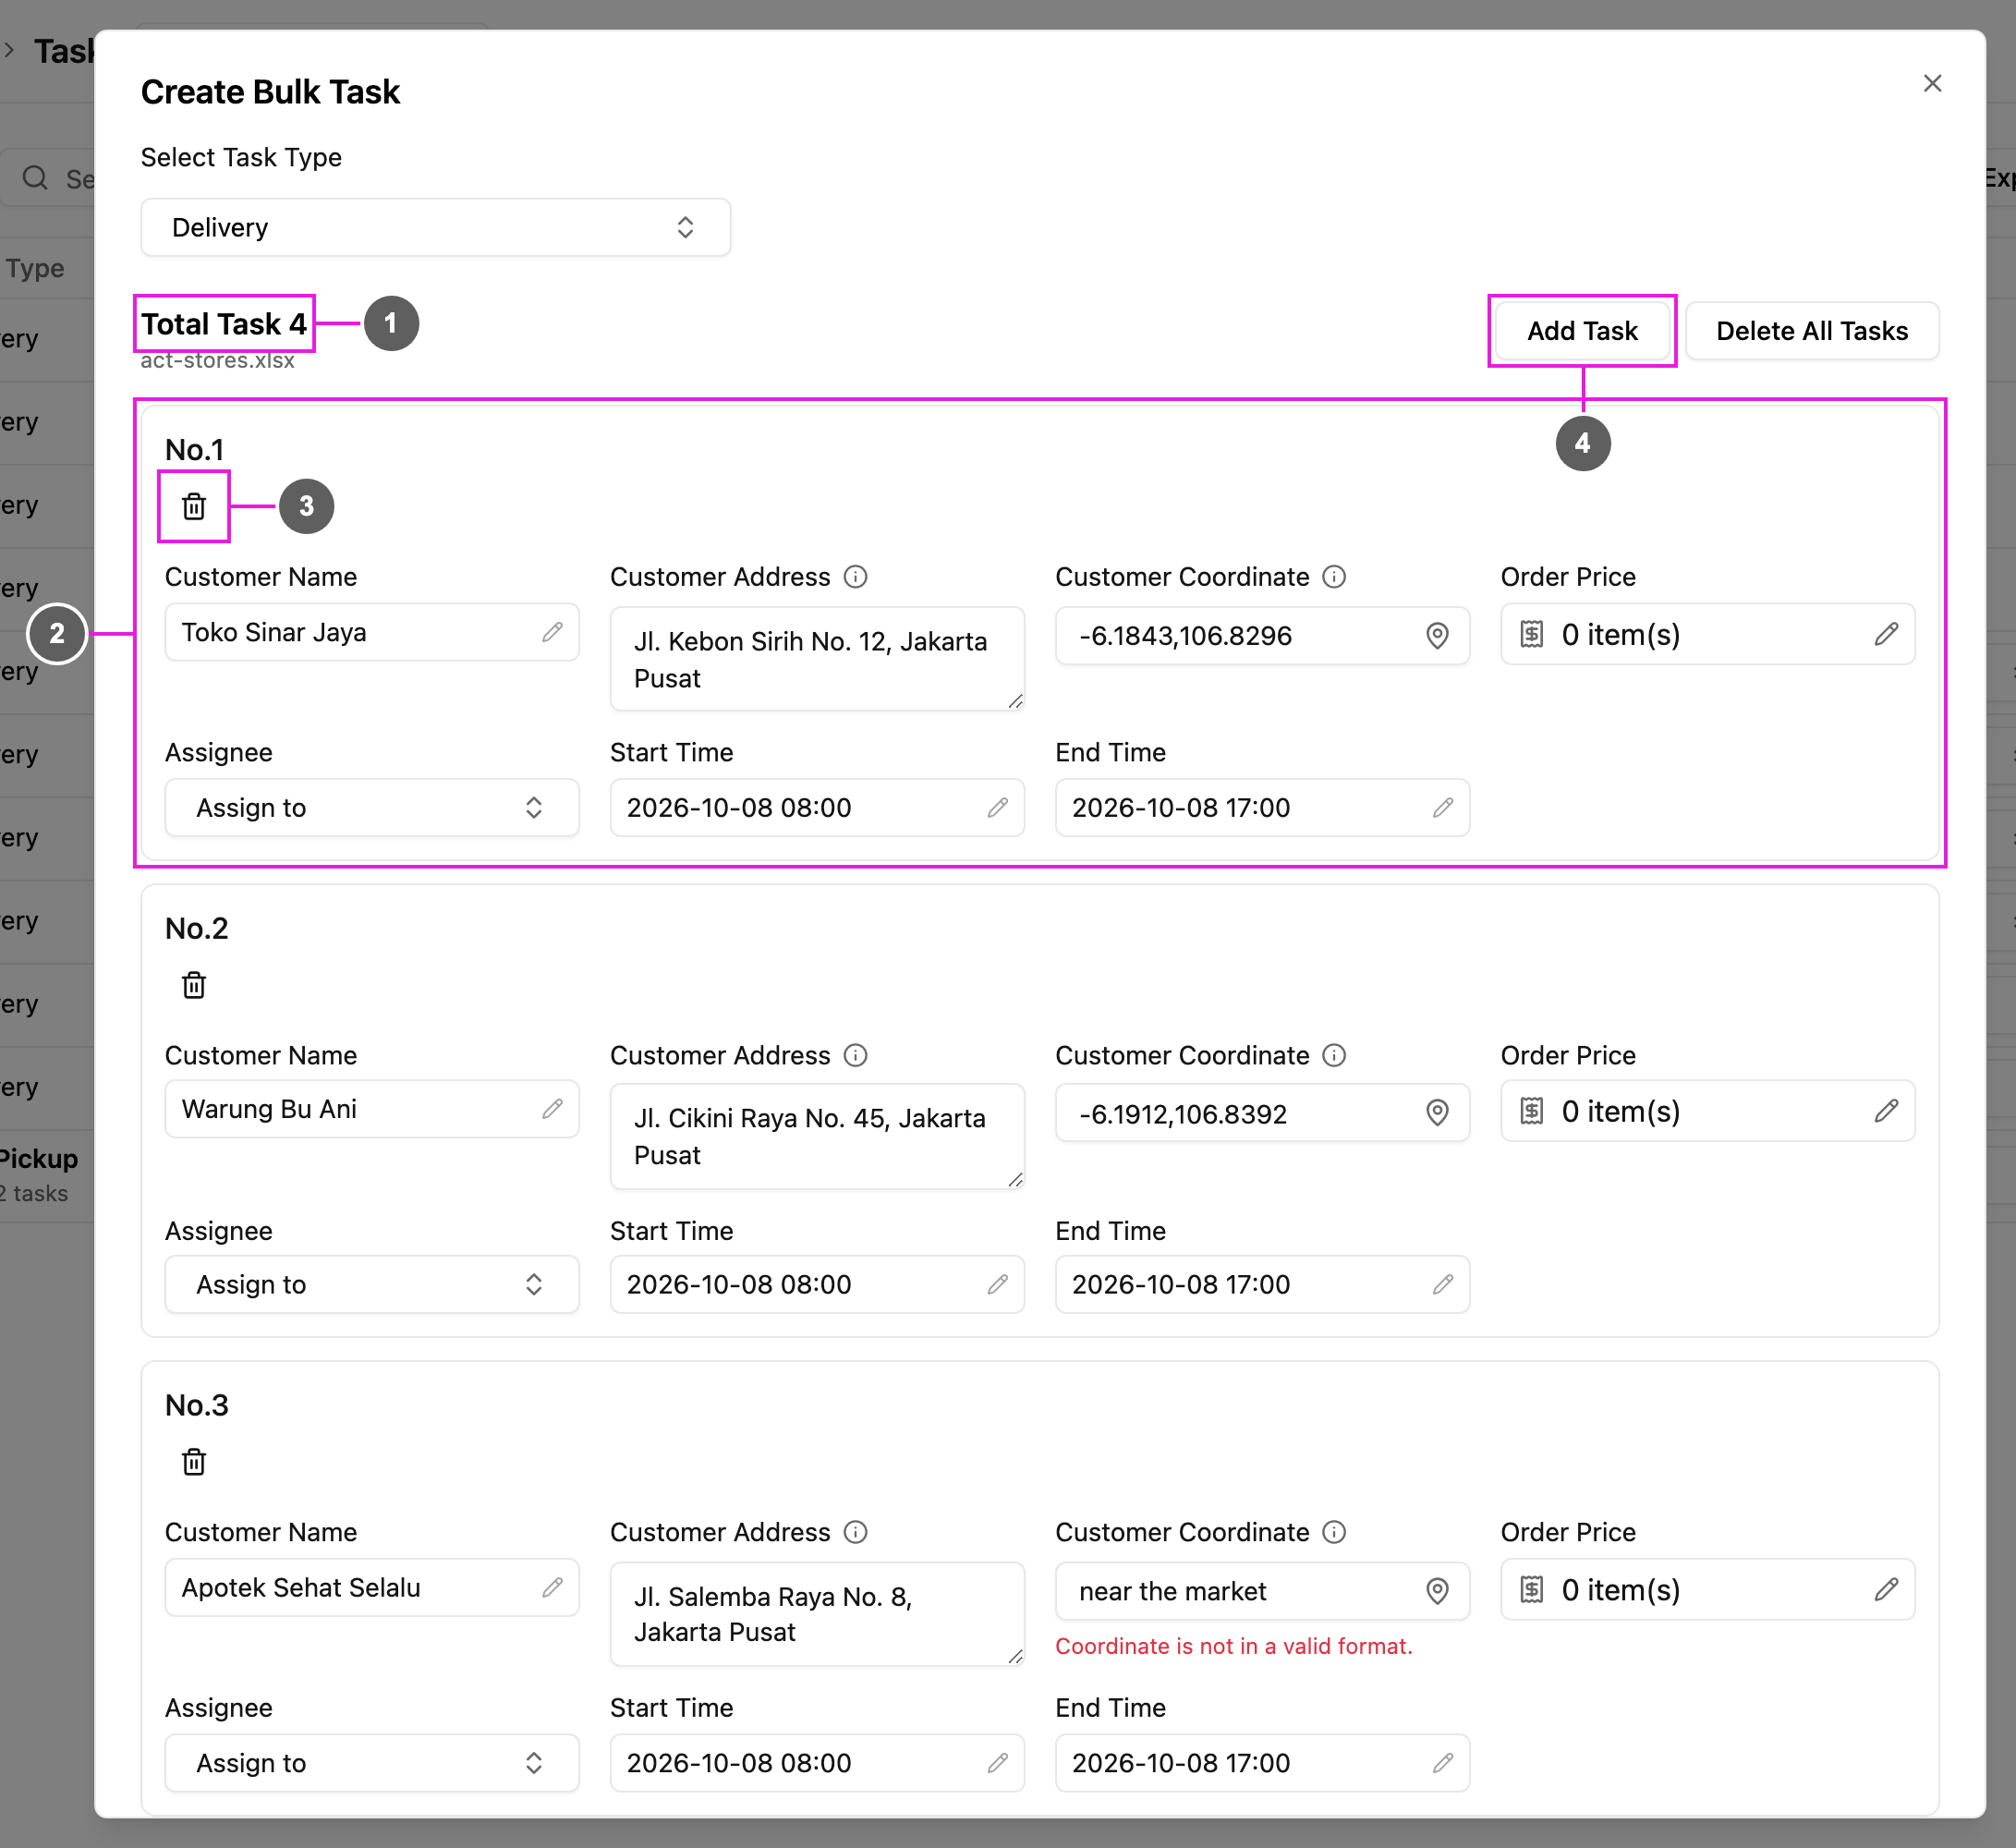
- Total Task: how many tasks will be created.
- Rows: click any cell to change its value. A bill, list, subpage or signature cell opens its own editor.
- Delete row: remove a task you do not need.
- Add Task: add another row. Delete All Tasks empties the table.
- Submit: create all the tasks.