

- The Initial page, shown when a task is created.
- Field app pages, shown while the field worker does the task.
Required permission:
- View flow
- Edit flow
Why the Initial page matters
A task usually moves through three states:- Created: someone creates the task on the web app, on the field app, by import or through the API.
- Assigned: a field worker is picked to do it.
- Done: the field worker finishes the work on the field app.
Initial page
Every task type has exactly one Initial page. It is created with the task type and cannot be deleted, renamed or moved. It is the place for information known when the task is created:- Customer or requester details: name, address, coordinate.
- Order details: order number, items, expected delivery time.
- Routing details: visit name, address, coordinate, open and close times, tags.
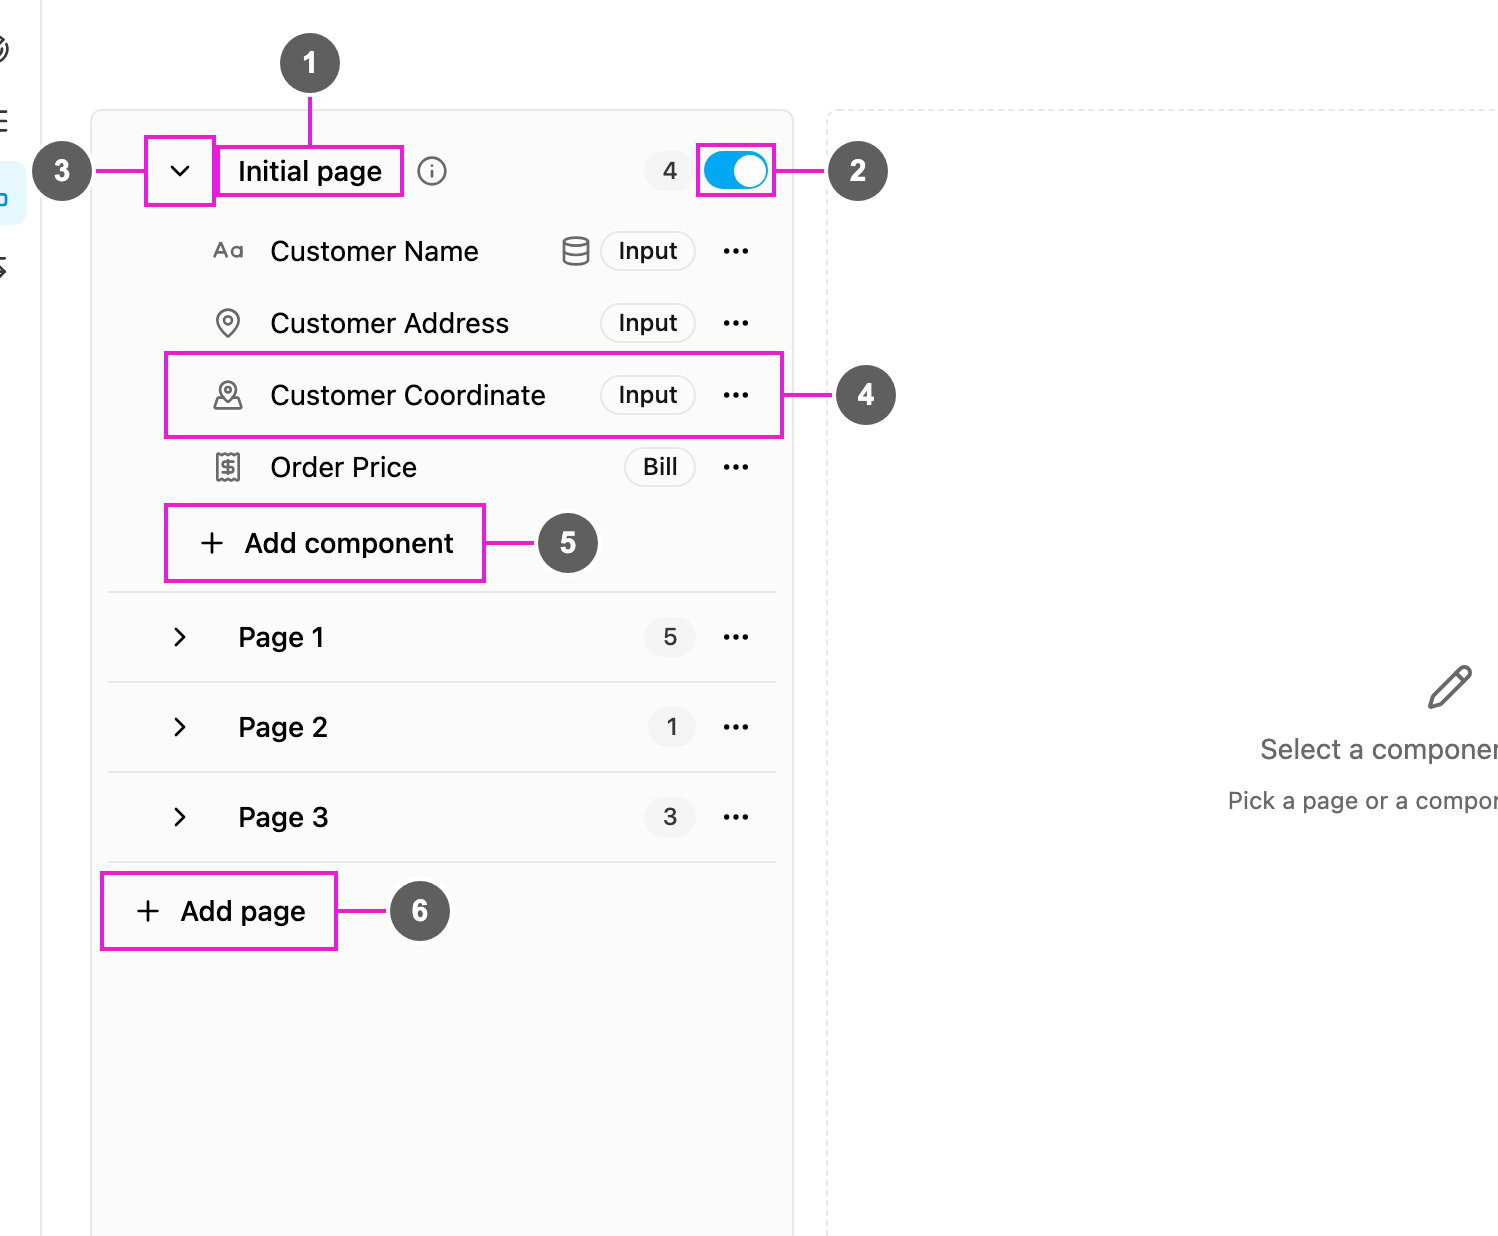
- Initial page: the fixed name. The ⓘ beside it explains that this page is shown when a task is first created. The number on the right is how many components it holds.
- Page enabled: turns the Initial page on or off. When it is off, tasks are created straight away without any pre-filled information, and the task type must have at least one field app page. This switch is only offered to some internal accounts; most task types leave the Initial page on.
- Show or hide components: expand or collapse the page.
- Component: a component on the page, with its type on the right. Click it to edit it, drag it to reorder, or use ⋯ to move or delete it. The database icon means it fills from a data source.
- Add component: add a component to this page.
- Add page: add a field app page.
Set up the Initial page
- Open the task type. The Initial page is the first row of the page list.
- Expand it and click Add component. Set up each component in the properties panel.
- Open the Configuration tab and map the Initial page components to the task list (Title, Content, Label) and to routing (Visit Name, Address, Coordinate and so on).
- Click Save. Tasks created from now on use the updated Initial page.
Field app pages
Field app pages are the steps the field worker goes through while doing the task, for example Delivery Info → Order & Proof → Receiver Confirmation. They only appear on the field app, never on the web app’s create-task form. Typical reasons to add a page:- Separate stages of work: pickup confirmation, in-transit update, drop-off proof.
- Conditional steps: show different fields depending on an answer, such as a successful or failed delivery.
- Show information from the Initial page: the customer’s name, address or coordinate, without typing it again.
- Capture media or signatures: group photo, signature and voice note components on their own page.
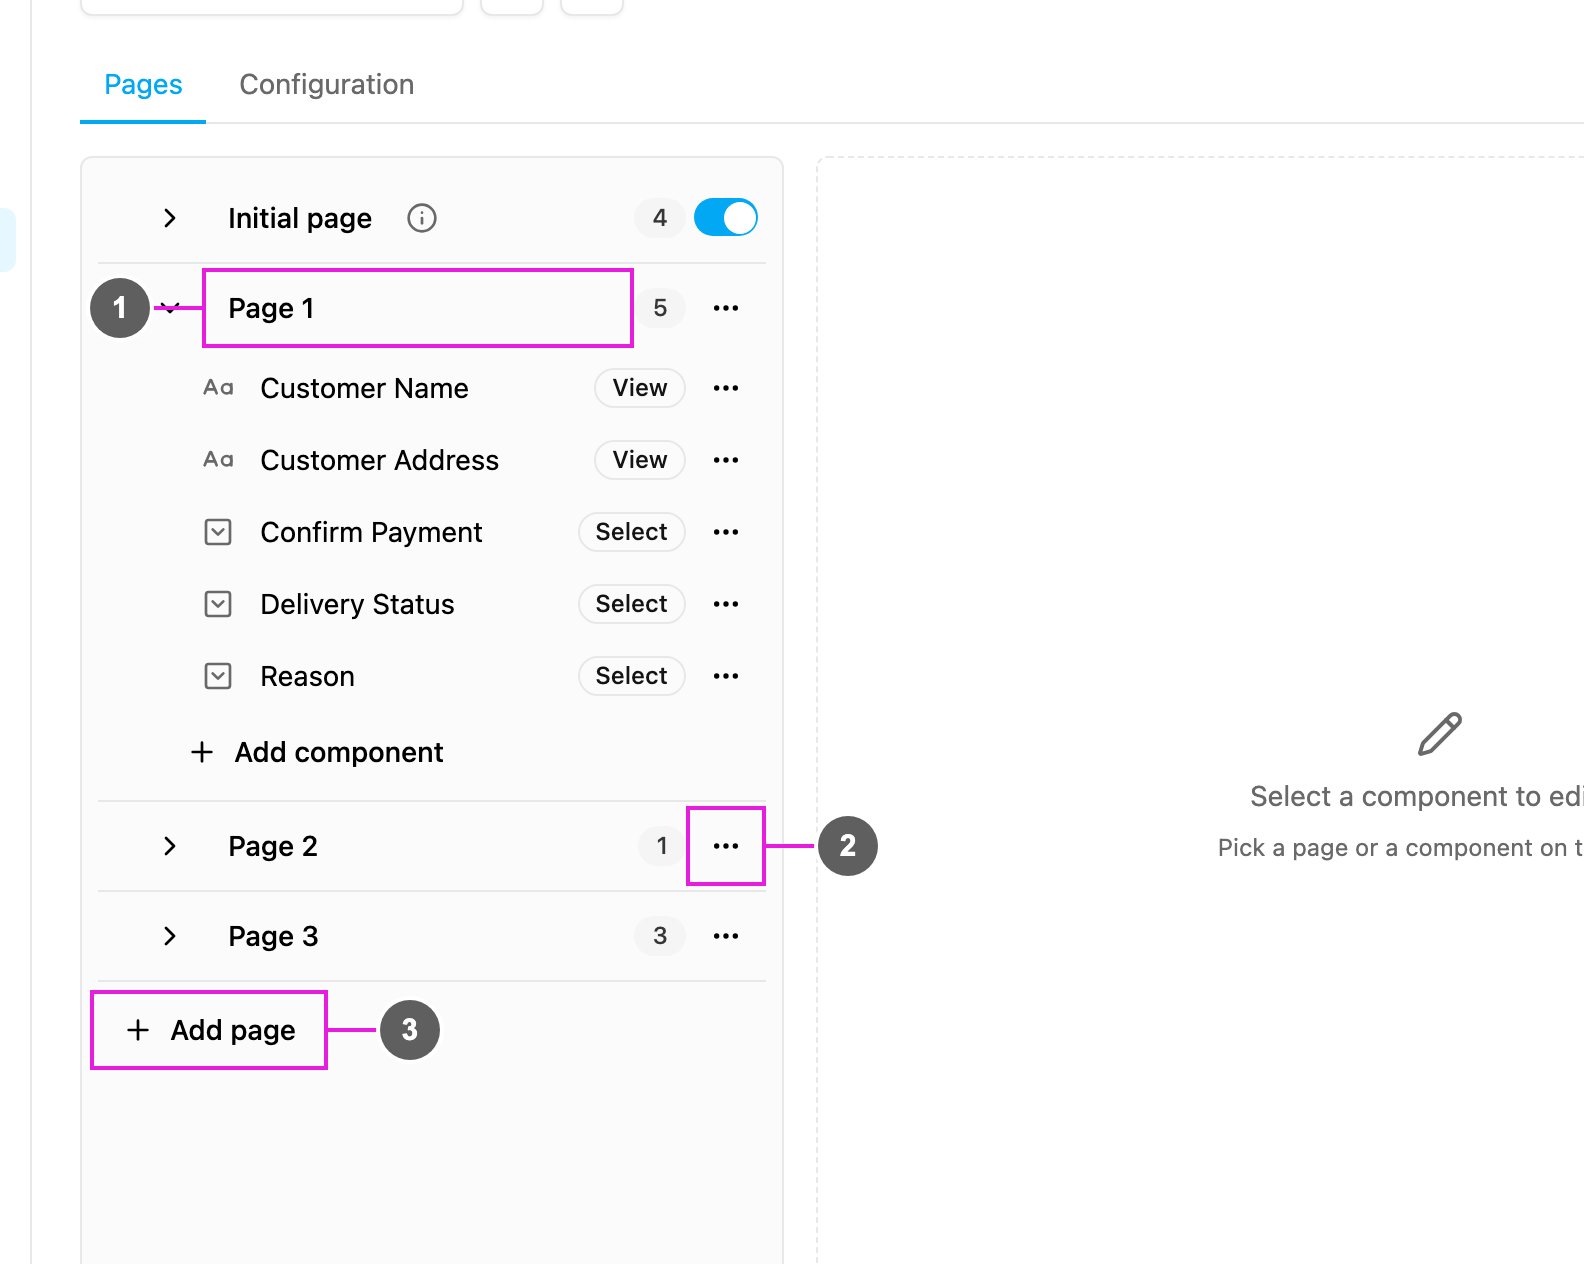
- Page title: click the name to rename the page, for example from Page 1 to Delivery Info. Clear names help field workers know which step they are on. Next to it is the drag handle: drag the page up or down, or focus it and use the arrow keys, to change the order. The Initial page always stays first.
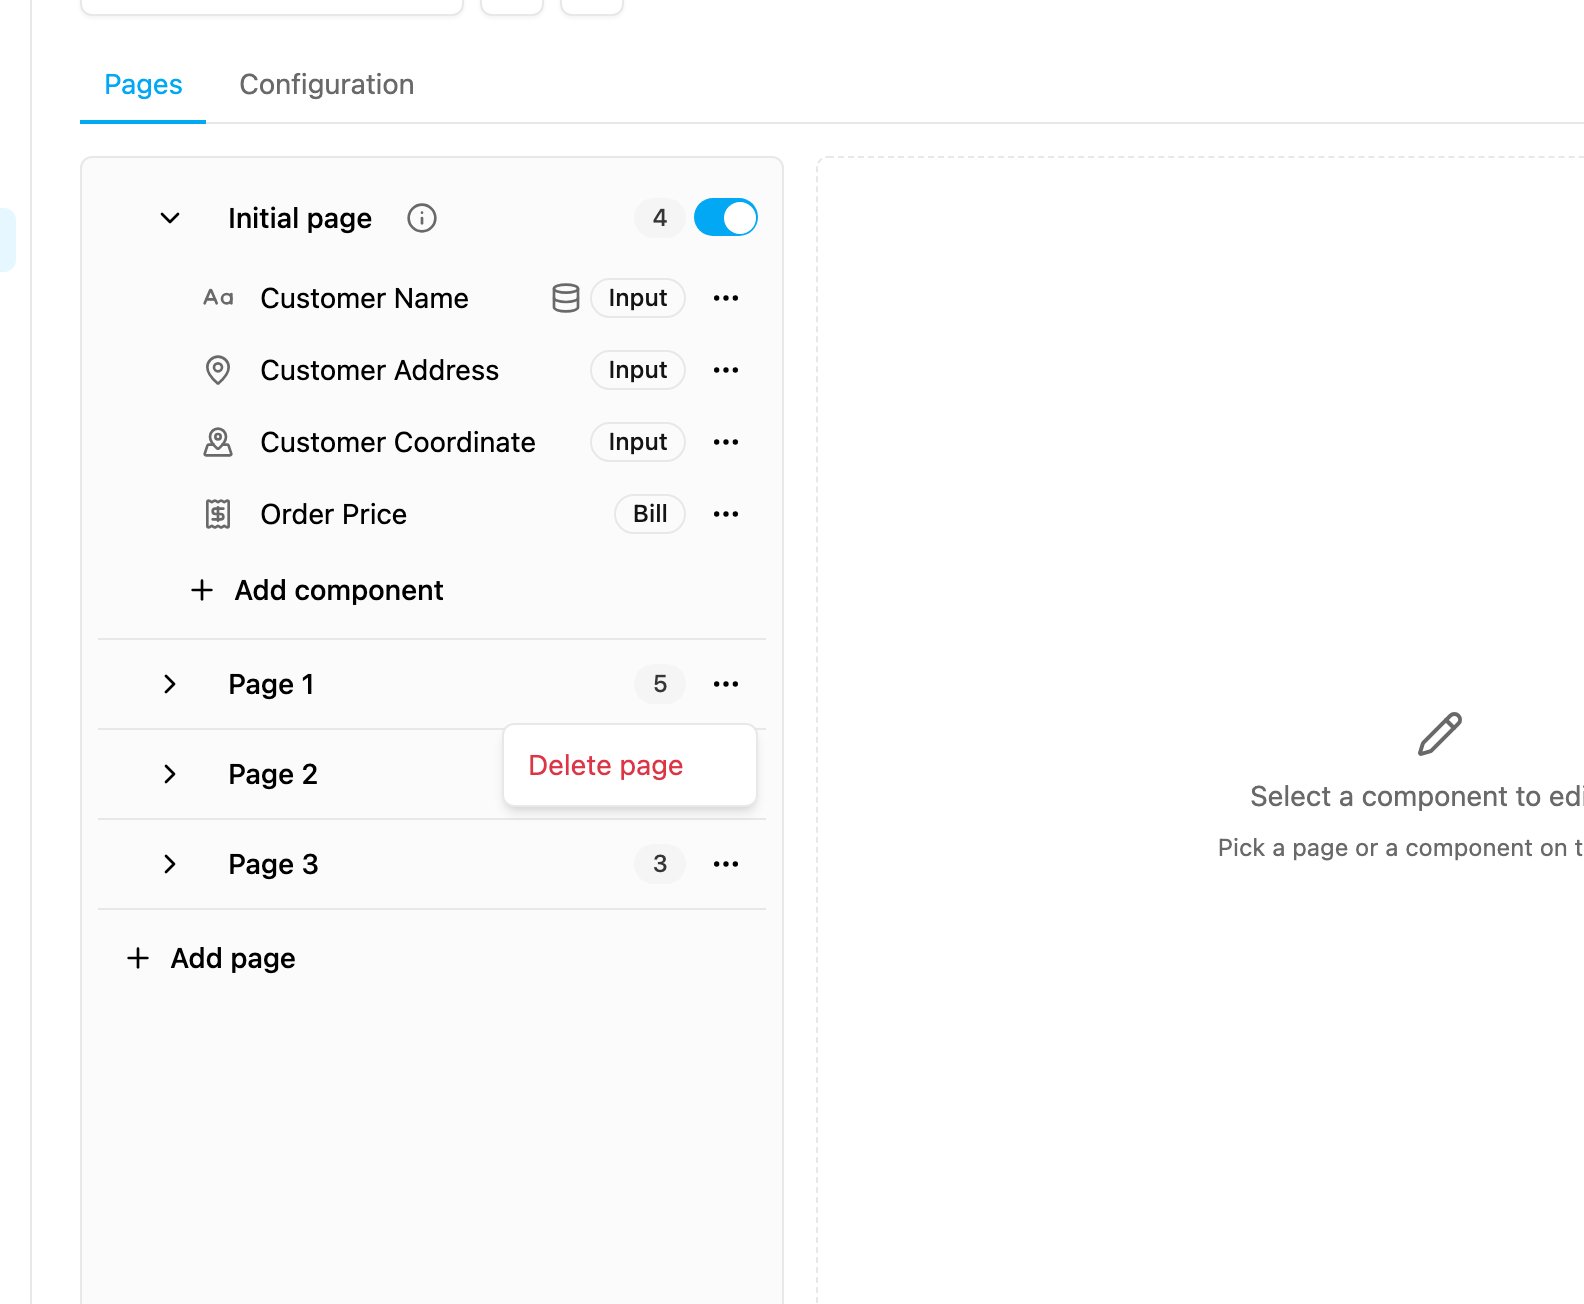
- Page actions: the ⋯ button opens Delete page. The page and all its components are removed when you save.
- Add page: add another field app page at the end. A new page is named Page N.
Set up a field app page
- Click Add page at the bottom of the page list.
- Click the page title and type a descriptive name, such as Delivery Info, Order & Proof or Receiver Confirmation.
- Expand the page and click Add component for each piece of information the field worker sees or captures.
- Optionally drag the page into a different position.
- Check it in the mobile app preview, then click Save.
Show Initial page values on a later page
A field app page can show values from the Initial page, so the field worker does not have to enter them again.- Open the field app page and click Add component.
- Choose View, and set Type of View to match the source, for example Text for a name.
- In Value, click Pick a component and pick the Initial page component to show, for example Customer Name. Only components of a matching type are offered.
- Every task created with this task type now shows that value on the page automatically.