

Required permission:
- View geotagging
- Create geotagging
- Edit geotagging
- Delete geotagging
Geotagging section
Open Planning › Routing › Configuration and go to Geotagging.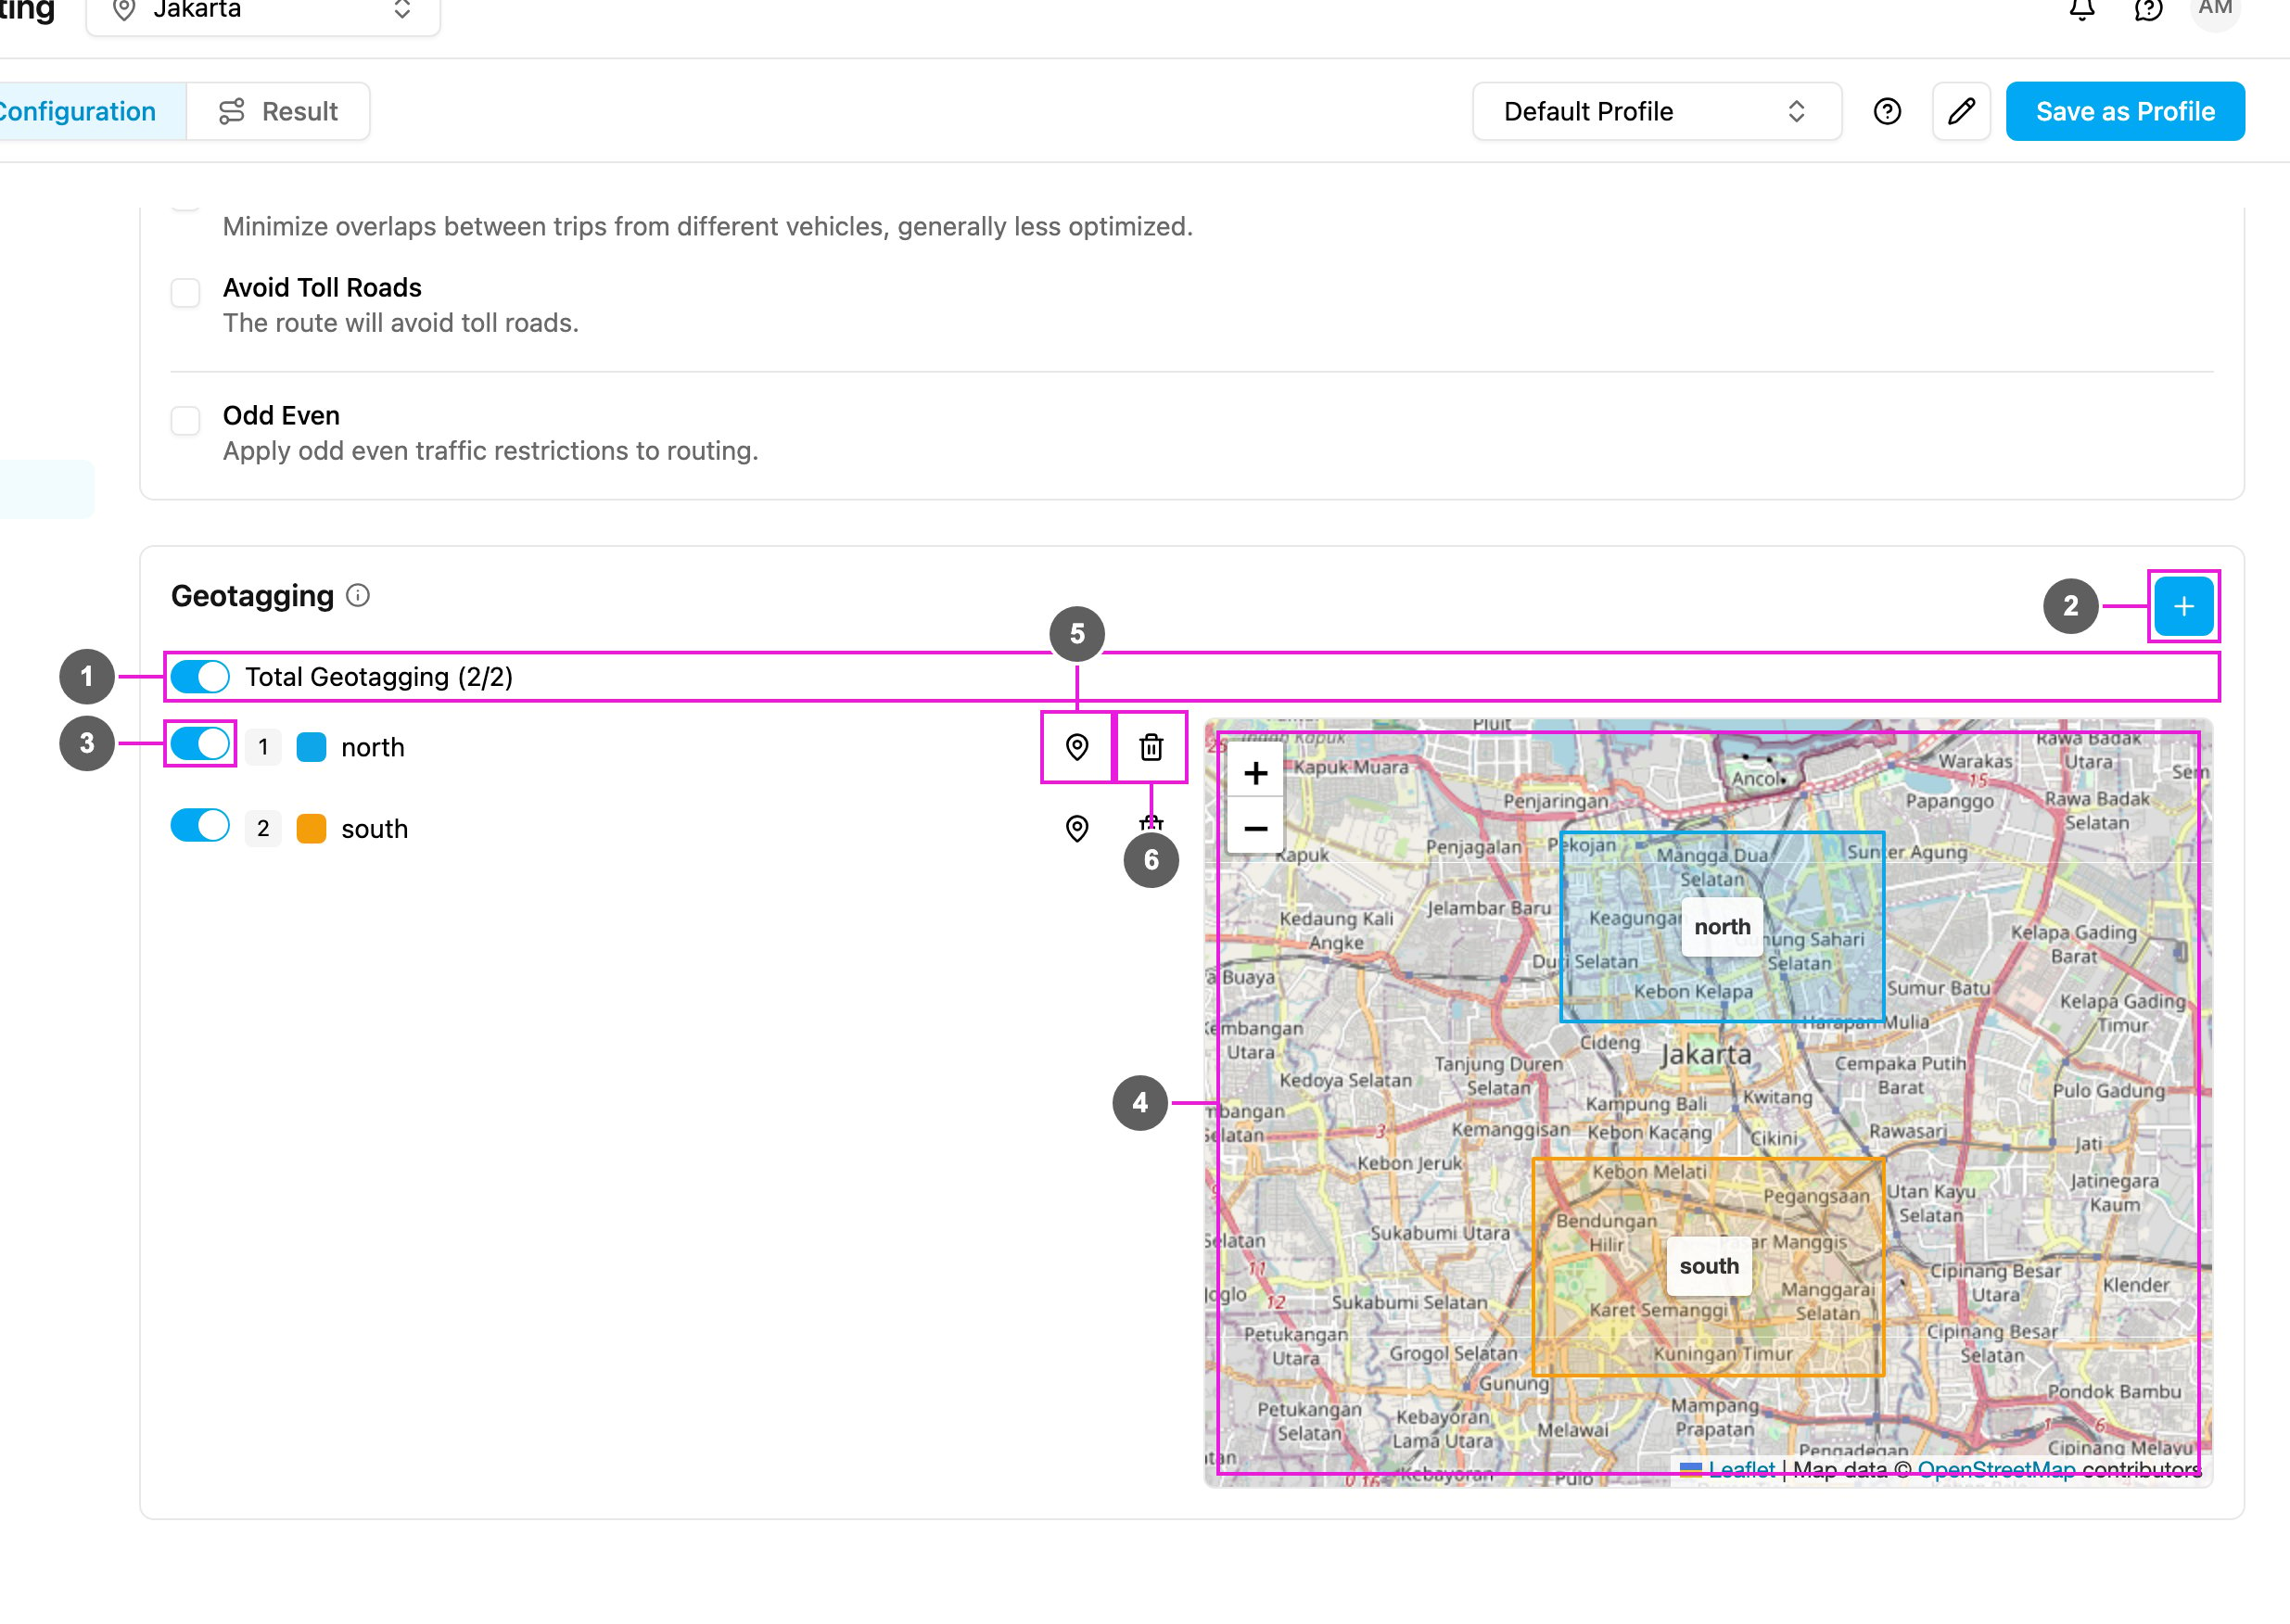
- Total Geotagging: how many areas are active out of all areas, for example 2/2. The switch turns all of them on or off.
- Add Geotagging (+): draw a new area.
- Switch: turn one area on or off for this profile. Only active areas tag visits. Each profile keeps its own choice of active areas, so a weekday and a weekend profile can use different areas. An area can only be switched on once it has been drawn.
- Map: all areas of the hub, each in its own color, with its name.
- Edit name and area: the map-pin icon opens the area to change it.
- Delete geotagging: the trash icon deletes the area after you confirm Delete this geotagging?.
Creating an area
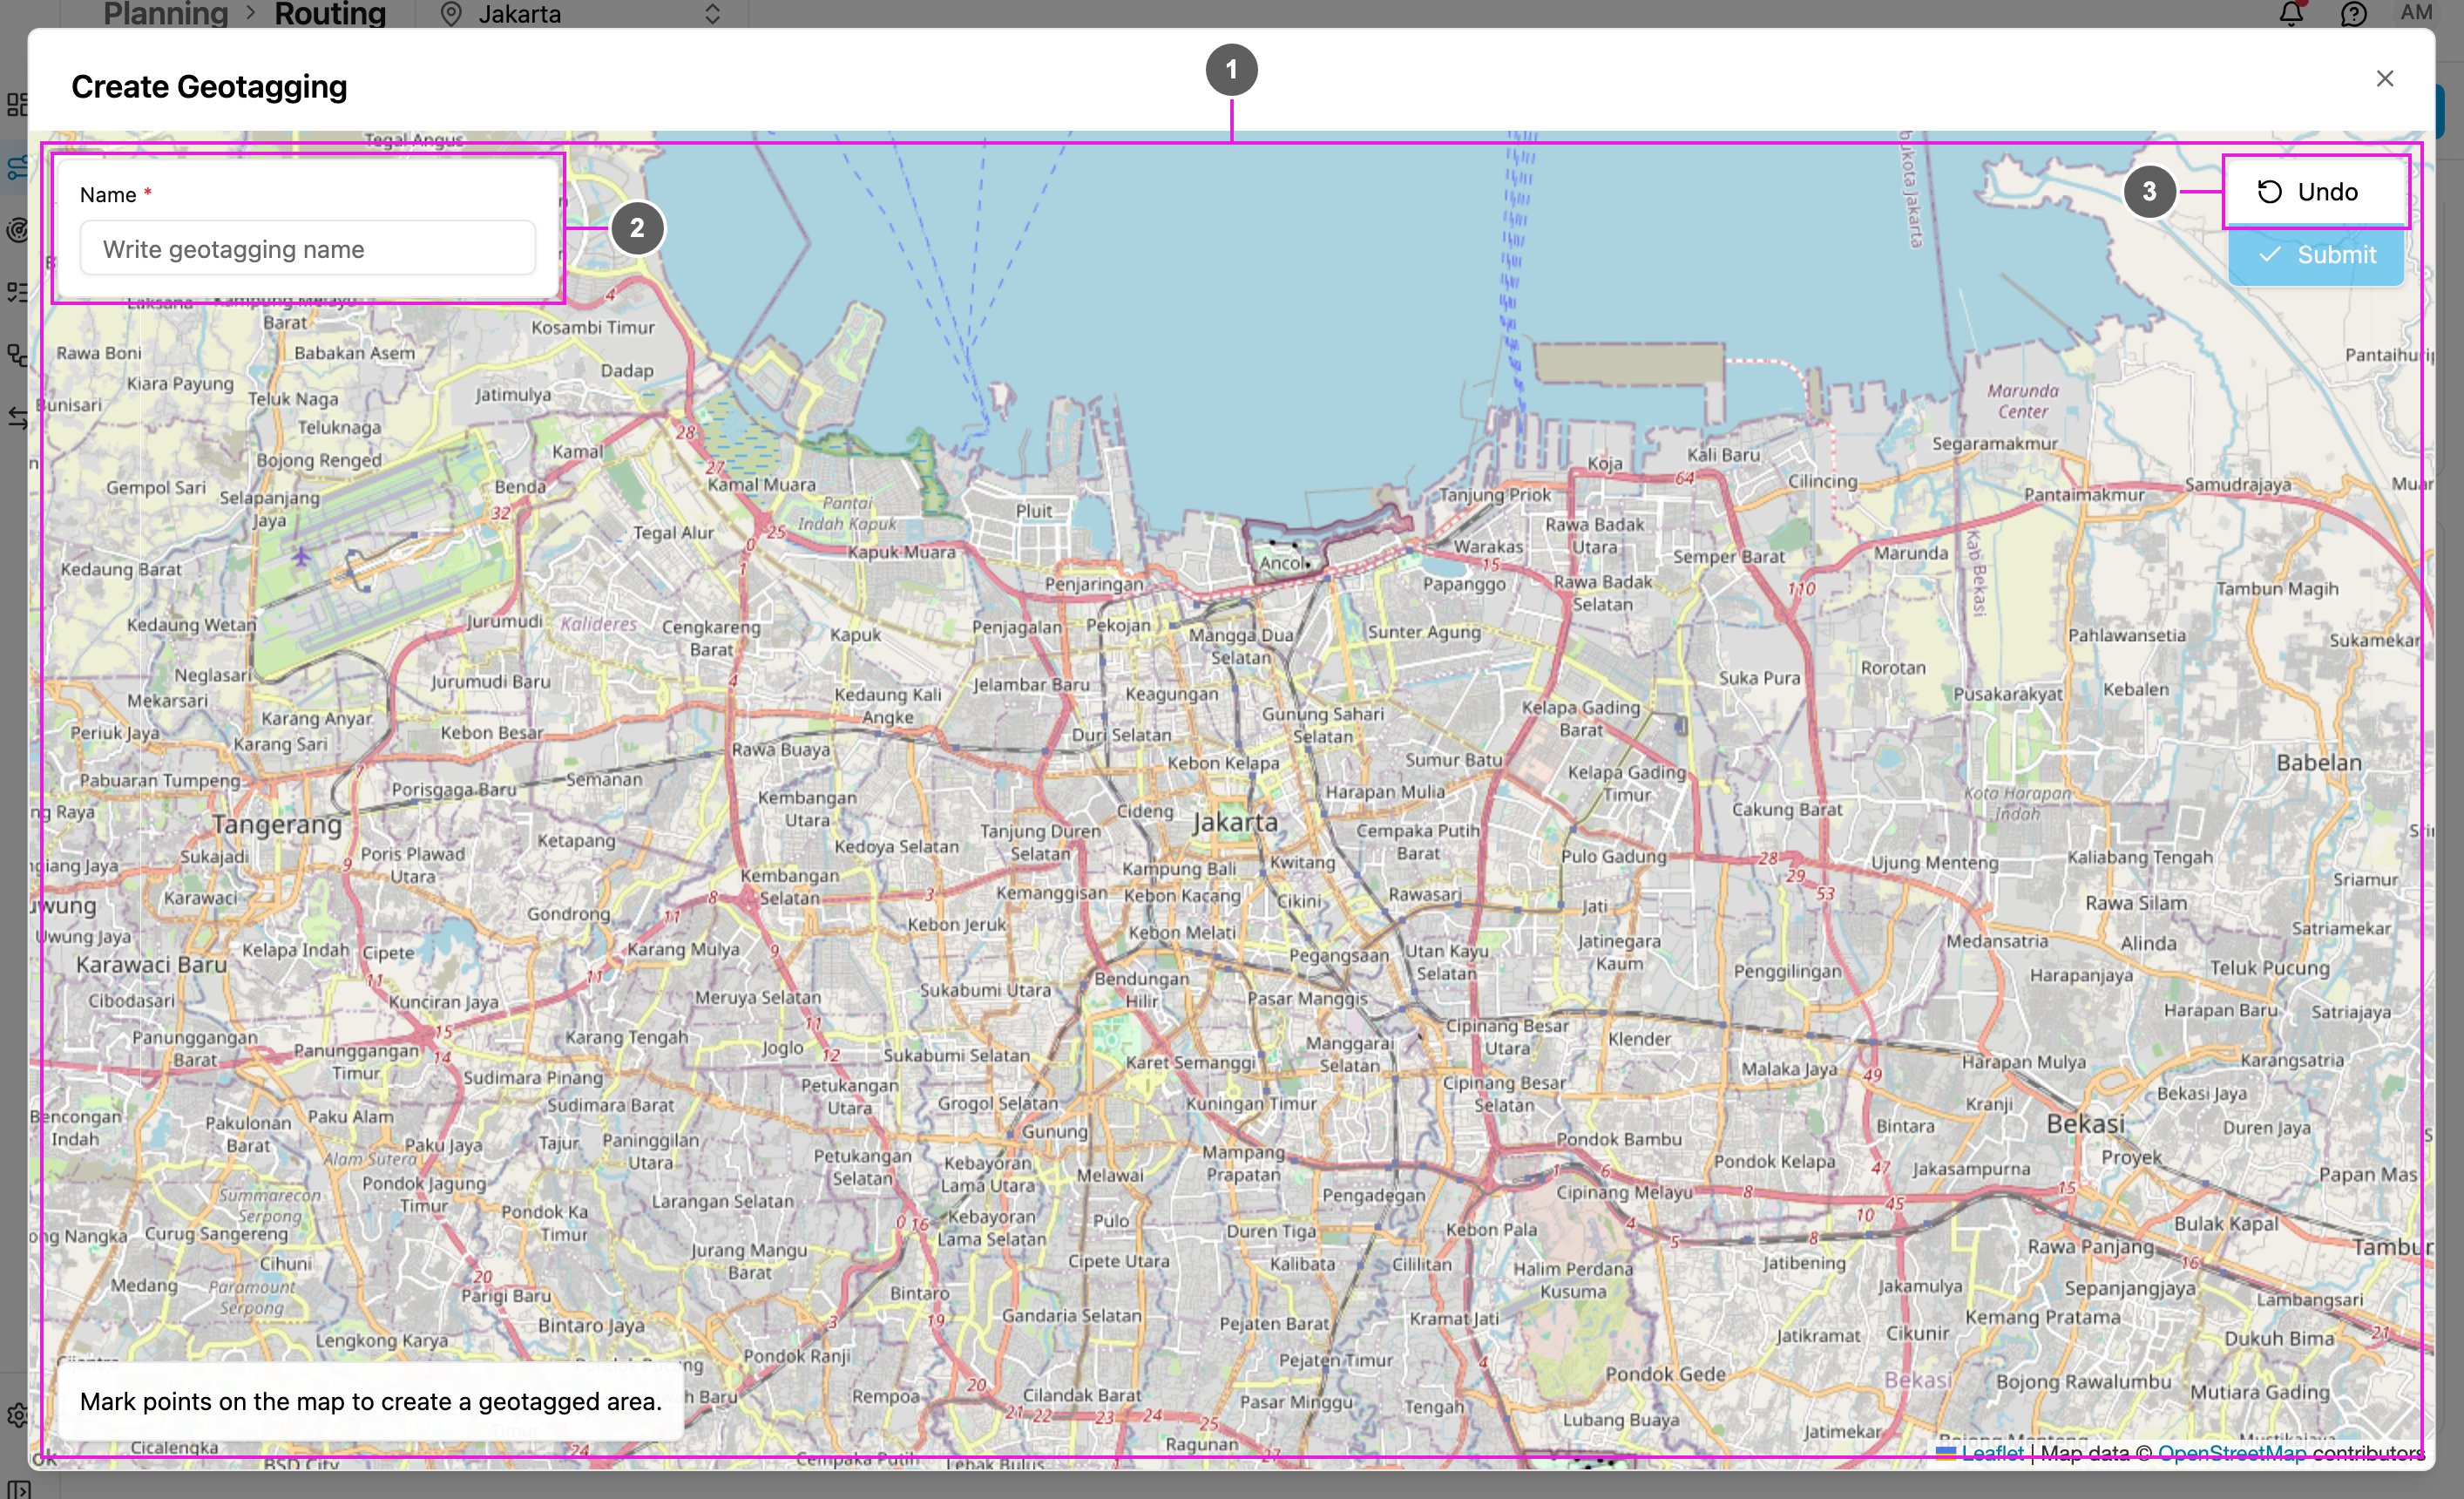
- Click +. Create Geotagging opens.
- Type the Name, usually the name of the area, for example south. The name must be unique in the hub.
- Click points on the map to outline the area: Mark points on the map to create a geotagged area. Use Undo to remove the last point, or Reset to start again.
- Click Submit.
- A visit that already has its own tags gets the area’s tag added to them.
- A visit inside two overlapping areas gets both tags.
- Only areas that are switched on are used. Before you optimize, switch off the areas you do not want to use for this run.
Example
You draw an area named south over the south of Jakarta. When you optimize, every visit whose coordinate lies inside that area is tagged south. On the Visit page, View all on map shows the active areas shaded on the map, each with the number of visits inside it.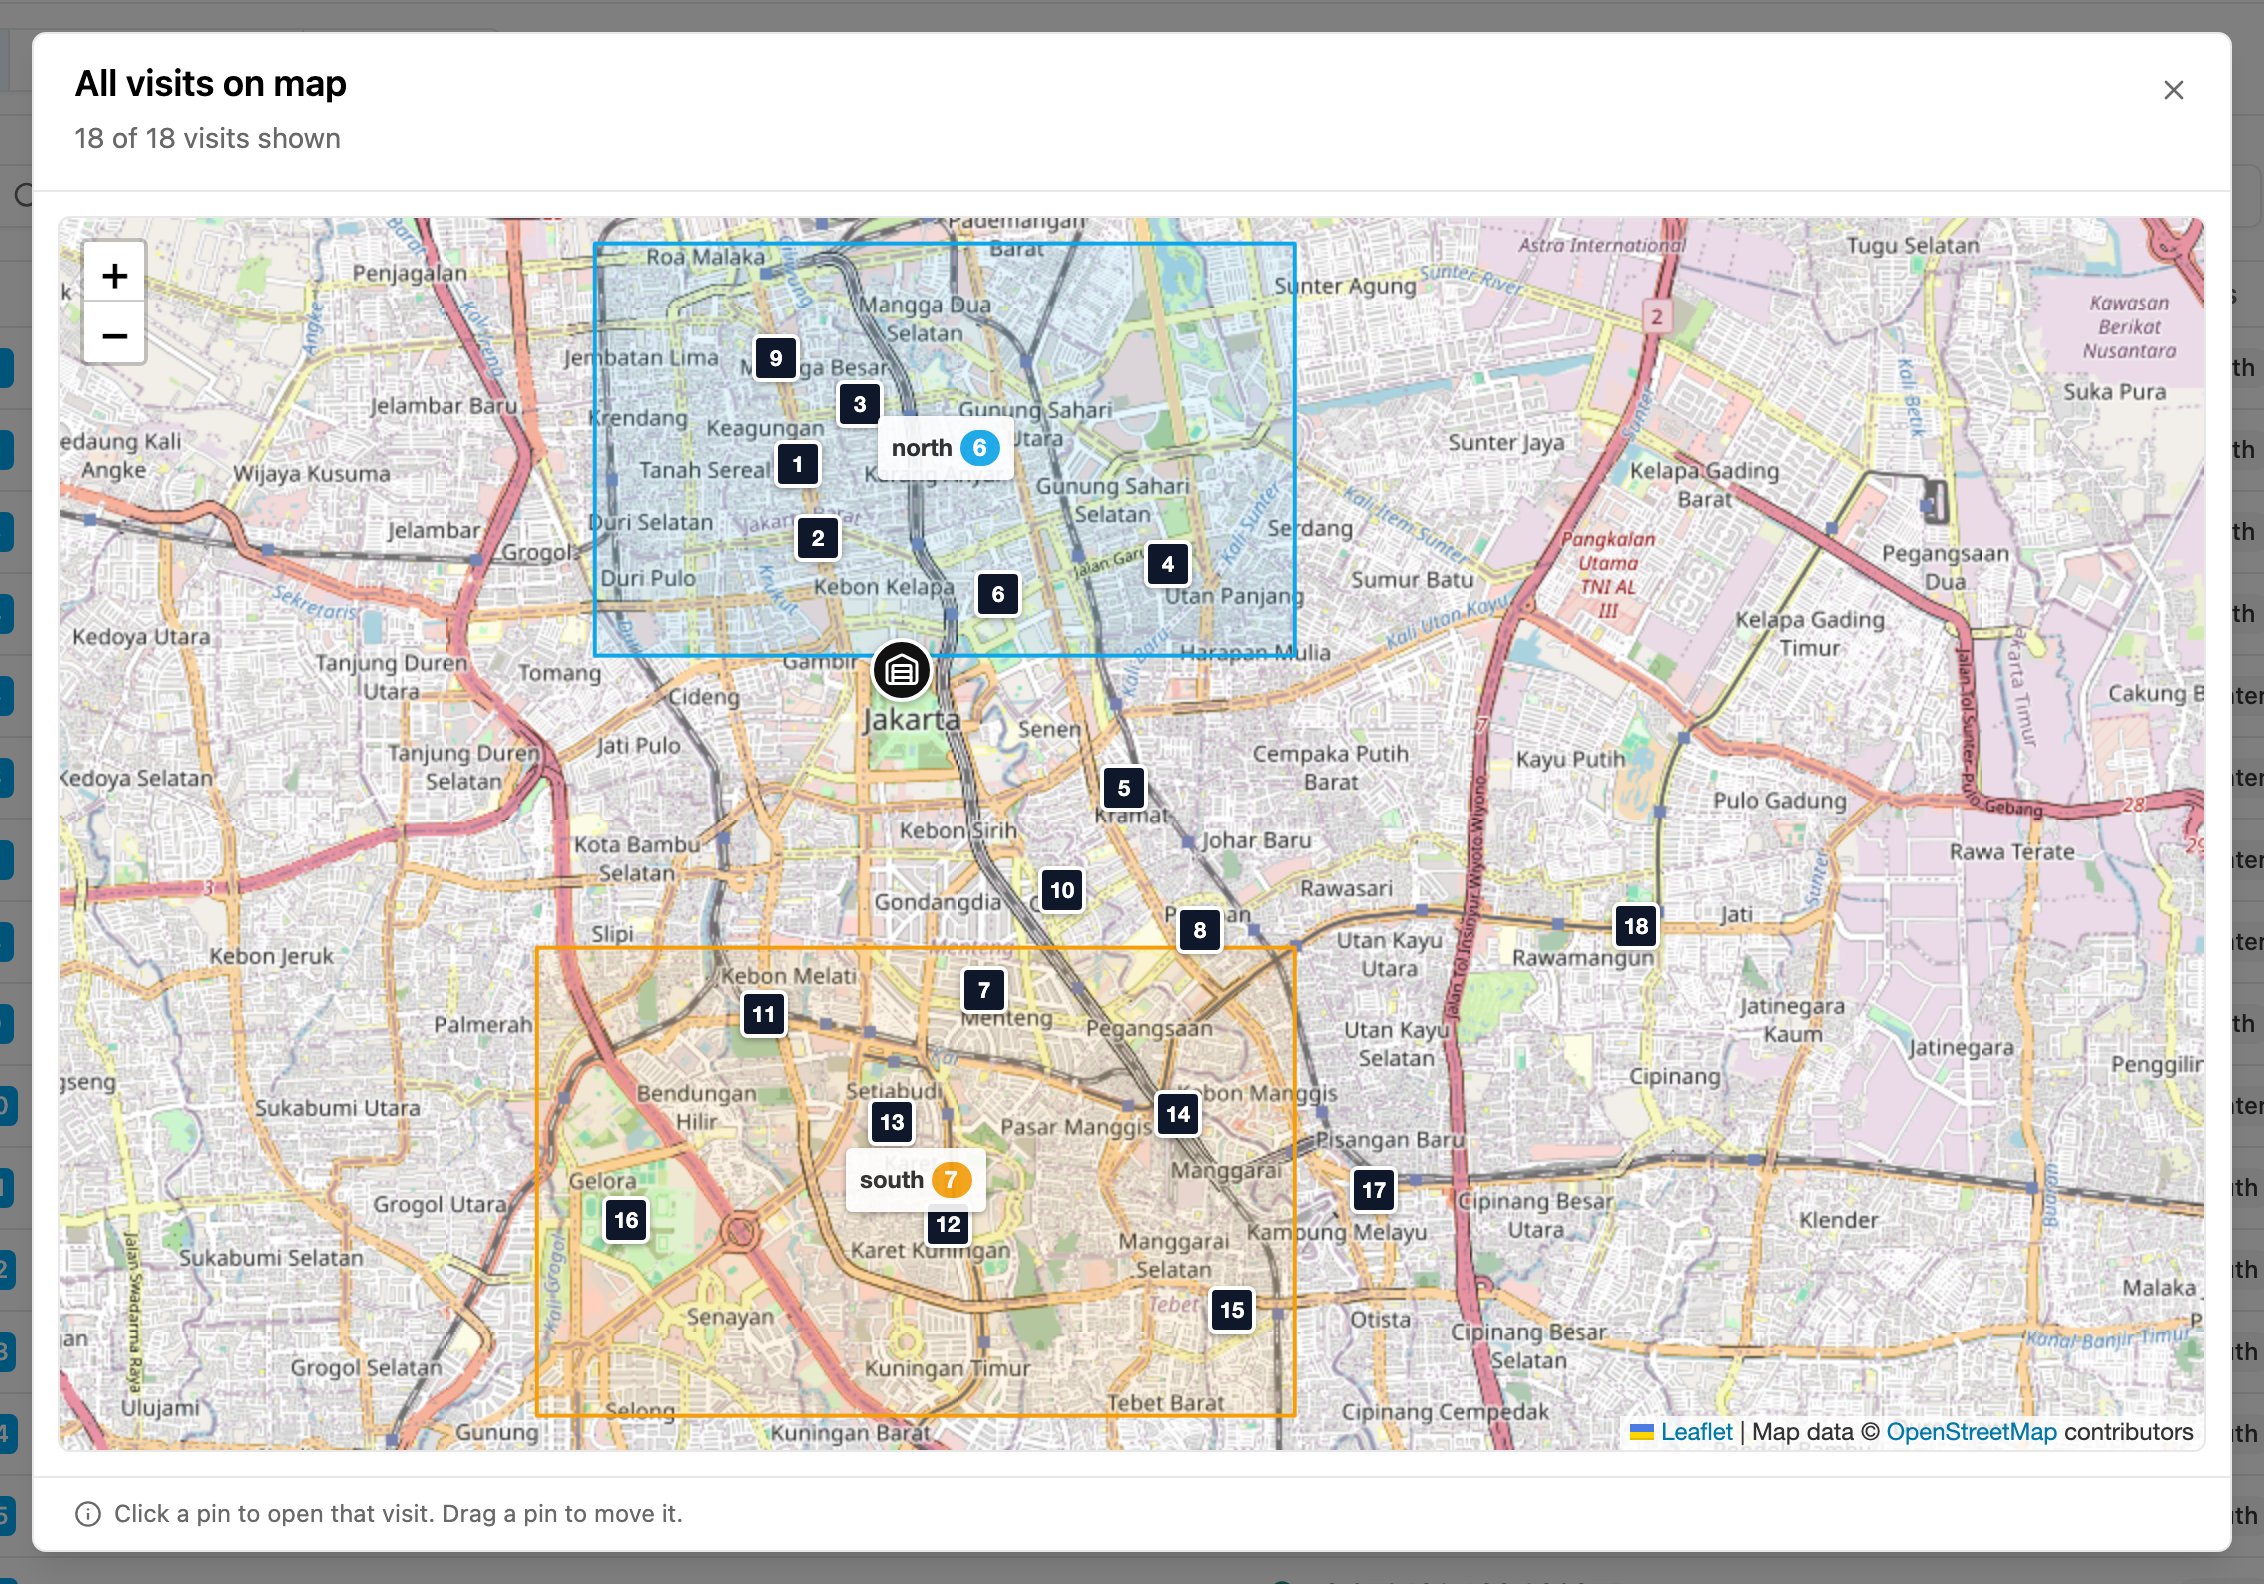
Editing an area
- Click the map-pin icon of the area.
- Edit Geotagging opens with the area drawn. Change it:
- Delete a point: click the point.
- Move a point: drag it to reshape the area.
- Change the name if needed and click Submit.
Geotagging and Clustering
Geotagging and Clustering both split work by area, but they solve different problems. Geotagging is manual. You draw fixed areas. Every visit inside an area gets the area’s tag, and only vehicles with that tag may serve it. The areas stay the same every run, so you decide exactly where each area begins and ends and which vehicles serve it. Clustering is automatic. You draw nothing. The optimization groups nearby visits and gives each group to a vehicle, to reduce overlap. The areas come from where the visits are, so they can change from one run to the next.You can use both: Geotagging decides which vehicles may enter an area, and Clustering keeps the resulting routes compact and separate.