

- Proof of delivery: the package at the drop-off point.
- Pickup check: the parcel and the pickup point.
- Damage report: damaged goods on arrival.
- Site inspection: the condition of a location.
- Receipt or form: a photo of a paper document.
Properties
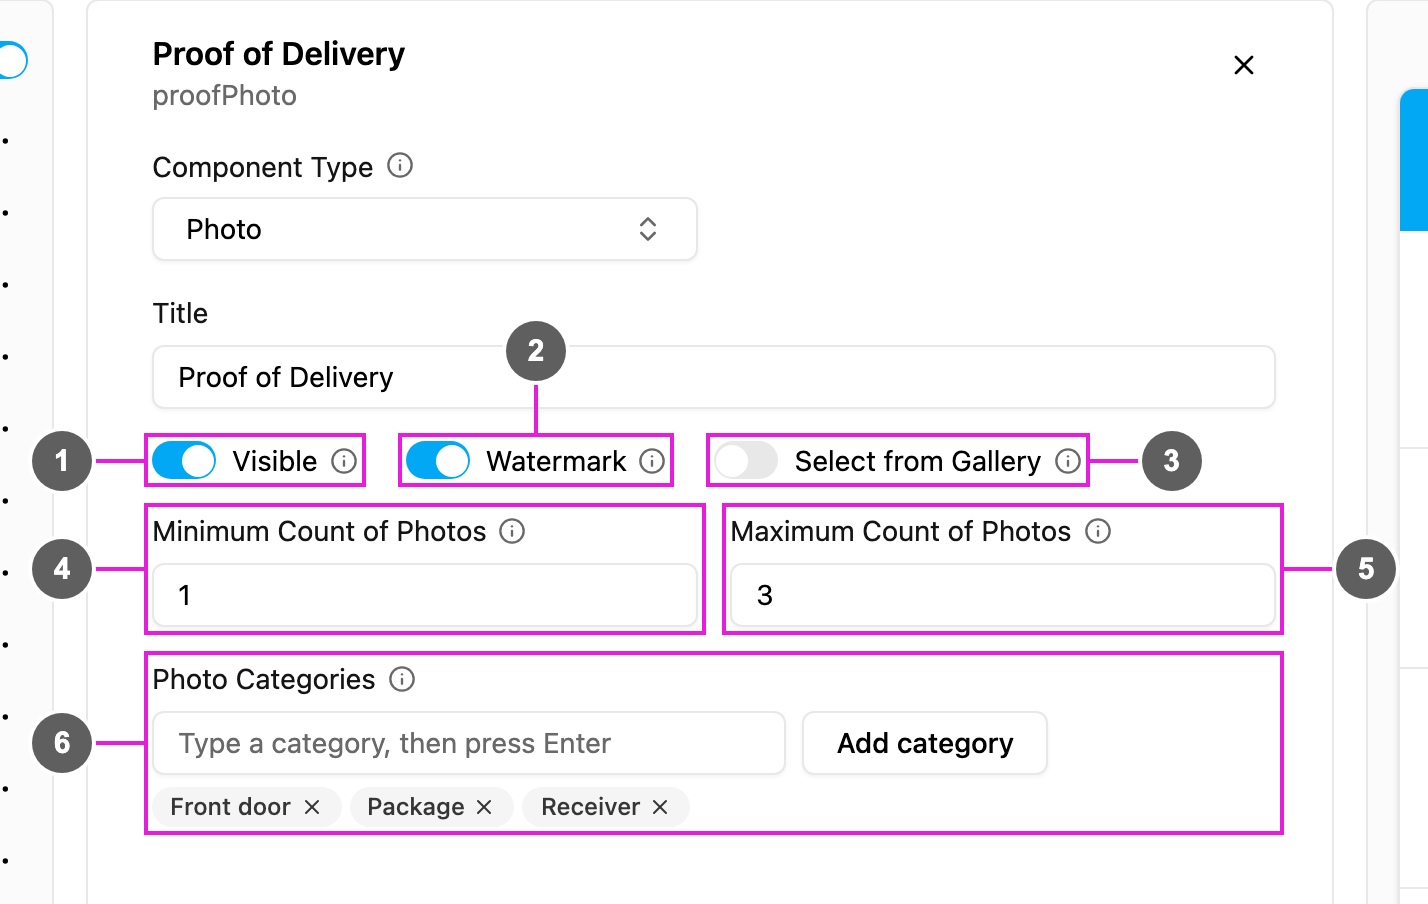
- Visible: when off, the component is hidden on the web and the field app; its photos are still kept and exported.
- Watermark: stamp the time and the location coordinates onto every photo taken.
- Select from Gallery: let the worker pick an existing photo from the phone’s gallery instead of taking a new one.
- Minimum Count of Photos: how many photos must be added. 0 makes the component optional; 1 or more makes it mandatory. It cannot be above the maximum.
- Maximum Count of Photos: the most photos that can be added, at least 1.
- Photo Categories: optional labels for the photos, such as Front door, Package or Receiver. Type a category and press Enter, or click Add category. Each photo is then filed under one of them.
Photo has no Required switch: a Minimum Count of Photos of 1 or more makes it required.
How to set it up
1
Add the component
Click Add component and choose Photo. Write a Title, such as Proof of Delivery.
2
Set the counts
Set Minimum Count of Photos (0 for optional) and Maximum Count of Photos.
3
Choose the capture options
Turn on Watermark for verifiable proof. Turn on Select from Gallery to allow existing pictures.
4
Add categories (optional)
Add Photo Categories to sort the photos.
On the field app
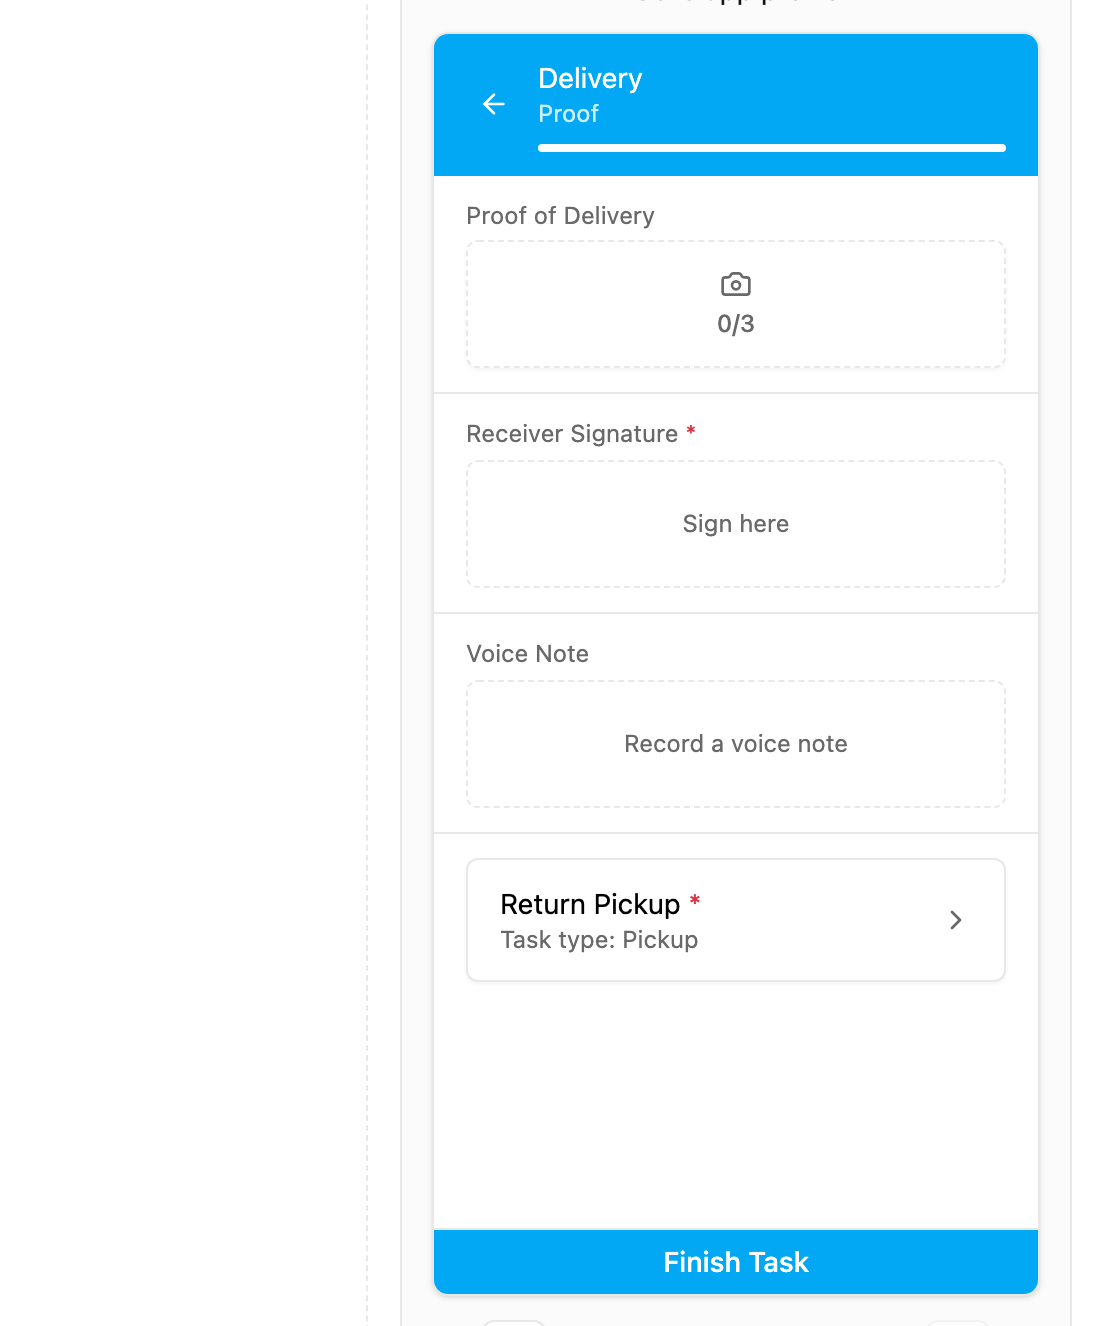
- The photo block shows the title and a counter such as
0/3(added / maximum). - Tapping it opens the camera, or the gallery when Select from Gallery is on.
- Photos appear as thumbnails; tap one to view or delete it.
- With Watermark on, the time and coordinates are printed on the saved photo.
- The task cannot be finished until the Minimum Count of Photos is reached.