

Required permission:
- View automation
- Create automation
Automation detail
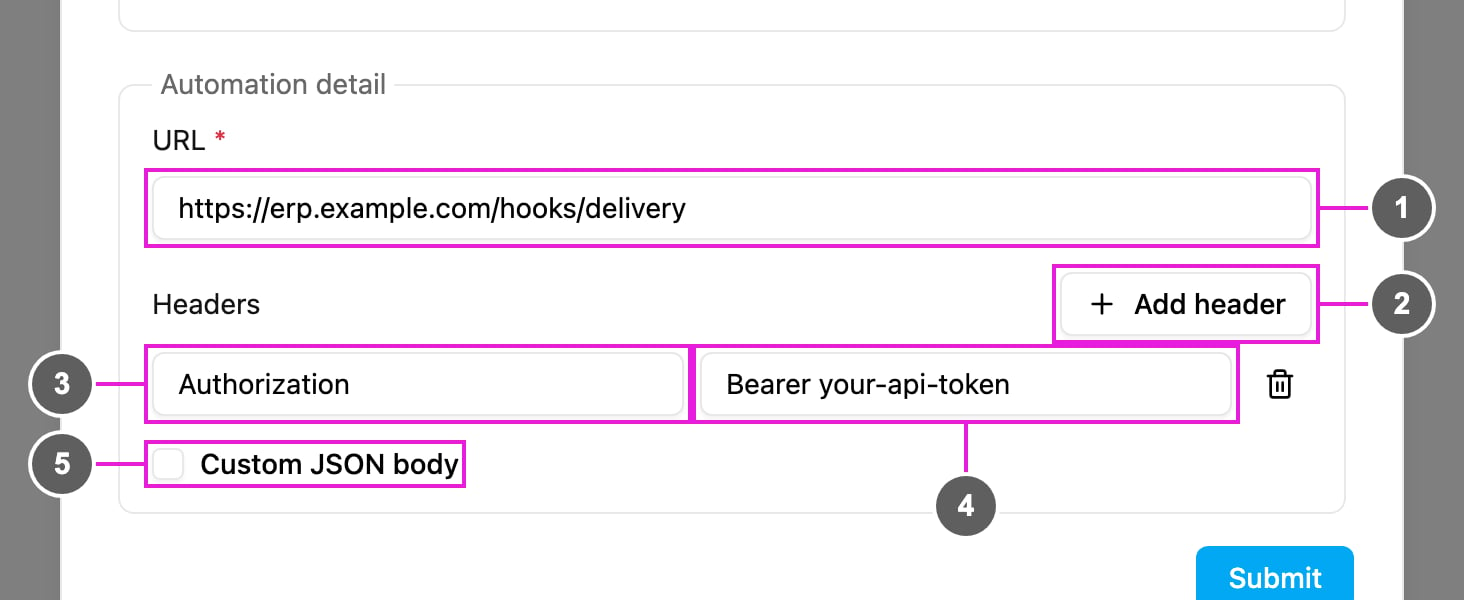
- URL: required. Where the request is sent, for example
https://erp.example.com/hooks/delivery. It must be reachable from the internet and accept POST requests. Use HTTPS. - Add header: add a header to the request. Without headers, the text “No header. The request is sent as-is.” is shown.
- Header name, for example
Authorization. - Header value, for example
Bearer your-api-token. The trash icon removes the header. - Custom JSON body: tick to replace the default body with your own JSON. See Custom JSON body.
Default body
Without a custom body, the request body is the record that started the automation. Task events (On Task Created, On Task Assigned, On Task Finished): the task with all its fields.Custom JSON body
Tick Custom JSON body to send your own JSON instead, with values from the event filled in.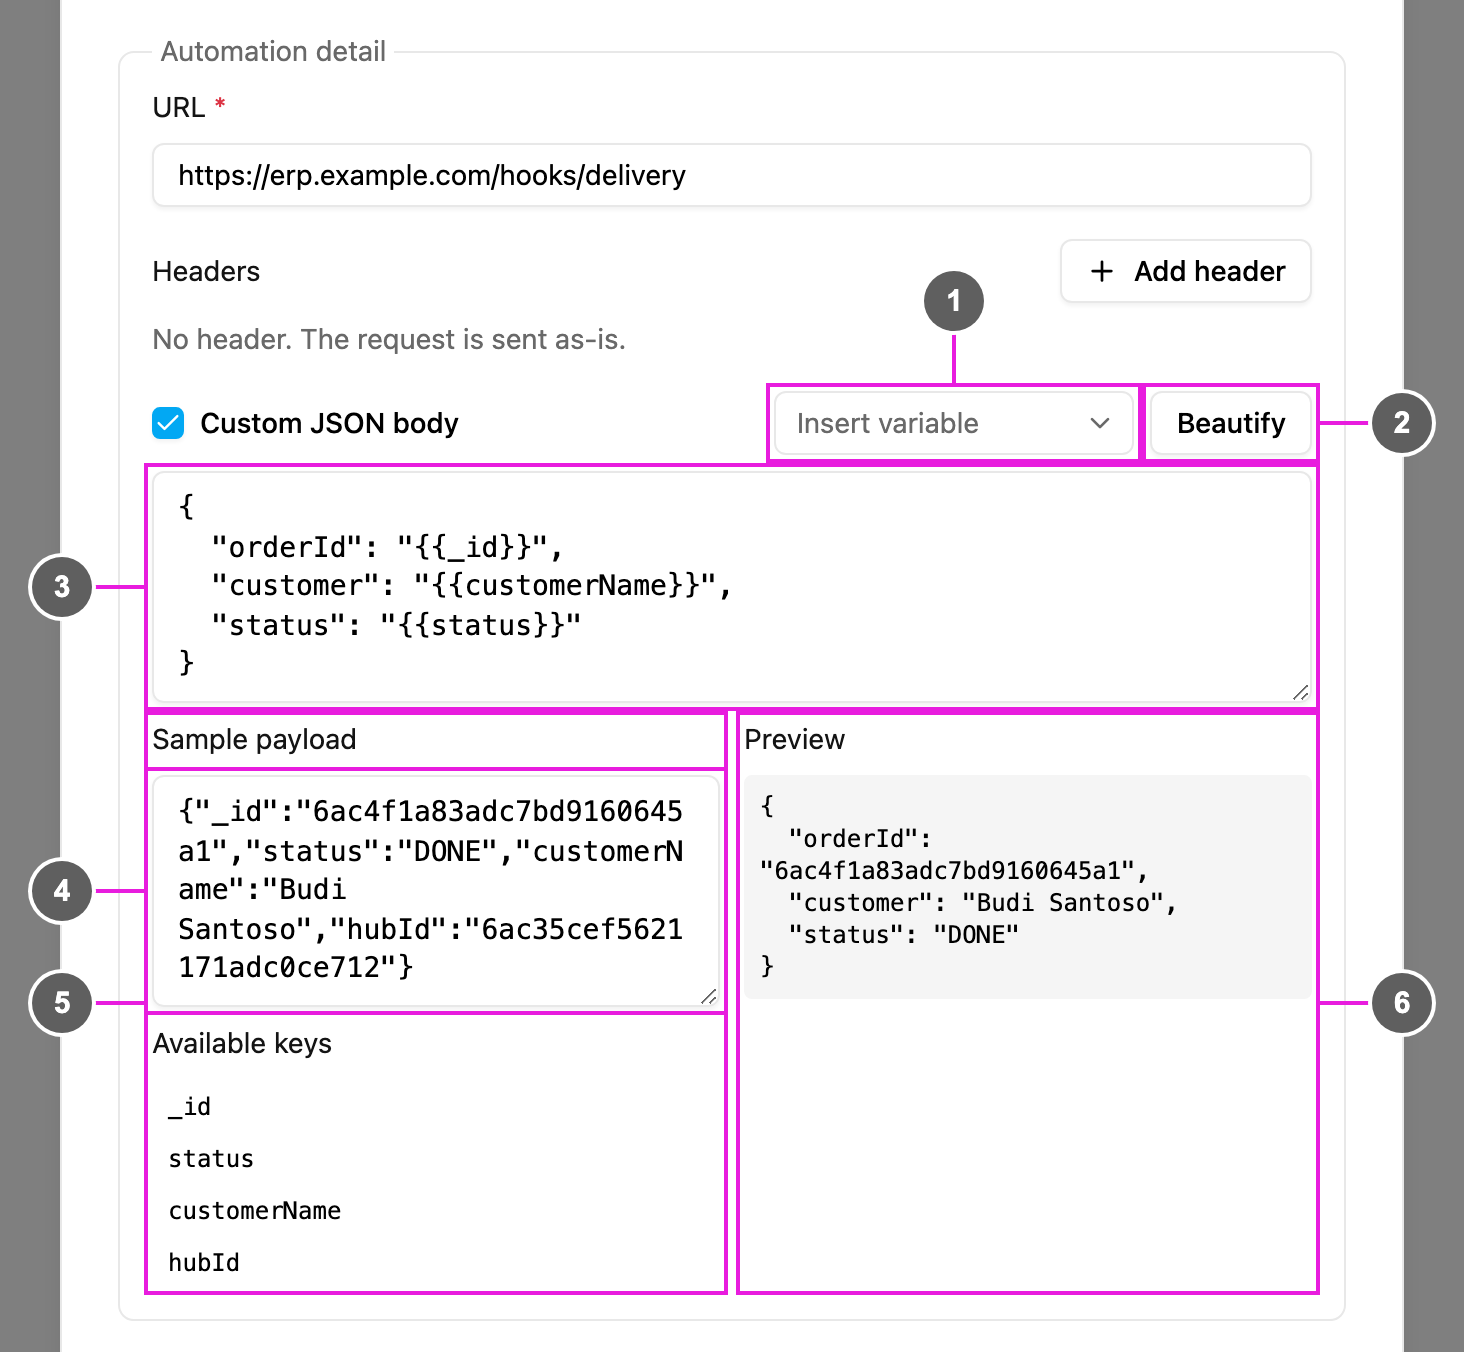
- Insert variable: pick a field of the trigger’s task type to insert its placeholder at the cursor.
- Beautify: format the JSON. If the text isn’t valid JSON yet, “Cannot format — not valid JSON” is shown.
- Custom JSON body: the body to send. Write a value as
{{key}}to have it replaced with the event’s value when the automation runs, for example"customer": "{{customerName}}". - Sample payload: paste an example of the default body, for example copied from the log. It’s only used to help you write the body and is not saved.
- Available keys: the keys found in the sample payload. Click one to insert it at the cursor. Nested keys are written with dots, for example
hub.name. - Preview: the body as it would be sent for the sample payload. Keys that the sample doesn’t contain are listed as
undefined: ....
Untick Custom JSON body to go back to the default body.
How it works
- The event happens and the rules, if any, are checked.
- The body is prepared: the default record, or your custom body with its placeholders filled in.
- Your headers are added.
- The POST request is sent to the URL.
- The request, your endpoint’s status code and its response are recorded in the log, where failed requests can be retried.
Examples
Security
- Always use HTTPS so the data is encrypted in transit.
- Protect your endpoint with an
Authorizationheader or an API key, and check it on every request. - Validate the body’s structure on your side.
- Rotate keys regularly and keep them out of shared documents.
- If your firewall allows it, accept requests only from known addresses.
Good practice
- Test your endpoint before switching the automation on.
- Answer quickly with a 2xx status and do heavy work in the background.
- Make your endpoint idempotent, using the record’s
_id, so a retried or repeated request does no harm. - Use rules to send only what your system needs.
- One automation sends to one URL. To send to several, create one automation per URL.
Troubleshooting
Nothing is sent.- Check that the automation is Active, its event and task type match, and the rules don’t exclude the record.
- Check that the URL is valid and reachable from the internet.
_id to ignore repeats.