

1. Set up the Initial page bill
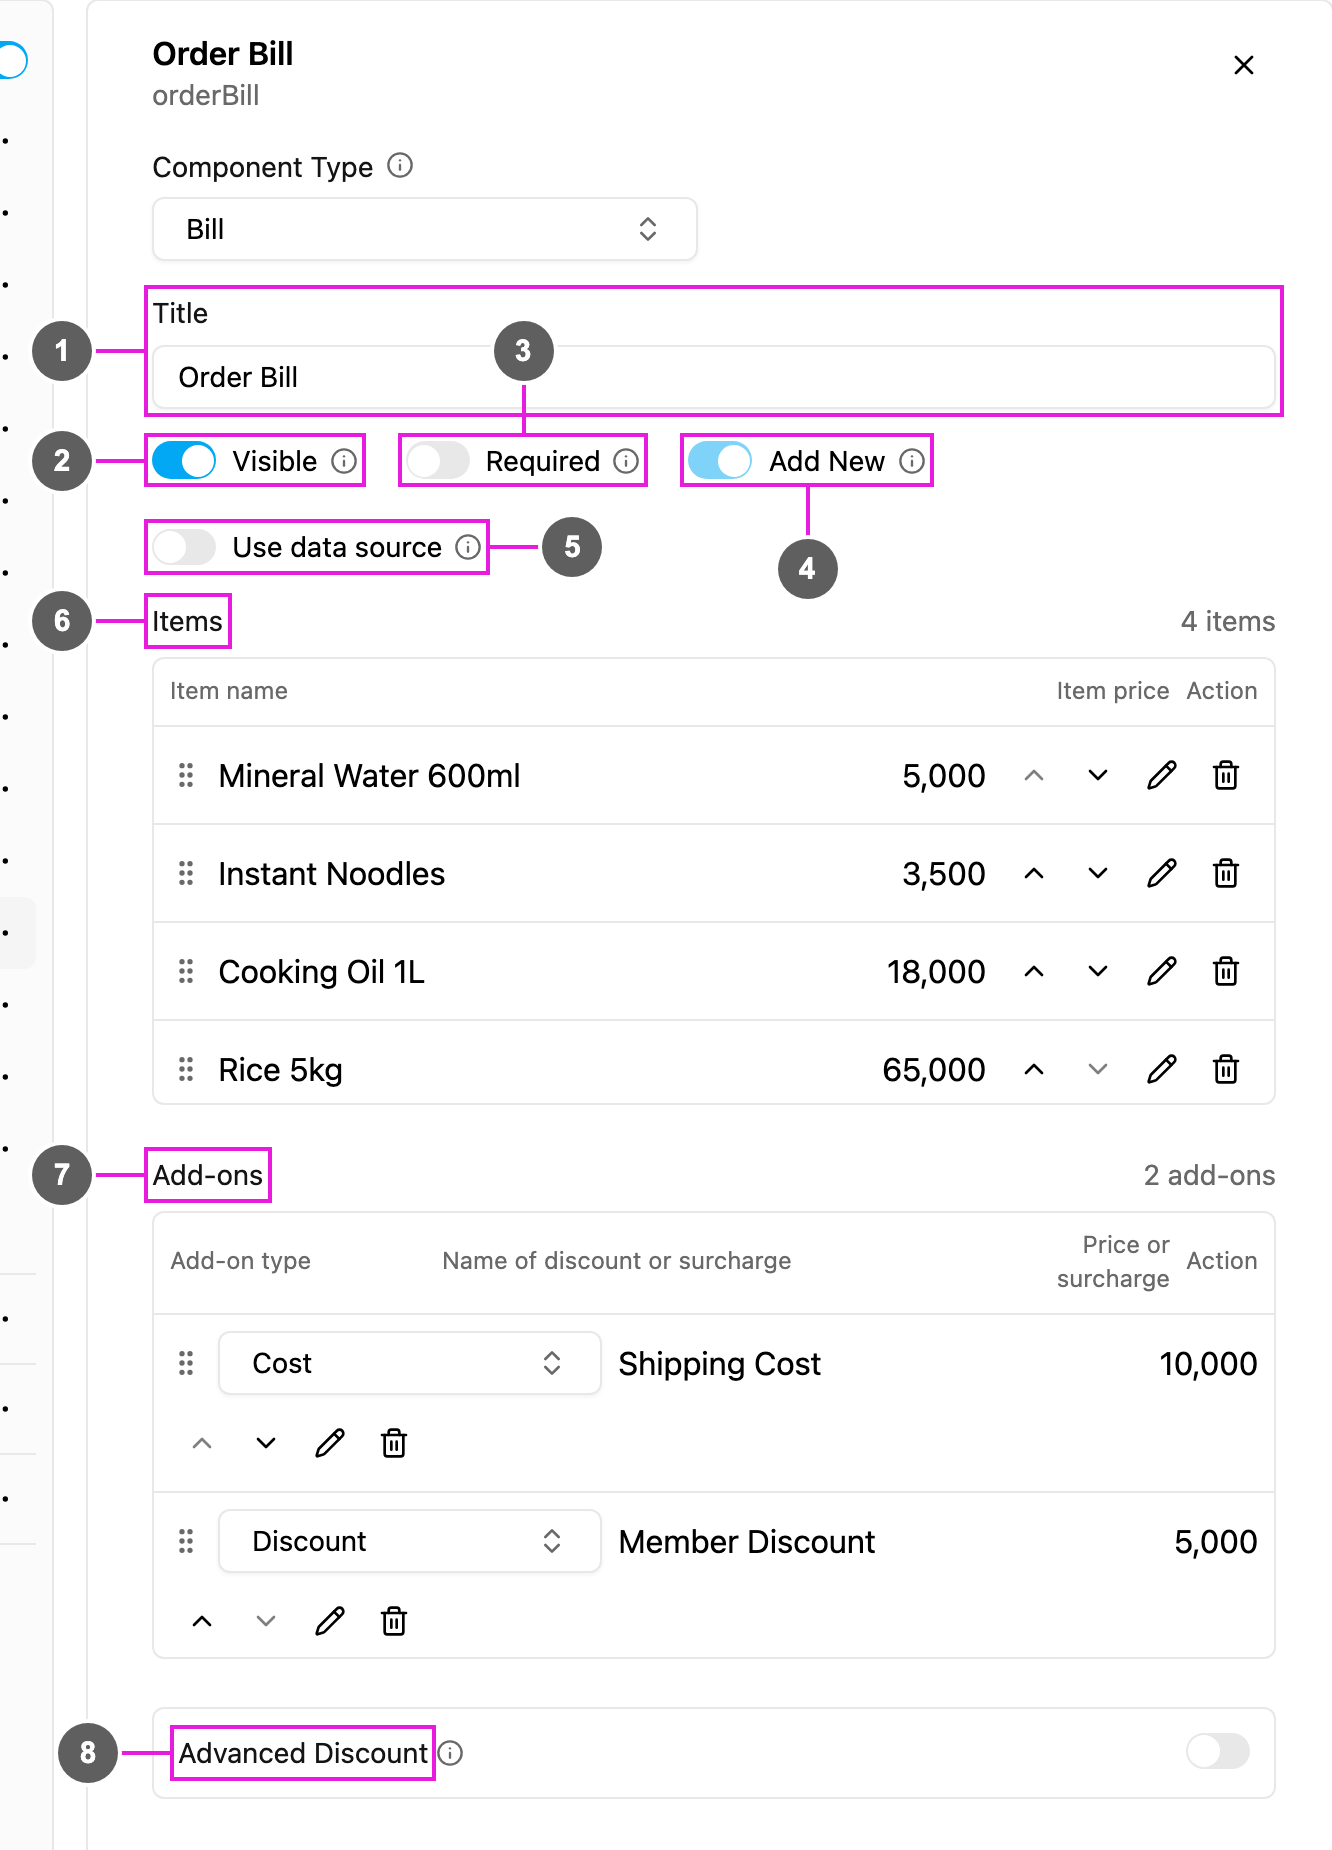
- Open the task type and click Add component on the Initial page. Choose Bill.
- Give it a clear Title, such as Order Bill. The field app page bill will point to this name.
- Under Items, add every product: type the Item name and Item price and click +. The header shows how many items you have.
- Under Add-ons (optional), add the costs and discounts: choose Cost or Discount, write the name and the amount, and click +.
- Leave Visible on.
2. Set up the field app page bill
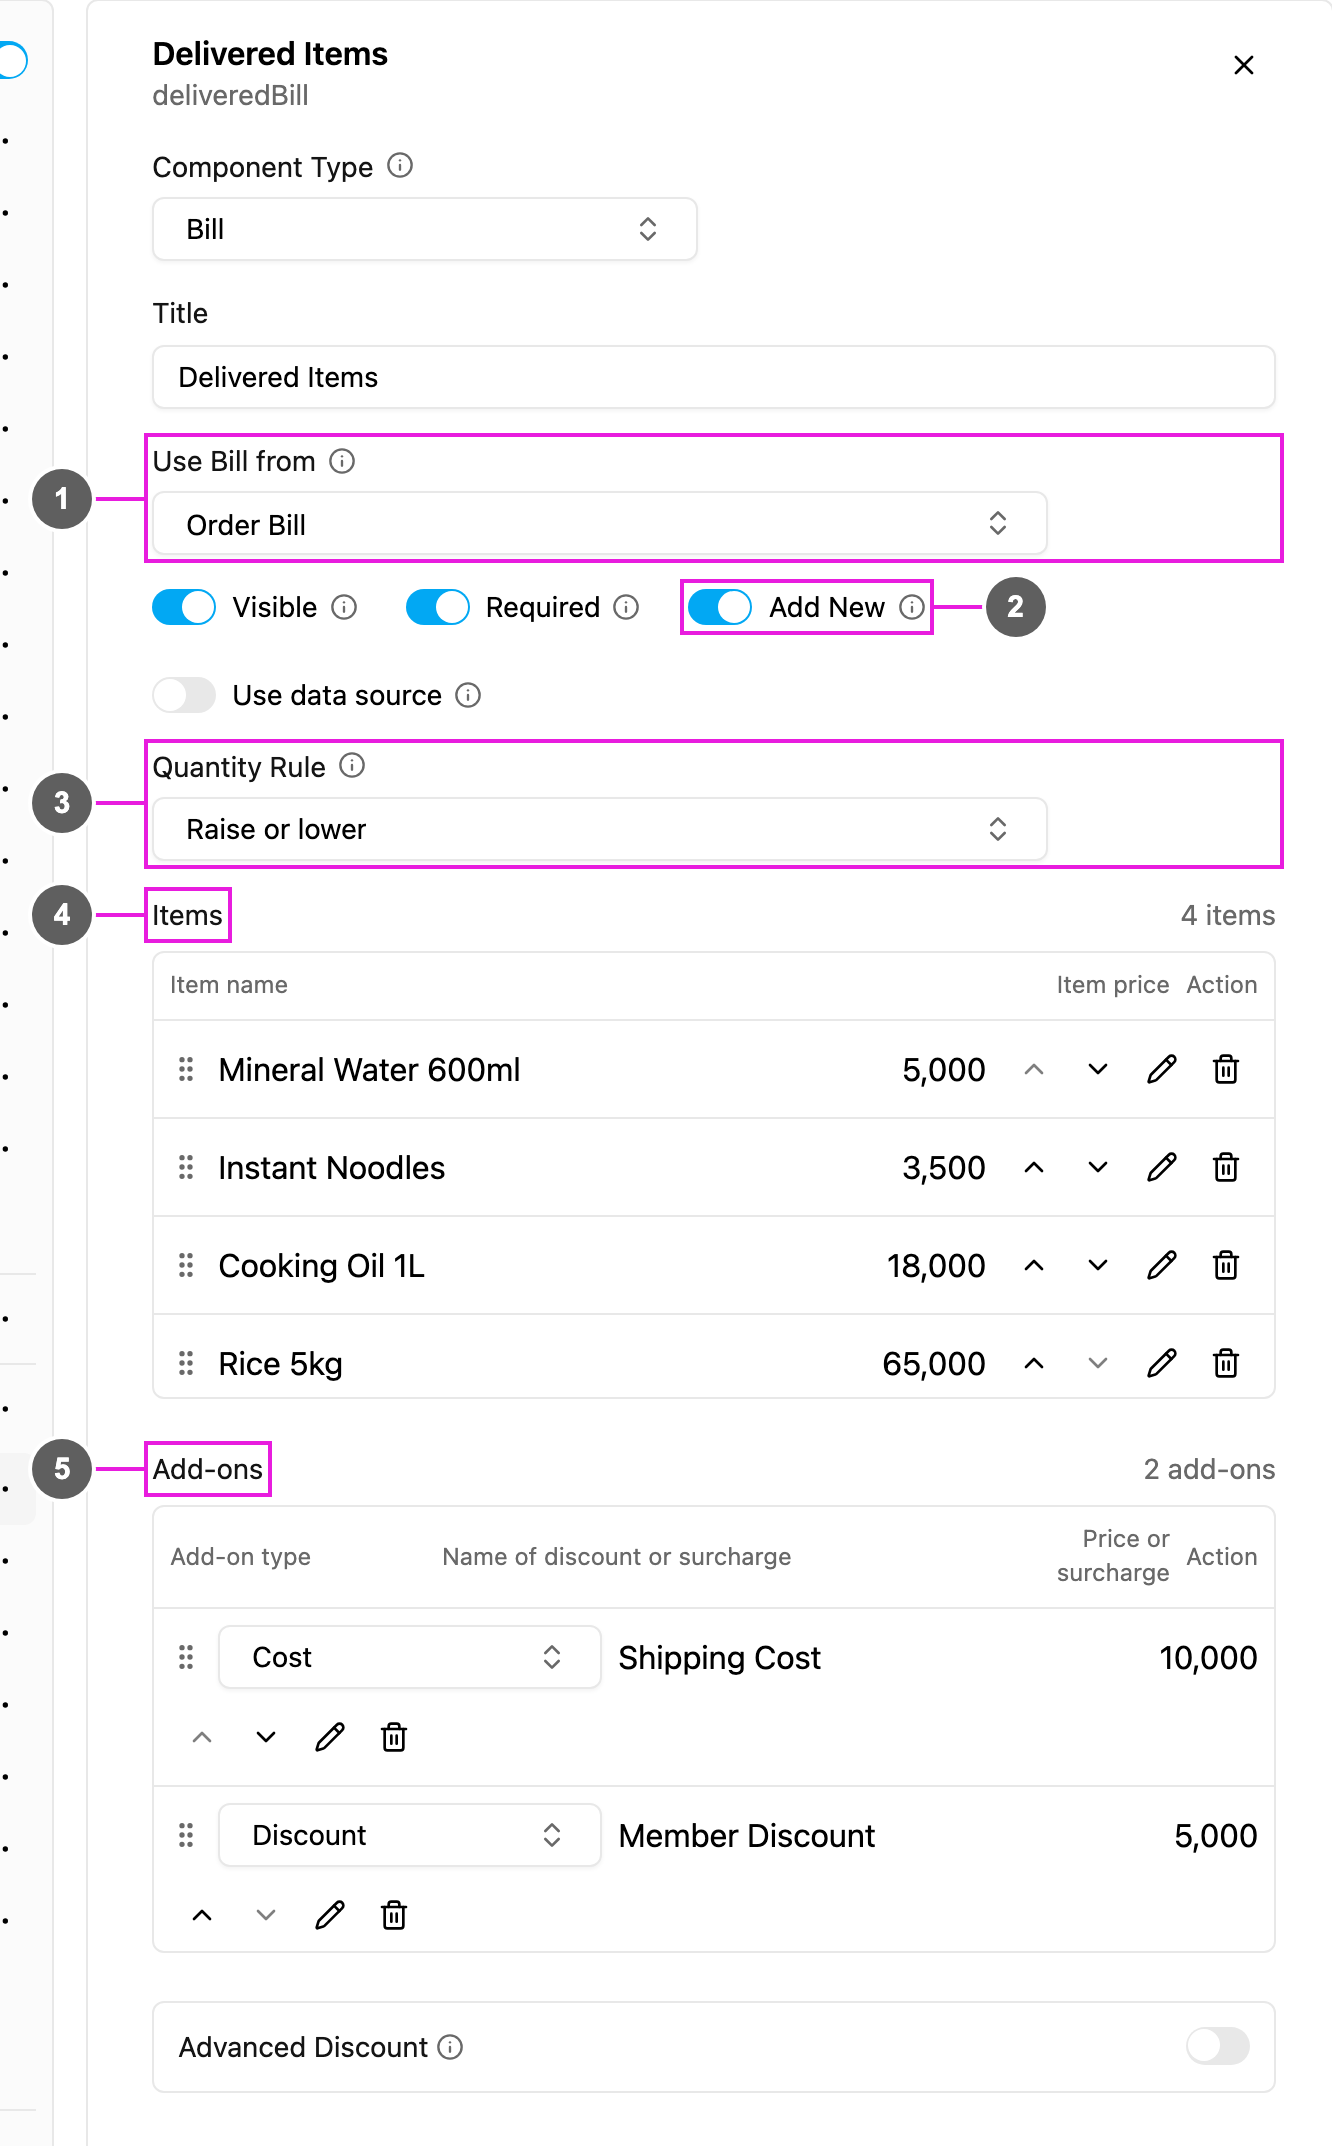
- Add a Bill on the field app page where the worker records what was delivered or sold. Give it its own Title.
- Set Use Bill from to the Initial page bill. Its items, add-ons and values appear here.
- Turn Add New on if the worker may add items that were not ordered.
- Pick a Quantity Rule if quantities may only go up or down.
- Click Save.
3. Check the preview
In the Mobile app preview, go to the field app page and tap Open on the bill:- the Item tab lists the items with their price and quantity,
- the Cost tab lists the costs and discounts,
- the Summary tab shows the totals.
4. Create tasks with bills
Bill data can be entered when creating a task on the web, or for many tasks at once from a spreadsheet:- Open Activities › Task, click the arrow beside New and choose Bulk.
- Pick the task type with the bill.
- Click Download template. The spreadsheet has the columns this task type needs.
- Fill in the spreadsheet, then drag it onto the upload area.
For example, a task with id
1 on the main sheet and three products has three rows with id 1 on the bill sheet.
See Creating a Task and Import.